As a part of the accessibility for Adobe Connect, Closed Captioning (CC), has been available in Adobe Connect for a while, but as an extension (essentially and ‘add-on’ app for your Connect rooms). In Connect v11.2, the CC functionality has been embedded into the core product.
This blog post covers how to use this CC functionality as a captioner and as a viewer. It covers assigning a captioning service and viewing CC content in recordings.
Caveat – I am not a captioner or an accessibility expert. This post discusses the use of the captioning technology in Connect rooms. I cannot speak to best practices that can be used in captioning to support Connect accessibility.
Note on subtitles – If you need to understand how to add subtitles to Connect MP4 videos, please see my post ‘How to add & show subtitles in an MP4 in your Connect room’ here.
v11.2 Closed Captioning overview video – Alistair Lee of Adobe has produced an excellent overview video here.
How to initiate the CC functionality
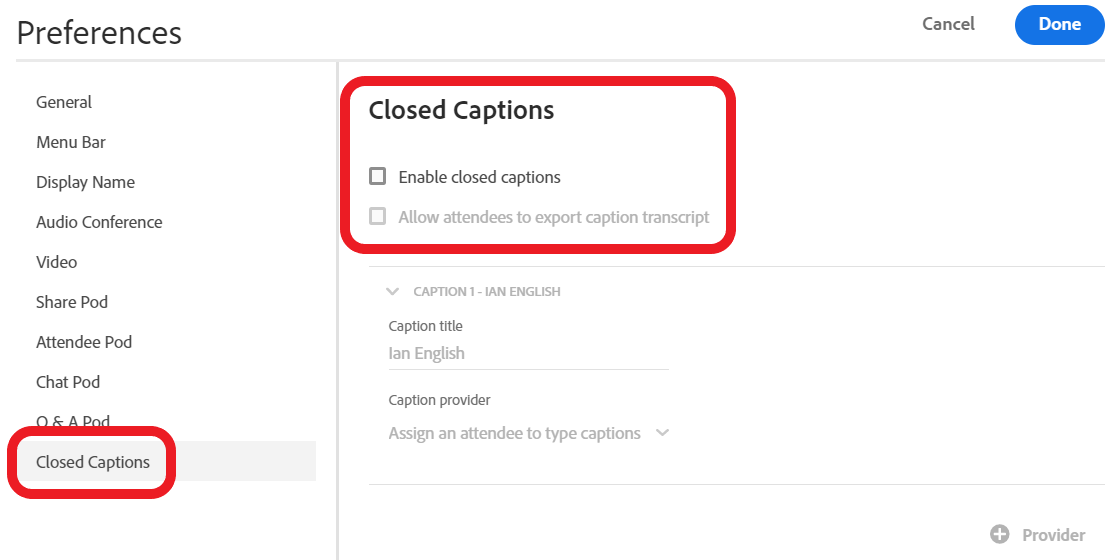
In v11.2, you will see a new option in the ‘Preferences’ pane (figure 1 below). You can turn on the CC option in the room by checking the ‘Enable Closed Captions’ box. At the same time, you can check the box to ‘Allow attendees to export chat transcript’ if you want to make the text available outside of the room.
Figure 1
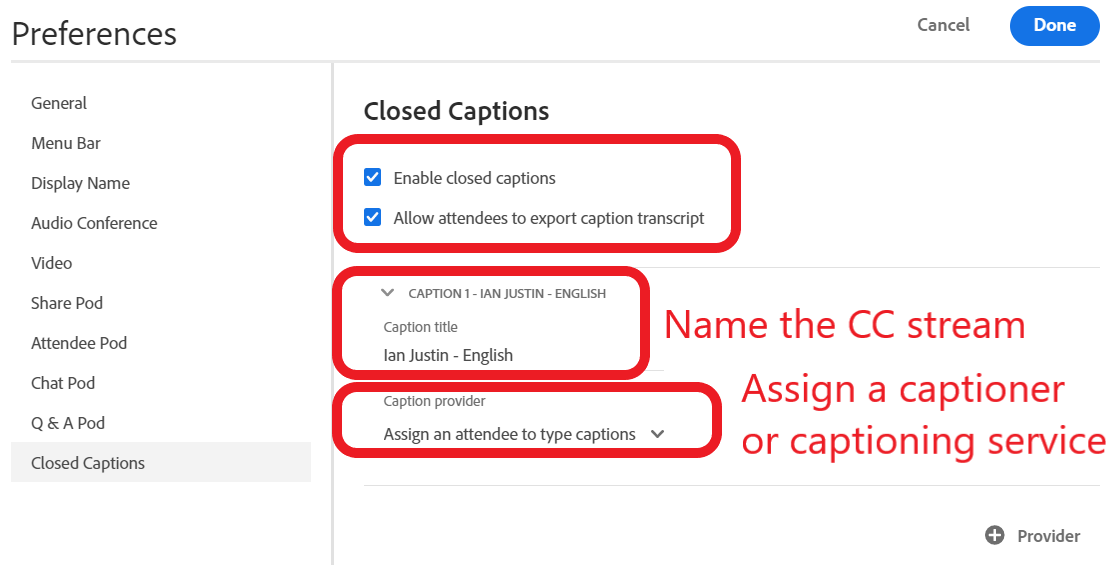
You can name the captioning stream and then choose whether to integrate with a captioning service or assign an in-room captioner (in my case I am going to cation in English and assign myself as the captioner). See figure 2 below.
Note – At the time of writing this post, the only integrate captioning service provider is StreamText. Adobe intends to add more services ASAP If you assign StreamText as a provider, you will see a ‘token’ that you can copy and paste into the StreamText event screen (we will cover this later).
Figure 2
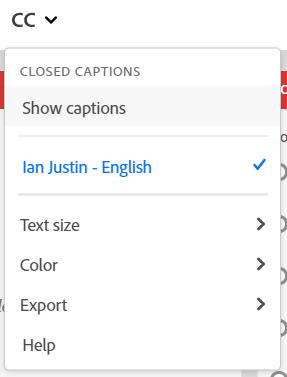
Once I close the ‘Preferences’ pane, the ‘CC’ menu will appear at the top of your room (figure 3a). This will also appear for all attendees as shown in figure 3b, (although of course the host for the room controls the administration side (captioner etc.).
Figure 3a (Host view)
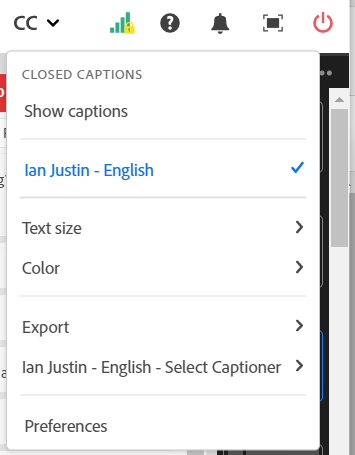
Figure 3b (Participant view)
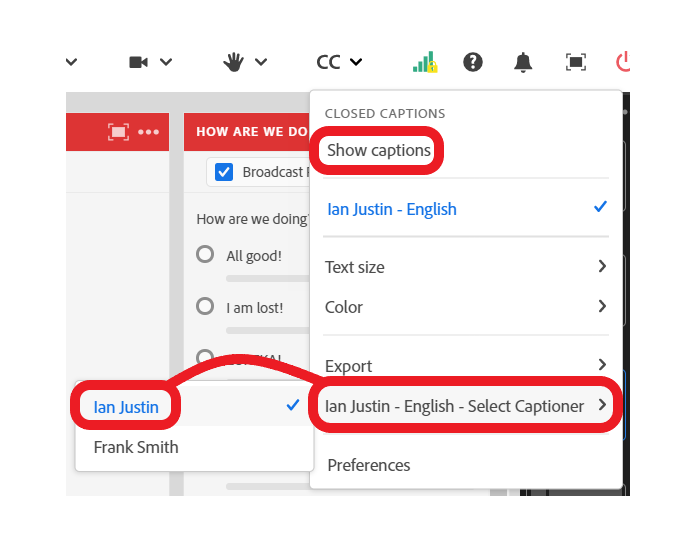
The host can assign the in-meeting captioner from the ‘CC’ menu (figure 4). I have assigned myself. As the assigned captioner, I will select ‘Show Captions’ to begin the captioning process.
Figure 4
As the captioner, I will see the option to begin captioning appear (figure 5). I can resize ad move this wherever I like in the room, including keeping it ‘off-stage’ in the ‘Host & Presenter Area’.
Figure 5
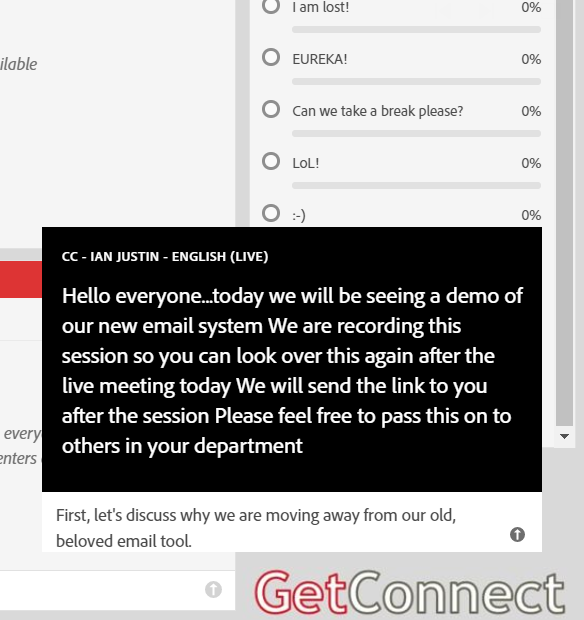
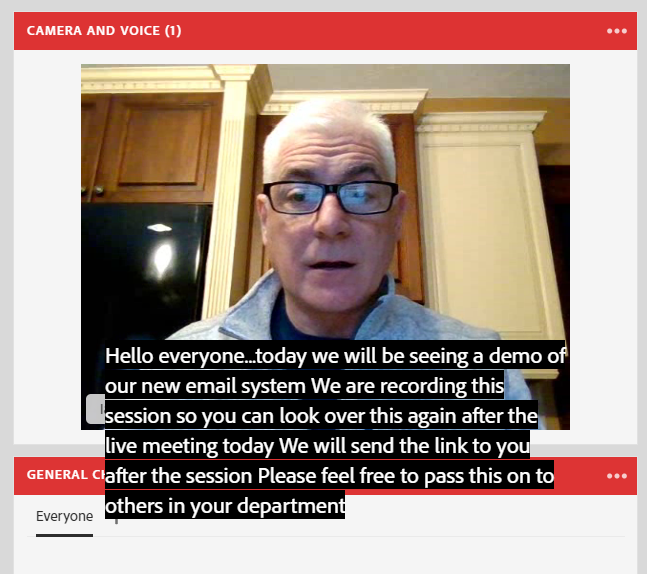
The participants (and the other presenters and hosts) can also click ‘Show Captions’ in the ‘CC’ menu to have the feed displayed to them. They can also move and resize the feed as they see fit (figure 6). You will note that as the viewers move off of the feed, it will only show the actual feed (not the wider ‘boxed’ interface).
In the example below, I have moved the feed over the camera of the presenter.
Figure 6
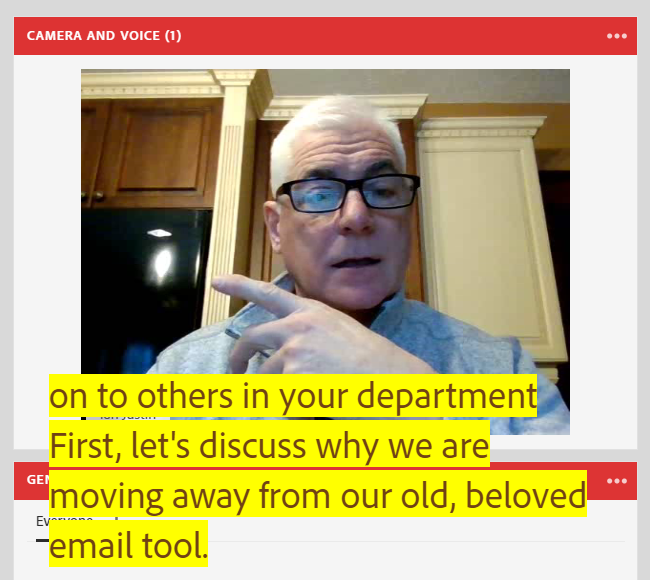
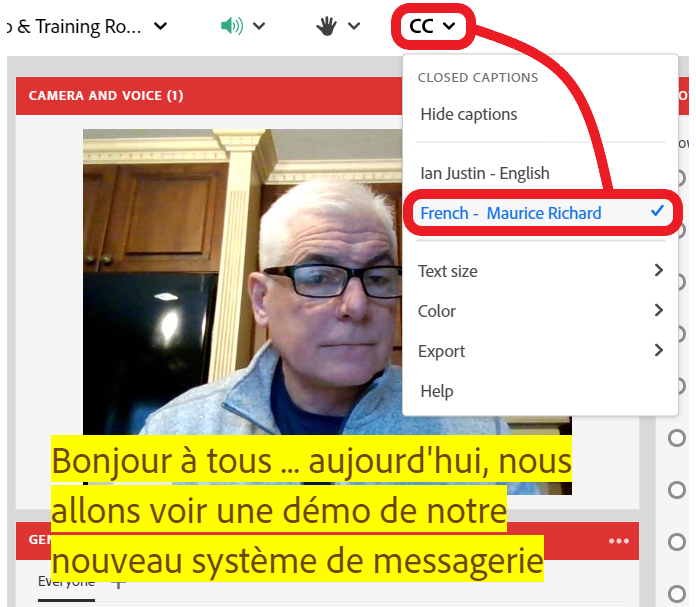
The viewers can use the ‘CC’ menu to individually adjust the text size and color to improve legibility (figure 7).
Figure 7
Assigning a captioning service to your room
As noted above, the only captioning service available at the time of writing this blog post is StreamText.
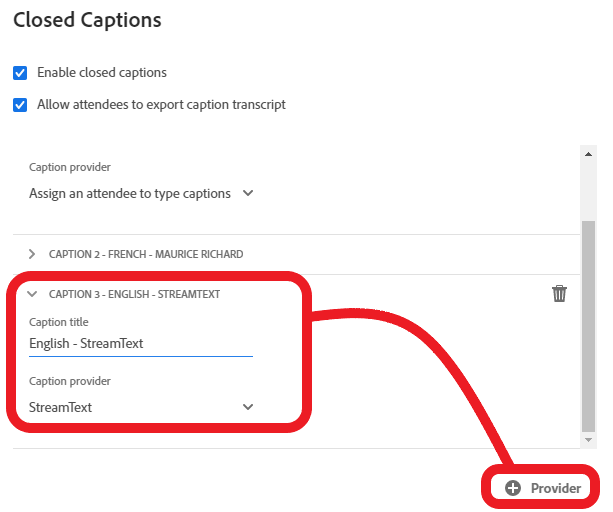
To use the service, select this as a new provider (‘+ Provider’ in the ‘Preferences pane. Select the ‘Caption Provider’ and name the stream (figure 8).
Figure 8
As a host, you can now open the ‘CC’ menu and you will see the StreamText option in the available feeds…to integrate with StreamText, click on the text in the ‘CC’ menu for StreamText (figure 9) and you will have copied the ‘StreamText API Token’ (figure 10). You will paste this into the StreamText event screen to integrate the provider with this session.
For detailed instructions on integrating your room with StreamText, see the instructions here.
The captioning stream will be available to attendees from the ‘CC’ menu as noted above.
Figure 9
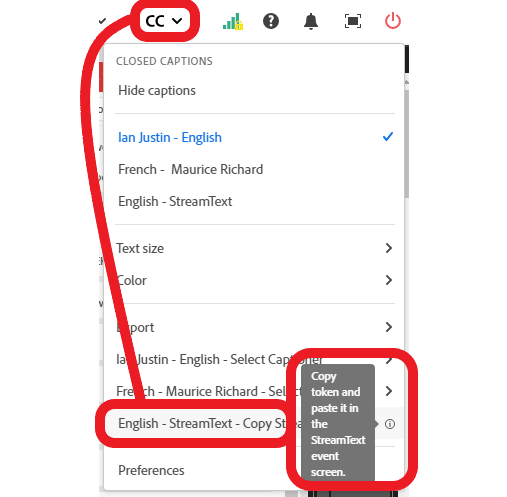
Figure 10

Using multiple in-room captioner captioning feeds
You can have multiple feeds in the room at the same time. In my example, I am going to add a French language captioning feed to the room to give attendees a choice.
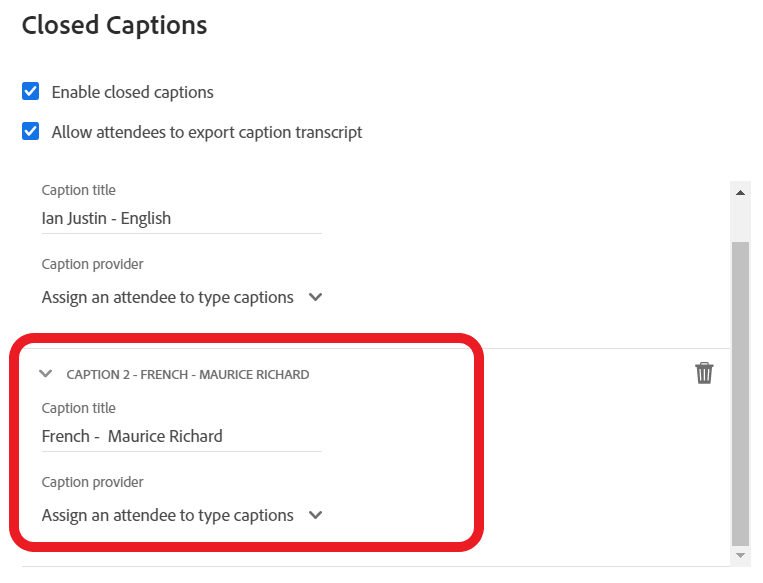
In the ‘Preferences’ pane and under ‘Closed Captions’ again, I click the ‘+ Provider’ option and complete the fields as above, only this time identifying the feed as French, see figure 10. Note that I am including the name of the captioner, you do not need to of course…this is as much for my sanity in tracking the users in this example.
Figure 10
The second captioning option now appears in the ‘CC’ menu. I can assign a new French-speaking captioner as shown in figure 11 below.
Attendees can now choose the English or the French captioning stream from the ‘CC’ menu (figure 12).
Figure 11
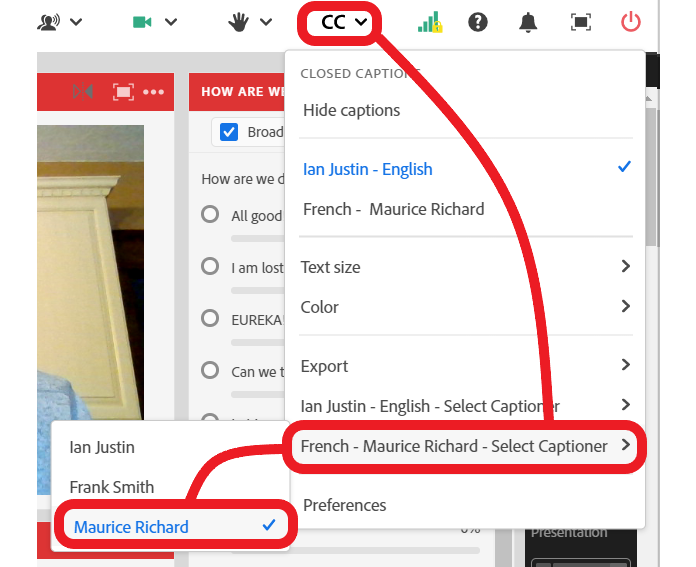
Figure 12
Captioning streams in recordings
The options for captioning streams is also available in recordings. If a recording has a captioning option the viewer will see a message that ‘Closed captions are available now’. You can show the captions from here (figure 11). A more effective way to display captions is likely to be to click on the ‘CC’ menu to the bottom-right of the recording (figure 13).
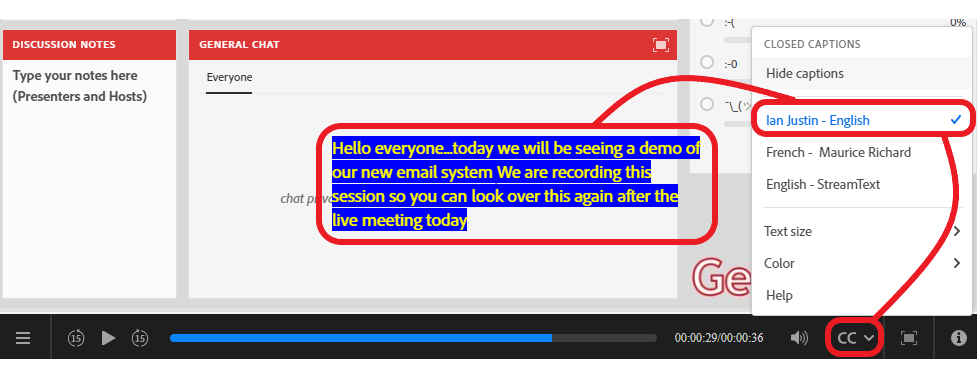
As you can see from figure 14, you can choose the captioning stream, change the text size and color and reposition and resize the stream.
Figure 13
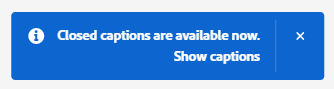
Figure 14
Downloading captioning transcripts
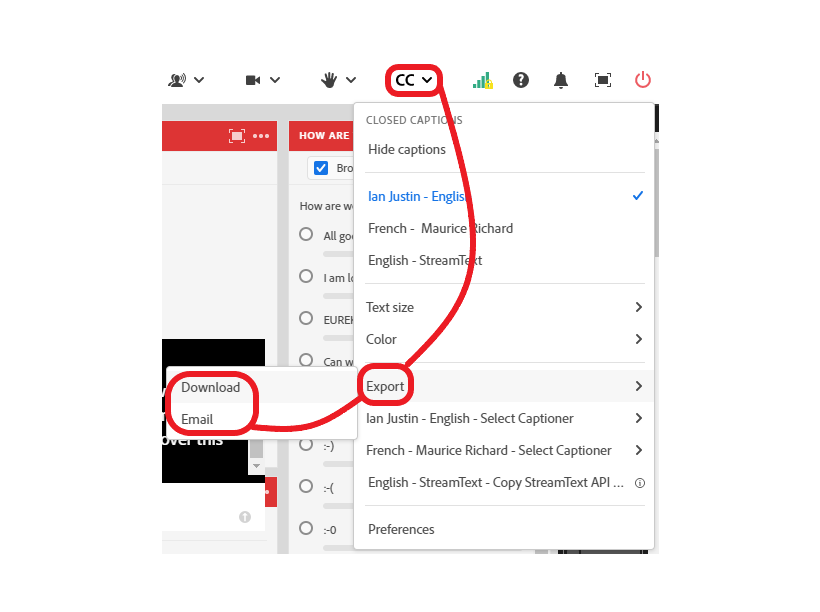
If you have enabled the option ‘Allow attendees to export chat transcript’ (figure 2 above), then the attendees in the live session will have the option to download the captioning stream transcript (figure 15).
If the attendee has joined as a ‘Guest, they will see the option to download the transcript. If the attendee has joined as a user with an email login and password, the attendee will also see the option to email the transcript to themselves.
Figure 15
The transcript is a simple text file (figure 16).
Figure 16
Captioning and Breakout Rooms
You can assign a captioner or a captioning service to breakout rooms. If the captioner is in the breakout room then the captioning will be available to the breakout room attendees. As above, if you assign more than one captioner or service to a breakout room then multiple feeds will be available to the participants in that breakout room (figure 17).
If the captioner or the captioning service is not in the breakout room, the option to view the captioning stream will not be available.
Figure 17
