The QuizConnect Pod is an excellent interactive, customizable, gamification and competitive pod created by Adobe’s Alistair Lee. Some of you may have used the previous version, but this version has the excellent advantage of a quiz creator as well (previously, you would need to edit a text file to create quizzes and it was reasonably intimidating for most users.
This blog post breaks down the use of the QuizConnect Pod step-by-step.
Thanks as always for Alistair for creating another excellent addition to Connect that shows the potential for the platform.
First, download the pod from the extensions page here.
Overall Process
Here is the overall process for using the pod and creating and loading quizzes:
- Download the QuizConnect extension
- Load the extension into your room in a Share Pod
- Load one of the pre-created quizzes (included with the extension download) into QuizConnect *or* create your own quiz and load it into QuizConnect
- Run the quiz
- Repeat 3 & 4 as necessary
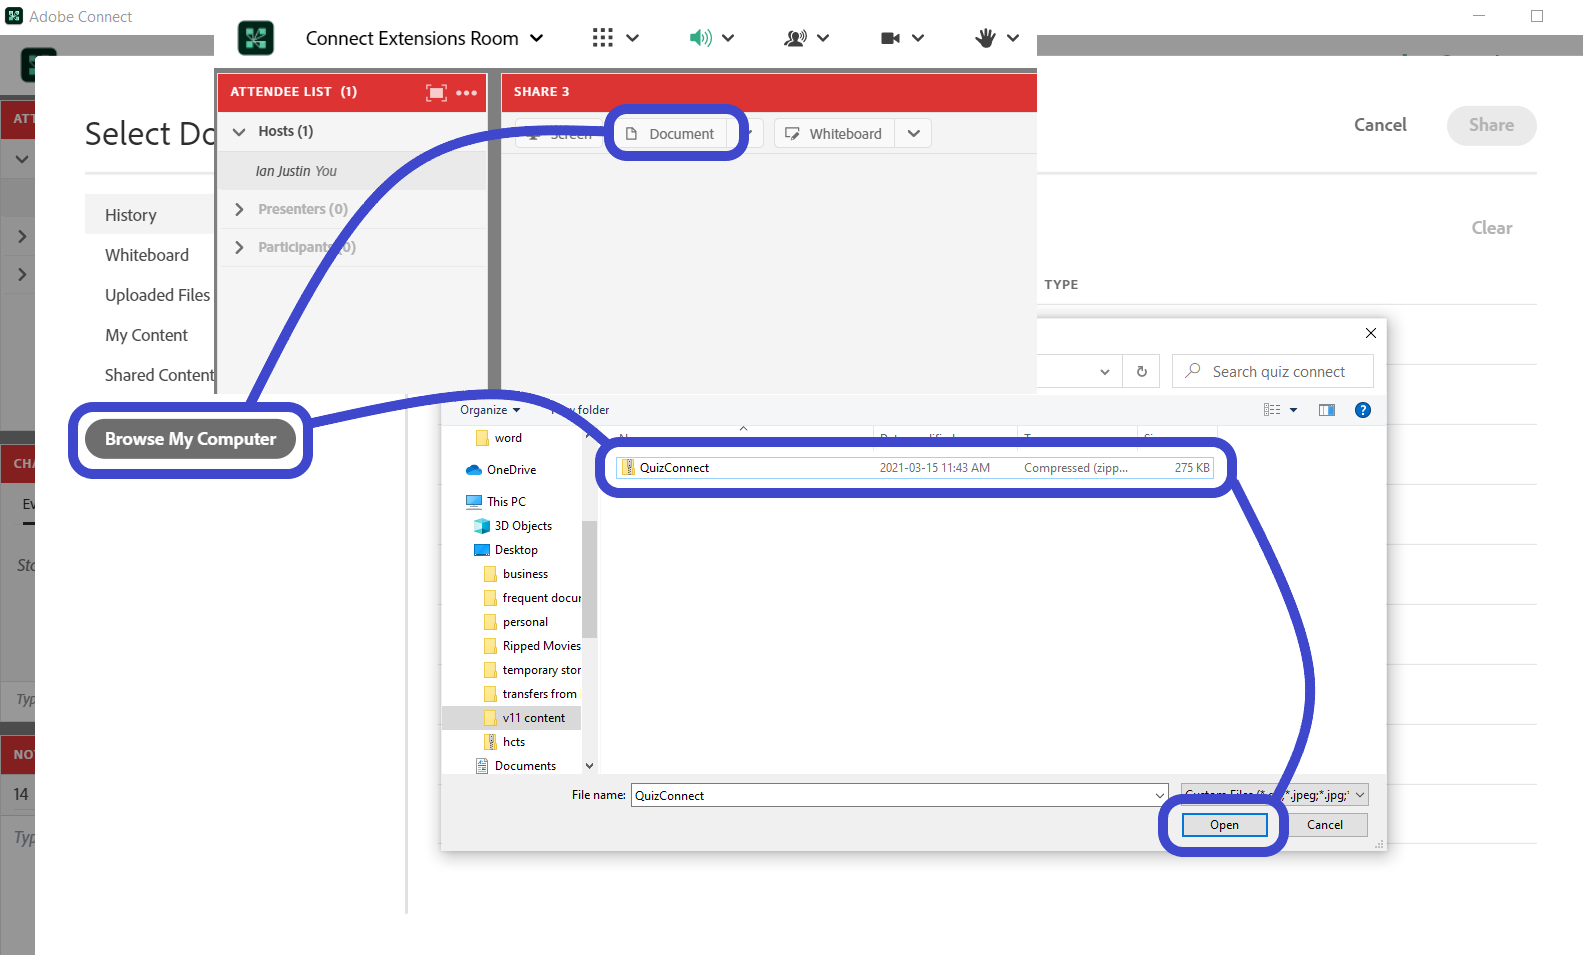
Load the QuizConnect Extension into your Connect Room – Either drag-and-drop the extension into your Share Pod, or select ‘Document’>’Browse My Computer’ in the Share Pod and navigate to the QuizConnect extension and ‘Open’ it into your Share Pod (figure 1).
Figure 1
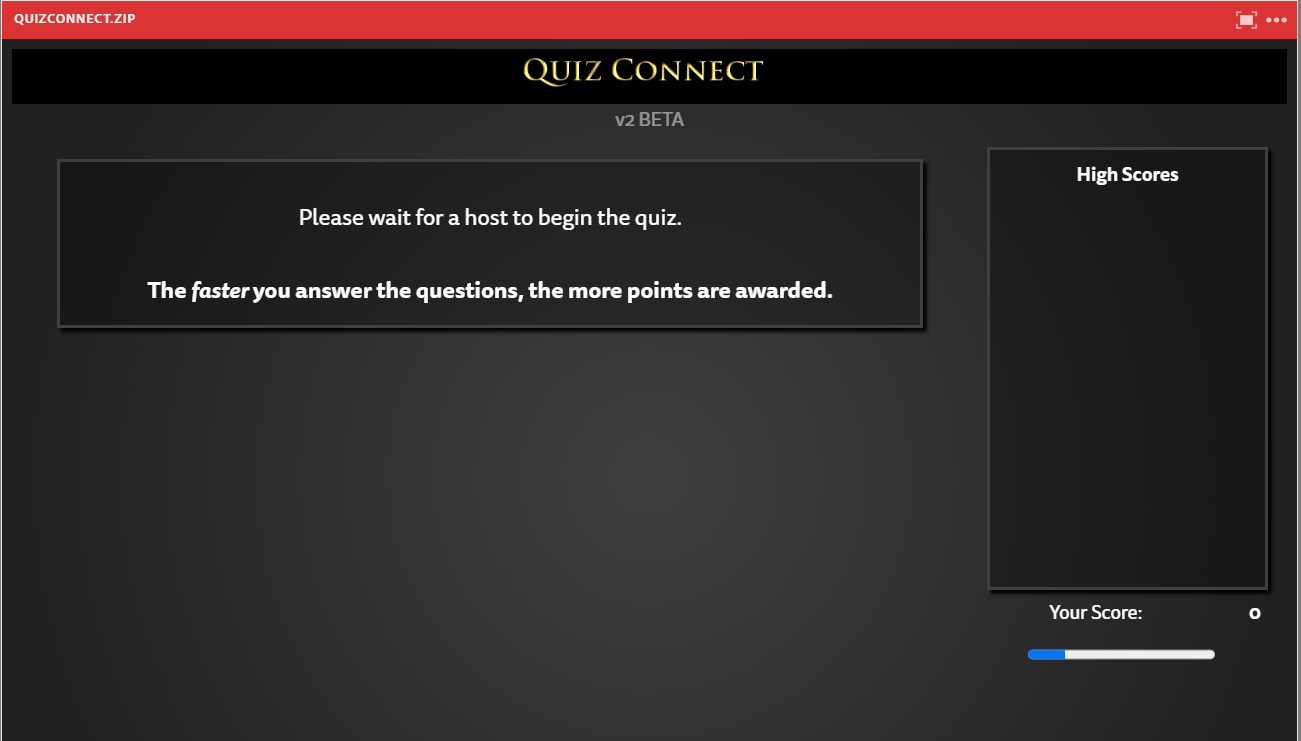
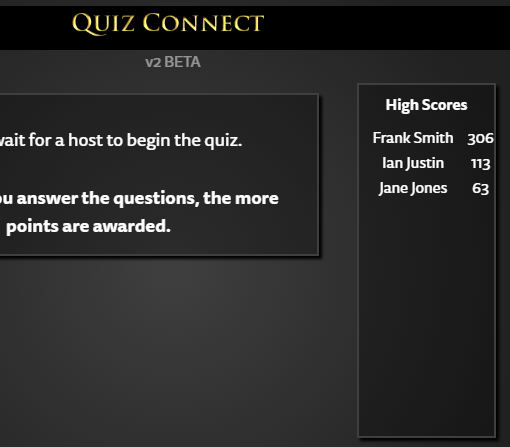
Note – the interface you will see as a host is different to the interface the attendees will see. The host will see figure 2 below, the attendees/participants will see figure 2a below.
Figure 2
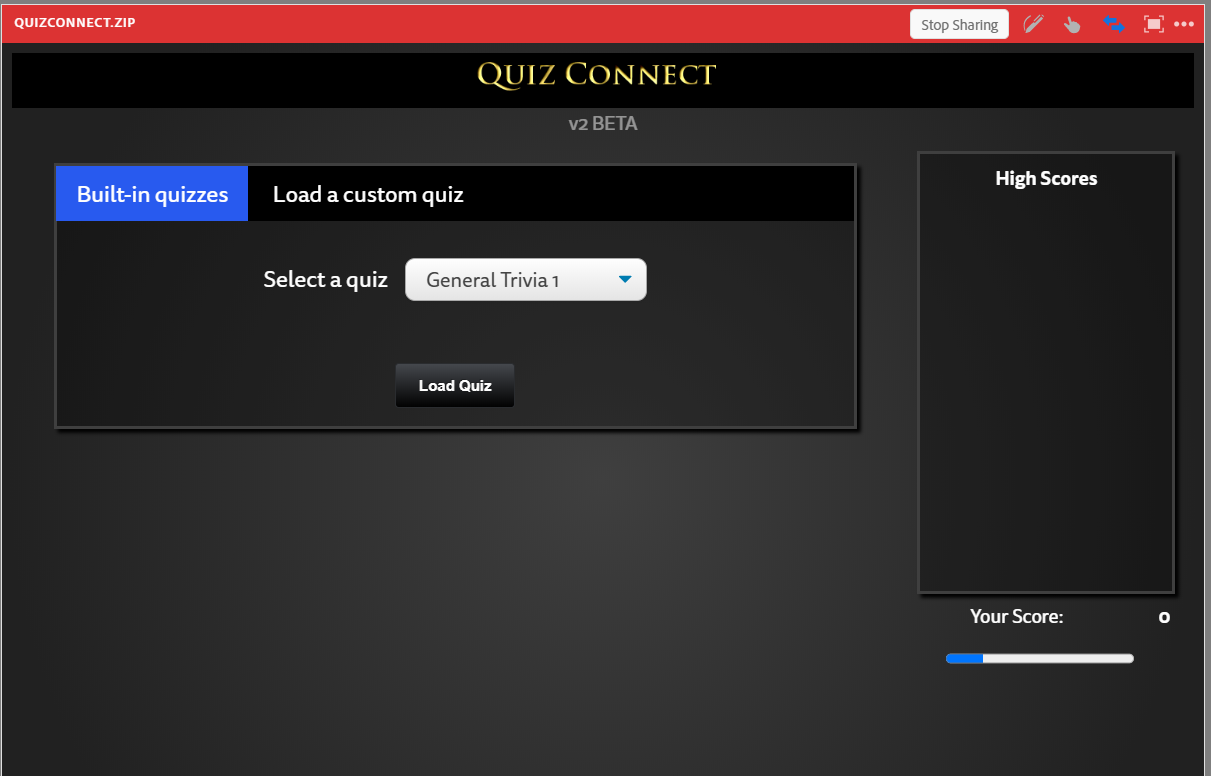
Figure 2a
Practice with one of the pre-created Quizzes
We can test the functionality before you build your own quiz, this will help you understand the way QuizConnect functions before you create your own content. We are going to test using the pre-created quiz ‘The Beatles’.
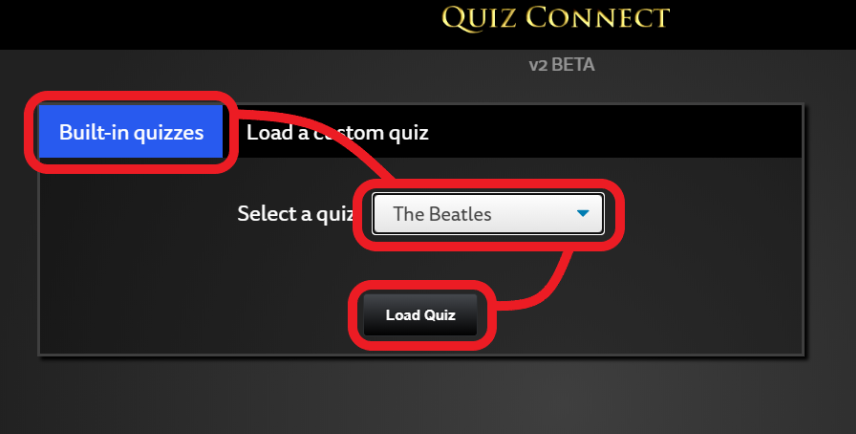
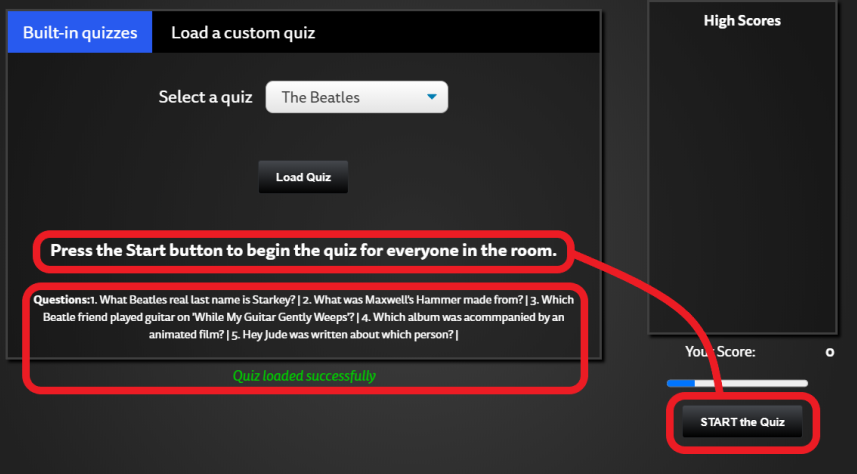
As a host, select the ‘Built-in quizzes’ tab and then select ‘The Beatles’ (or whatever you feel like of course!) and then ‘Load Quiz’. See figure 3 below.
Figure 3
Once the quiz has loaded, you will see a preview of the questions you have loaded (as a check for you) and the option to ‘START the Quiz’ (figure 4).
Figure 4
Start the Quiz -Once you click ‘START the Quiz’, it becomes available to everyone. Here is how the scoring works for your quiz-takers:
- Points for getting the question right
- More points if you can answer the question in the shortest time
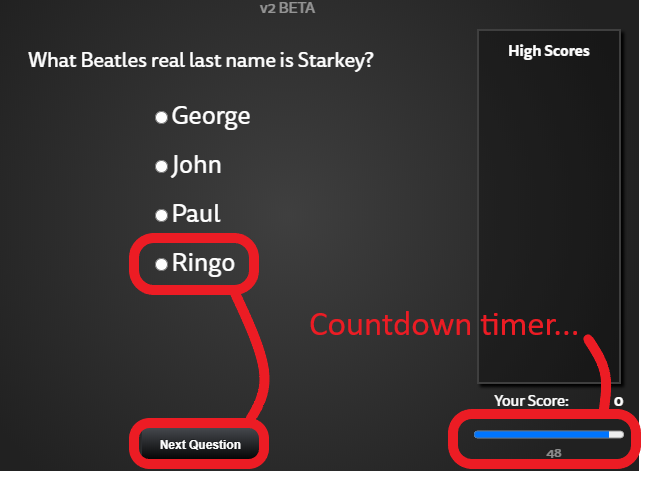
You can see the quiz-taker view from figure 5 below. In this example, if the quiz-taker were to ‘Ringo’ and ‘Next Question’ at this point, they would receive 48 points, as that is the reading on the countdown timer. The faster you give the correct answer, the more points you score.
Figure 5
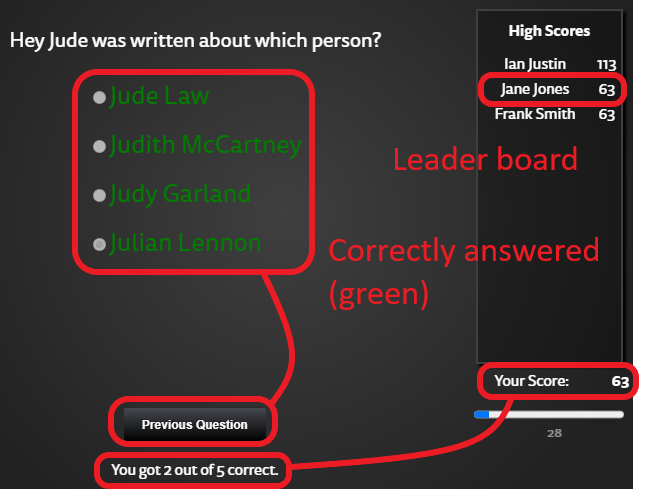
Once each person has finished the quiz, they will see their score to the bottom-right of their screen and also see the option to go back and see which questions they answered correctly and incorrectly. Incorrect answers will be red and correct answers green.
As you can see in figure 6 below, Jane Jones scored 63 points, made it to joint second on the leader board and answered this particular question correctly (Julian Lennon).
Note – The leader board will show approximately the top 15 scores only.
Figure 6
You can see from figure 7 below that Ian Justin (the host) got this particular question wrong and made it to the top of the leader board.
Figure 7
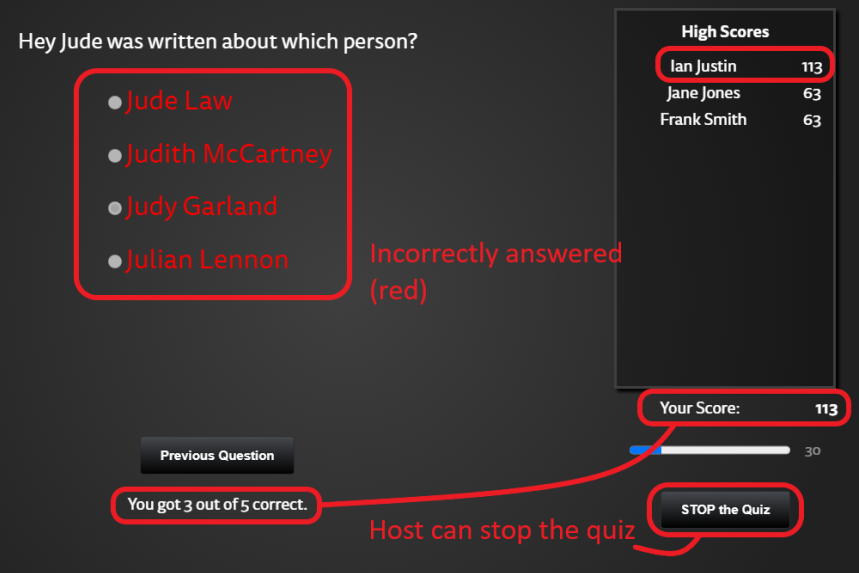
Stop the quiz – The host has the option to stop the quiz (see figure 7 above). When the quiz is stopped, the scores will remain and the message for the attendees will revert to the message in figure 2a above.
Cumulative quiz scores vs. individual quiz scores – As a host, you have the option of loading another quiz at this time. In this example, we loaded a new quiz and started and stopped the quiz as above. You can see from figure 8, Frank Smith did a great job and increased his cumulative score from 63 points to 306 points and he is at the top of the leader board now.
Figure 8
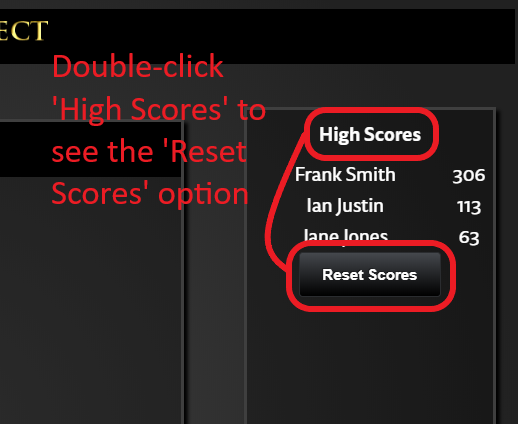
If you want the scores and the competition for each quiz to be independent, you can double-click on the ‘High Scores’ text to the top of the leaderboard and you will see the option to ‘Reset Scores’ and set everyone back to zero (figure 9). Now the next quiz will be scored independently (sorry Frank!).
Figure 9
Best practice note – It seems to be a good best practice to talk through the correct answers for everyone after the quiz is closed just to bring everyone up to speed as a group.
Create your own Quizzes
As noted at the start of this post, there is a new tool that has been added by Alistair Lee that allows you to create quizzes without the rather intimidating option of editing a text/XML file manually. Let’s create a new quiz and use this in our room.
First, click on the tab ‘Load a custom quiz’. We are going to make a new quiz, so click on the small prompt ‘Build your own quiz here.’ to open the ‘QuizMaker’ tool.
Note – In the current version, it is possible that the link above will not work from your Connect room due to room permissions/security. The workaround is to hold down the ‘shift’ key and click the link to make this work from within your room. You can of course, also click on the link int his blog post to open the QuizMaker tool.
Overall Process
Here is the overall process for building and saving your own, custom quizzes:
- Open the QuizMaker tool from the link here or from the QuizConnect extension in your room.
- Add your questions and answers.
- Save the quiz content as a QUIZ file on your computer (don’t worry, it is just a click).
- Load your custom quiz into QuizConnect in your room Share Pod.
- Run your quiz as noted in the sections above.
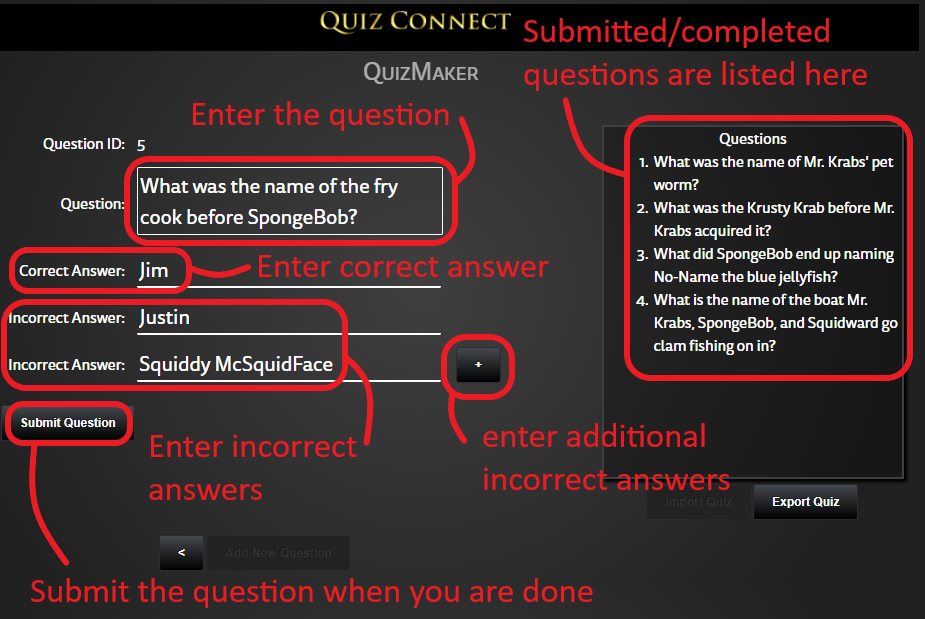
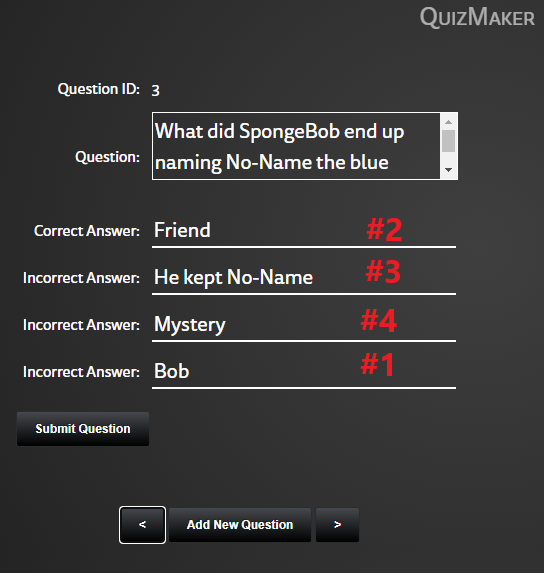
Add your questions and answers using the QuizMaker tool – In the QuizMaker tool, enter your question in the first field (figure 10). In the next field you can enter your correct answer. After that you can enter a number of incorrect answers, clicking the ‘+’ sign to add each additional answer.
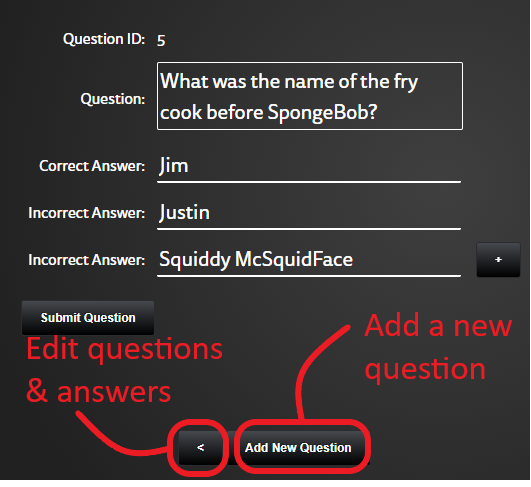
When you have completed the question and the answers, click ‘Submit Question’ to complete the process and move to the next question by clicking on the ‘Add New Question’ button (figure 11). The questions will be listed on the right-side of the tool.
Figure 10
You can check and edit the questions and answers by clicking on the arrow to the left of the ‘Add New Question’ button (figure 11).
Figure 11
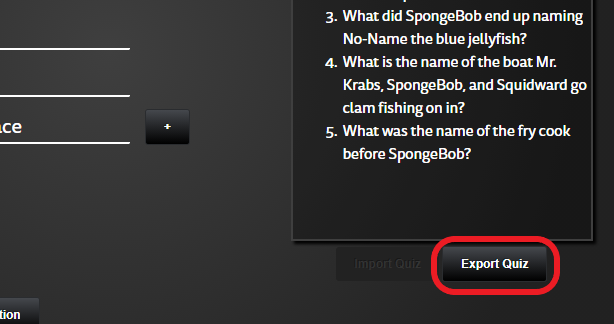
Export and save your quiz – Now that you have a completed quiz, click the ‘Export Quiz’ button (figure 12). You will now see the text that makes up the quiz you will load into your room.
Figure 12
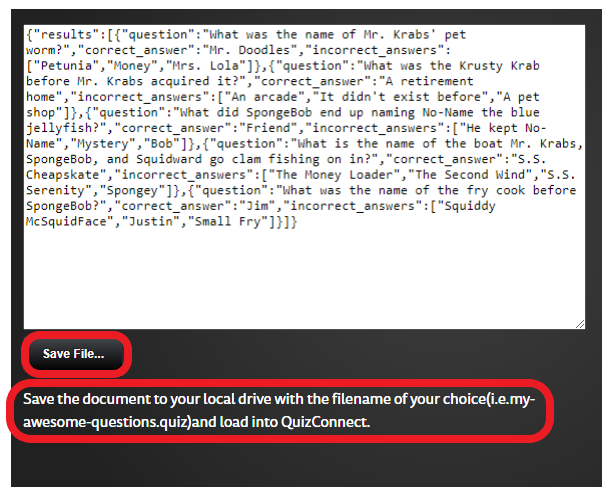
Now save the quiz text as a file using the ‘Save File’ button in figure 13. Give it a name you will recognize, in my case ‘spongebob quiz’.
Figure 13
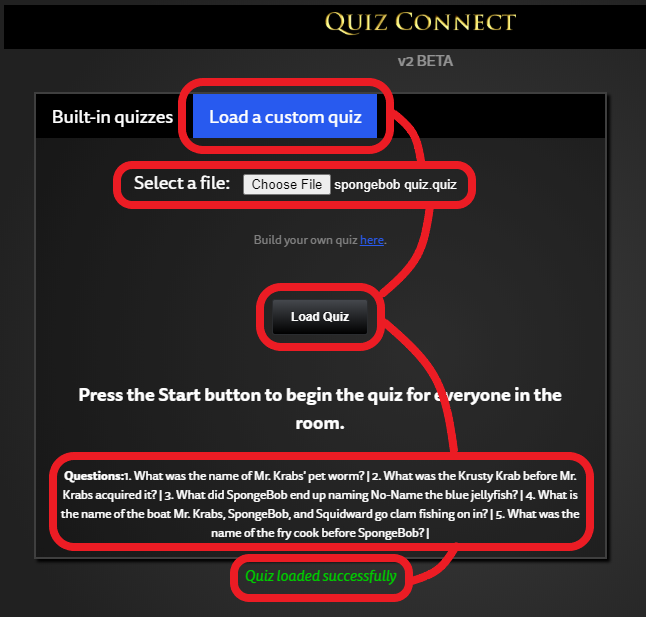
To load this custom quiz into QuizConnect, open QuizConnect in your room and click on the ‘Load a custom quiz’ tab. Now select the QUIZ file you saved and ‘Load Quiz’ (figure 14). You will see the preview of your questions and a message that the quiz was loaded successfully.
You can now start the quiz and run it as noted in figure 4 above.
Figure 14
Note – If you see and error loading the custom quiz, please see section ‘Errors & Troubleshooting’ below.
Order of the quiz answers
The order of the answers you enter in the QuizMaker tool will be displayed in the QuizConnect tool in alphabetical order, top to bottom of the list. So the example below in figure 15 would be in the order noted.
Figure 15
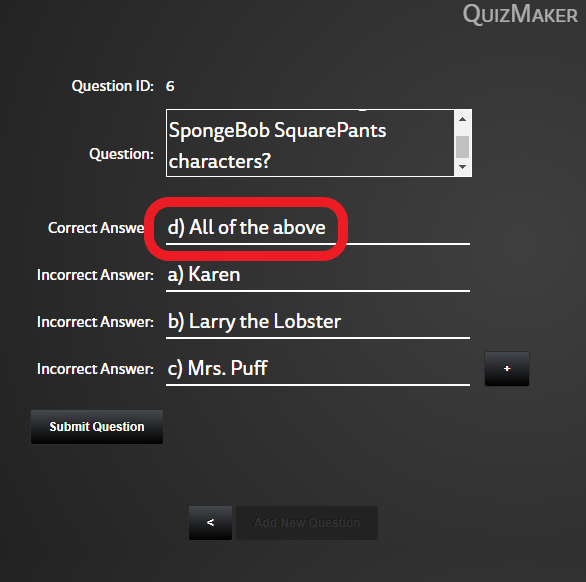
You can also create an ‘All of the above’ question by adding reference letters in front of the answers as seen in figure 16 below. The ‘d)’ answer will be forced to the bottom of the list. If you want to make this less obvious, you could use reference letters in front of all of your questions and answers and manually ‘shuffle’ the order, or have an answer ‘All of these’ which would be shuffled alphabetically as normal.
Figure 16
Edit your quiz in the QuizMaker tool – You can edit an existing quiz by loading it back into the QuizMaker tool. To do this, click on the ‘Import Quiz’ button in the QuizMaker tool (figure 17).
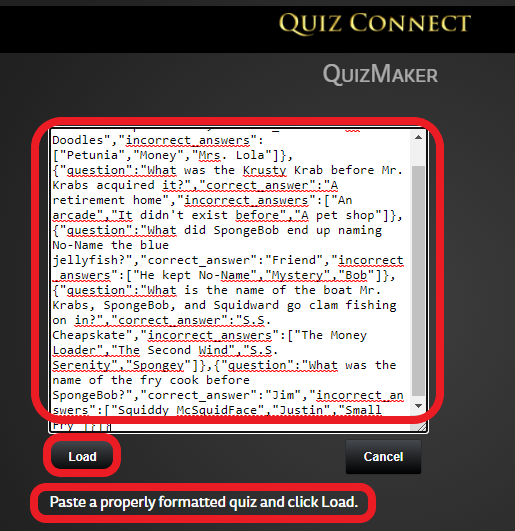
Now open the custom QUIZ file you have created and copy everything (ideally with a shortcut of ‘CTRL-A’ ‘CTRL-c’ to avoid missing something). Paste this into the window in QuizMaker and select ‘Load’ (figure 18). You can now edit the quiz, add questions as shown in figure 11 above.
When you have completed your editing, export the quiz as shown in figure 12 above.
Figure 17
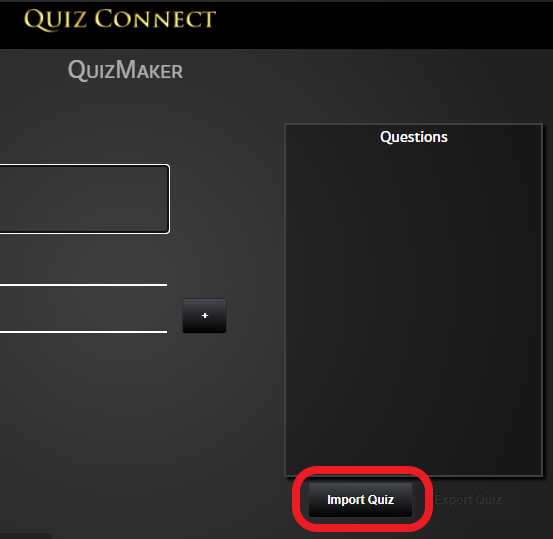
Figure 18
Errors & Troubleshooting – If there are any issues with loading your quiz into QuizConnect, you will see a message to that effect (figure 19 below). A couple of things to consider here if you are troubleshooting:
- The QUIZ file has been manually edited – this may mess up the formatting. Try to edit the file by importing it into QuizMaker and making the changes there.
- Unsupported formatting of characters – The QuizMaker tool has a check in place to deal with any odd characters in your quiz. But if you see any errors, look for anomalies and odd characters in your questions or answers in case these have been missed as a part of the checking process and remove/replace these characters.
- .QUIZ File extension is not supported (*Mac only*) – At the time of writing this post, the Mac Connect Desktop App. will not allow the .QUIZ extension to be loaded into the room Share pod. To workaround this, rename the .QUIZ file to .ZIP (so ‘spongebob quiz.quiz’ should be renamed to ‘spongebob quiz.zip’). This is *not* an issue with the Windows PC version of the Connect Desktop App.
Note – If you see an error uploading the quiz into the QuizMaker tool, reload the whole page before trying again with the corrected file. The error seems to persist, even with a clean file *until* you reload the page. Similarly, if you see an error loading the quiz into your Connect room and QuizConnect…stop sharing the QuizConnect tool and reload it into your Share pod. The error message seems to persist for the corrected file otherwise.
Figure 19
