You may have situations where you want your attendees to acknowledge that they have read a document in your room, or even to sign the document. At this time, fillable PDF forms do not work in Adobe Connect. Below are some workarounds that may help you in this process.
Scenario #1 – Use the whiteboard to sign a PDF form *as an individual*
Note – In this scenario, you can print/save the signed page, but you cannot print a complete, multi-page document with the signature.
Upload the form into a Share pod as a PDF (not a ‘fillable’ PDF form as this will not be ‘fillable’ in the Connect room). Have your attendee read through the form in their own time by unchecking the ‘Sync’ option in the Share Pod (figure 1). When it is un-synched (readable independently) the icon will be not be blue.
When the attendee has finished reading the document, click the ‘sync’ option again (to turn it blue) and move to the signing area of the document (as the document is synched, you are also moving the attendee to the signing area/page).
Turn on the whiteboard for the attendee by first enabling the whiteboard by clicking on the pen icon (figure 1) and then mouse-over the attendee’s name and select ‘Drawing’ (figure 2). The whiteboard tools will appear on the attendee’s screen.
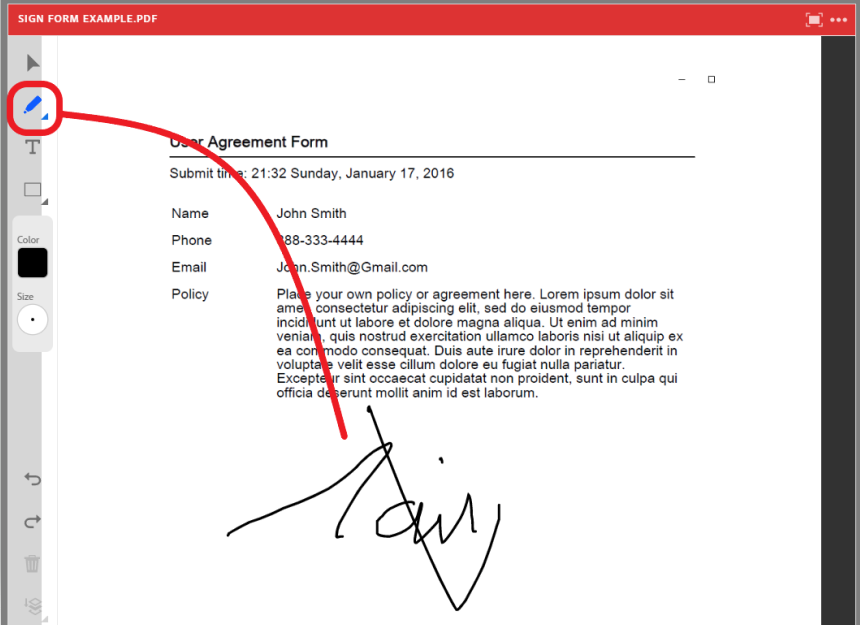
The attendee can select the ‘Marker/Pen’ icon and sign the document (figure 3).
Figure 1
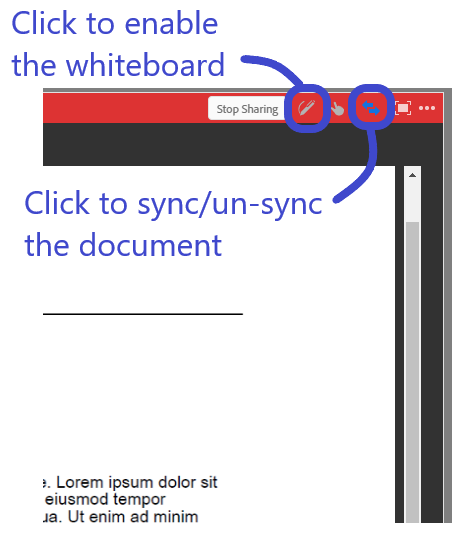
Figure 2
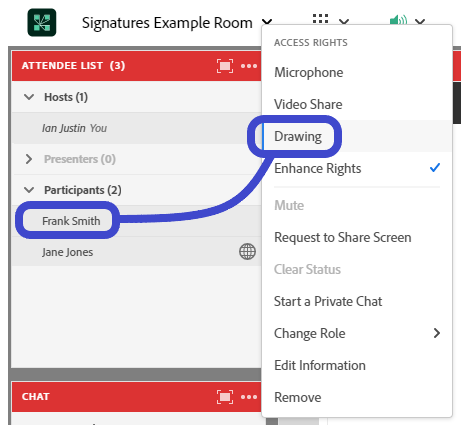
Figure 3
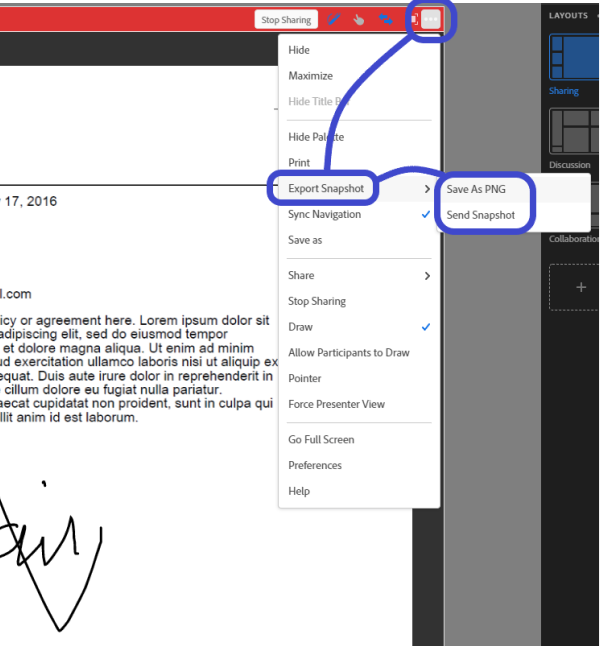
Now as a host, you can keep a record of the signed document by clicking on the Share pod pod option menu (the three dots) and selecting ‘Export Snapshot’. You will have the option to save as a PNG to your desktop, or you will have the option to email the document to yourself (or others). See figure 4.
Figure 4
Scenario #2 – Using the room to preserve the signed document
Connect rooms are persistent. If you take the example above, the full signed document will be retained in the room as a record. To maintain signed records in the room, either build (clone from a template) a new room for each signing, title the room with the person’s name is appropriate. Keep that room as a record of the process and the completed, signed form.
If you want to use a single room for multiple signings, create a new layout for each new attendee/signee. Into each layout add a different Share pod and into each Share pod upload a new copy of the PDF form. Just as above, the document and the signature will be retained in the room and you can go back into the room in the future to confirm the signing.
Using the room does not preclude you downloading the signed page(s) as noted in scenario #1 above. This creates an additional layer of security and archiving.
Scenario #3 – Use a poll (or polls) to confirm acceptance to a document or terms
In this scenario, you are using a poll and the poll reporting to confirm acceptance of a document. This does have the advantage of being far easier to implement for a larger group.
First, upload the document to your Share pod as noted in scenario #1 above. In this layout, also add one or more polls that can be used for acceptance/agreement. I also suggest you add clear instructions in a Notes pod or as a PPTX slide.
Multiple Choice Poll question – In figure 5 below, I have the form (which can of course be multiple pages) in a Share pod on the right-hand side and un-synched. The instructions are in a Notes pod and for the poll I have used a simple ‘Multiple Choice’ poll question. Figure 5 shows the attendee perspective with the navigation controls for the PDF and a simple choice for the poll.
The attendee reads the document and agrees (or disagrees) in the poll.
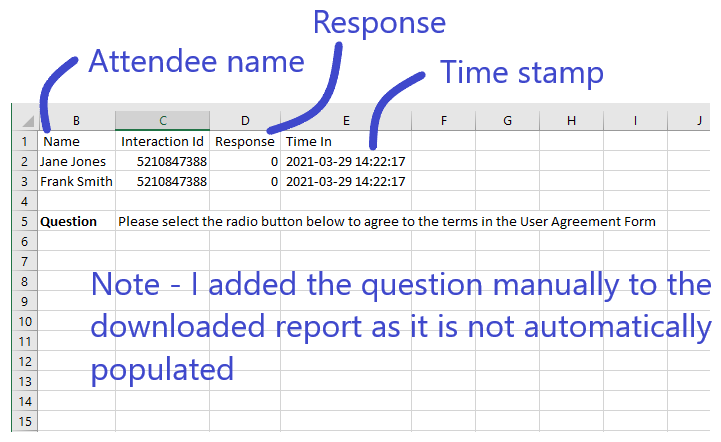
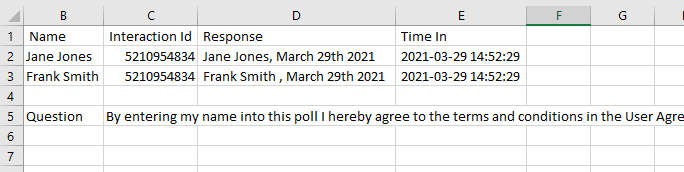
As a host, you can see who has answered the poll question by clicking ‘View Votes’. This means that you can see who has (and more importantly who has not) answered the poll and/or agreed or disagreed with the terms (figure 6). You would then ‘End Poll’ and the results will be written to your ‘Reports’ section for the meeting room in Connect Central (the back-end interface). You can see this in figure 7a below, and the report can be downloaded as shown in figure 7b below.
Figure 5
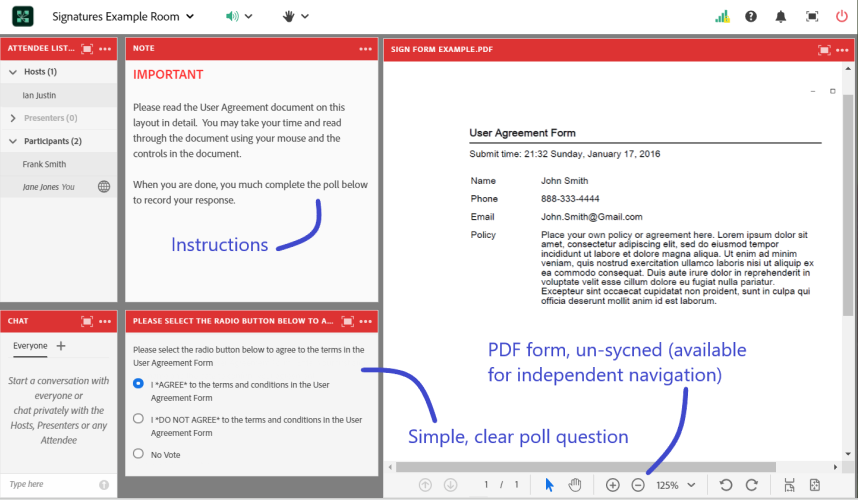
Figure 6
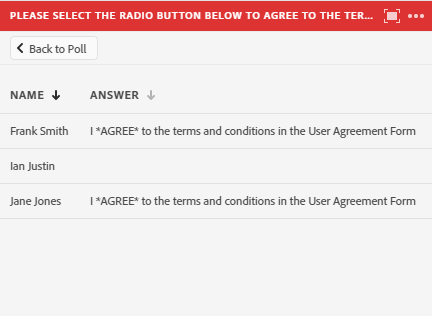
Figure 7a

Figure 7b
Short Answer Poll question – You may find that a better poll for this use-case is a short answer poll where you can instruct the attendee to enter specific information. The view for the attendee in this case is shown in figure 8 below. The attendee enters their response into the text field and they can edit it once it has been entered if you feel the response is incomplete etc.). Once you you end the poll the attendees cannot edit their response. You can still use the ‘View Votes’ option as noted above to see who has (and has not) answered the question.
Figure 8
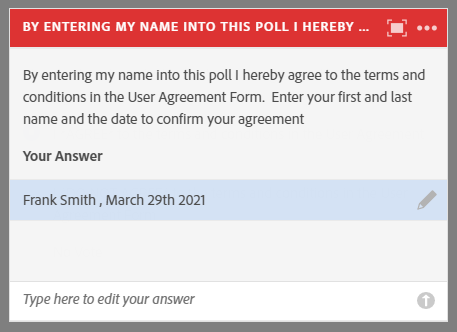
Figure 9a
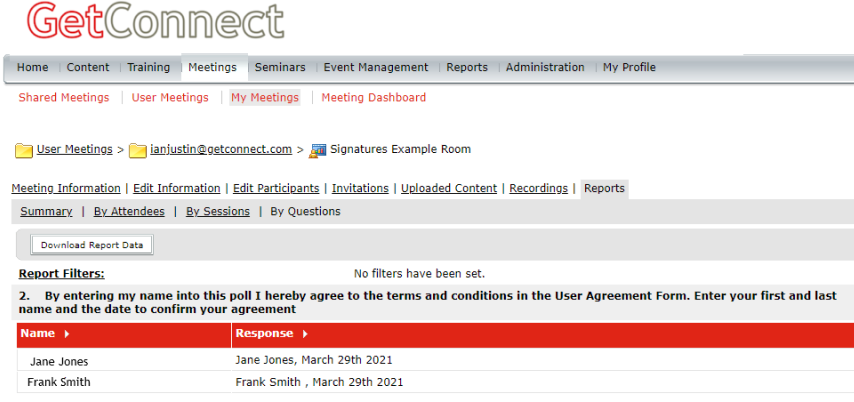
Figure 9b
You can use the same polls over and over again by ending the poll, clearing the answers and running it again. The multiple sets of answered will be retained in the reporting section.
Scenario #4 – Using Breakout Rooms to sign forms
This option would be similar to scenario #1 above, but rather than having the forms in layouts in the main room, duplicate the forms when you make your breakout rooms into the breakout rooms. You would assign your attendees to a breakout room and have them read and sign the form using the whiteboard there.
As the breakout rooms are also persistent, the signed forms will remain in the room as a record for the future.
Scenario #5 – Upload a fillable PDF form into your room
In this case, take a regular, fillable and save-able PDF file into your room by loading it into the File Share Pod. You can load the file into the File Share pod by clicking on the ‘add file’ text, or dragging a file into the pod or by clicking the ‘+’ icon to add subsequent files (figure 10).
Your attendees will see the form in the pod and they can download the file individually, or if there are multiple files, they can click on the pod options menu (the three dots) and select ‘Download All’ (figure 11).
Note – I typically rename the File Share Pod by double-clicking on the title of the pod. Renaming the pod as ‘Resources’ or ‘Handouts’ or ‘Forms’ tends to be easier for attendees).
Figure 10
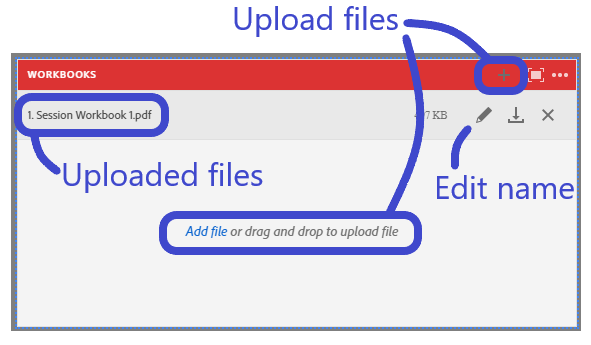
Figure 11

The attendees can now complete the form and save it, ideally with the convention of their own name, they can then send the form to you over email, or you can have them upload the forms back into the room as follows:
- Give your attendees the right to upload files into the File Share pod by mousing-over their names and selecting ‘Enhance Rights’ (figure 12)
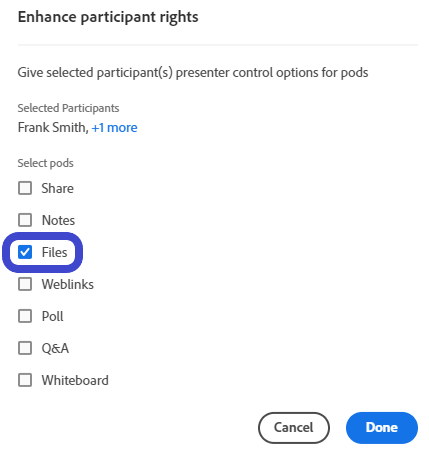
- In the next pane, select the ‘Files’ option (figure 13)
- The attendees will now see the options to upload files as you have seen in figure 1 above
Note – This option should not be used if the forms are confidential or private as other attendees could download the forms from this pod as well.
Figure 12
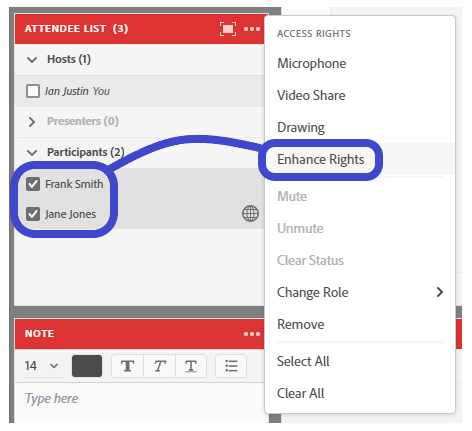
Figure 13