In Connect v11 there is the option to allow multiple subtitle tracks to an MP4 that is displayed in your Connect room.
In this scenario, each attendee in your room can choose to display the subtitles for the movie independently…so one use might choose ‘English’ as their subtitle track, another user might choose ‘French’. Each person will still be able to watch the movie in the room at the same time and synched with one another, but to see the translation in their own language.
Note – it is also possible to have alternate audio tracks associated with the MP4 in the room as well that individuals can choose. I will try to cover that in a separate post as the process is more involved.
Technical Overview
The overall requirements for subtitle tracks in Adobe Connect are below:
- Connect MP4 files will need to use the .vtt (Video Text Track) format for subtitles. You can see more on this format here.
- You will need a .vtt file for each subtitle track.
- You will need a JSON file that essentially tells the MP4 and the .vtt files how to work (more on that later).
- All of these files are zipped and then uploaded into your Connect Share Pod.
How does this function in Connect?
Below is the experience for the attendees in a Connect room.
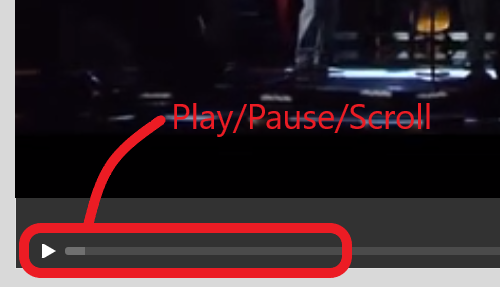
The movie plays in the Share Pod as usual, controlled by the presenter or host in the room (figure 1)
Figure 1
Everyone in the room will be able to click on the ‘three dots’ to the top-right of the Share Pod (‘Pod Options’ menu) and there they will see the option ‘Subtitle Tracks’, in figure 2 below I have chosen ‘English’ and the English subtitles are shown and synched to the movie.
Figure 2
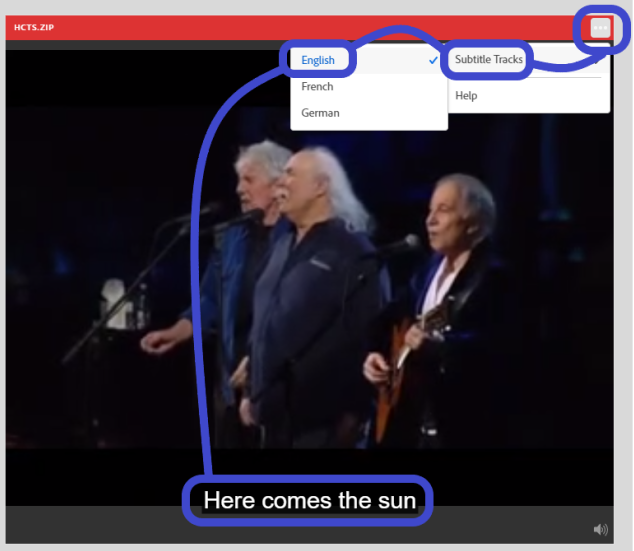
Copyright © Paul Simon.
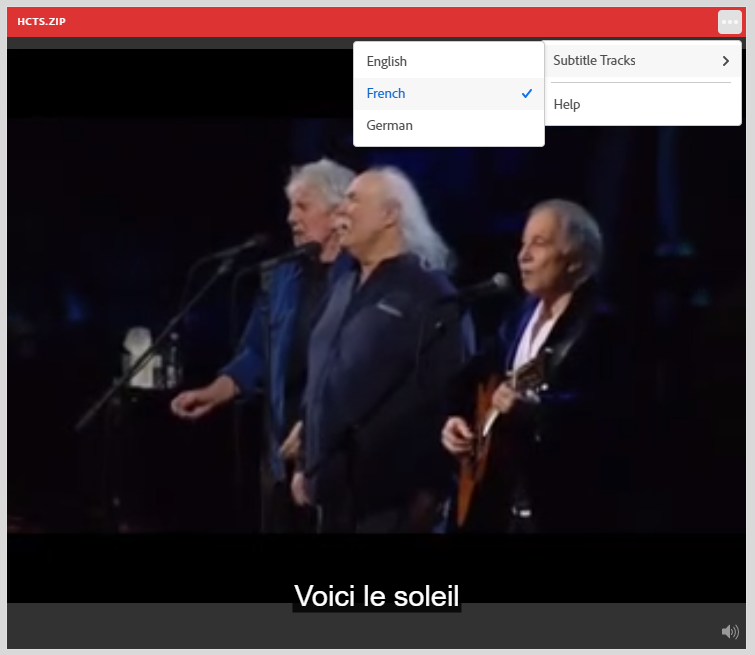
Similarly, if I select ‘French’ I will see the French subtitles (figure 3).
Figure 3
MP4 with Subtitles Creation Process
The process I followed to create this example is outlined in some detail below. I have used free tools in this example and created the content from scratch.
If you have an accessibility team that is responsible for the creation of compliant content then they should be able to give you content in the format outlined below.
Capture/find the video – The video needs to be in MP4 format. In order to have the video play successfully for all users, please follow the guidelines in my post here. If the video is pausing/buffering for users then it has likely been encoded at too high a date-rate and it needs to be re-encoded in accordance with my guidelines.
Add the Subtitles – Technically, you could create this file manually, but it would be pretty challenging and incredibly dull! I found a tool online that allows you to watch the video and add the subtitles dynamically.
Note – Neither Ian Justin, nor GetConnect has any affiliation whatsoever with the site/tool https://www.vtt-creator.com/. You should always ensure that your IT team is OK with you using any 3rd party tool.
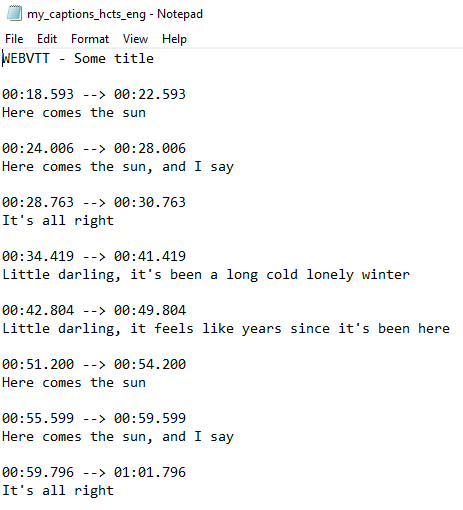
Example (raw) .vtt file – In figure 4 below you can see an example file that I created using this online tool. You can see that the file essentially consists of time-stamps for the start and end of the caption display, and the caption itself.
Figure 4
Adding your own captions using the VTT Creator online tool – Go to the URL https://www.vtt-creator.com and click on the button ‘CREATE CAPTIONS’.
On the next page, click on the button ‘SELECT VIDEO FILE’, navigate to your video and load it into the tool. Your video will appear in the tool interface.
Note that you can pay to have this tool automatically extract the captions from the video file, I am not considering this option, nor have I tested this option.
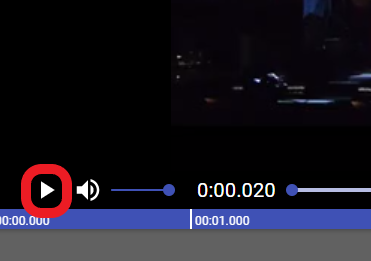
Click on the ‘Play’ option to the bottom-left of the video (figure 5) and let the video play to the point of your first caption, in this example, the start of the lyrics. Pause the video in the right place to add the first caption.
Figure 5
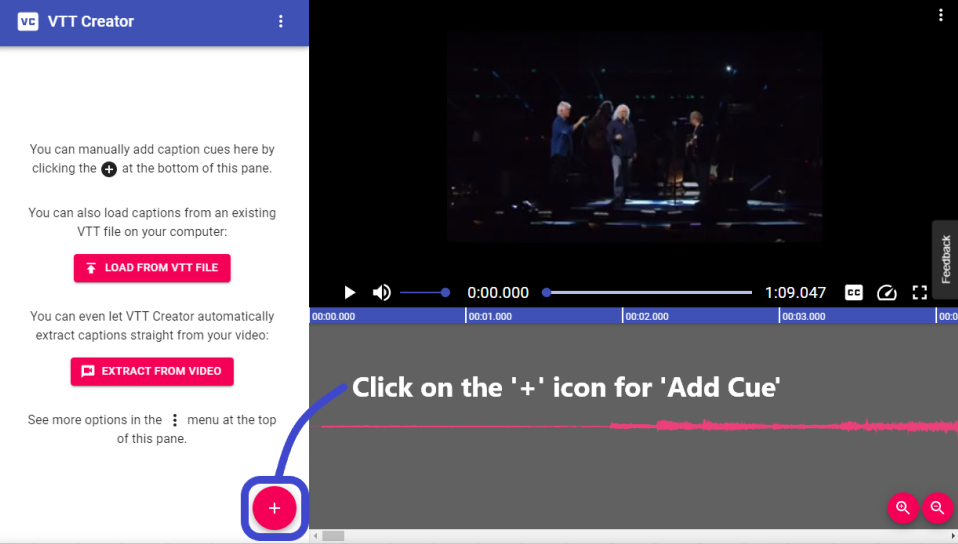
At the right place in the video, click on the ‘+’ sign to the bottom left of the interface to ‘Add Cue’ (figure 6).
Figure 6
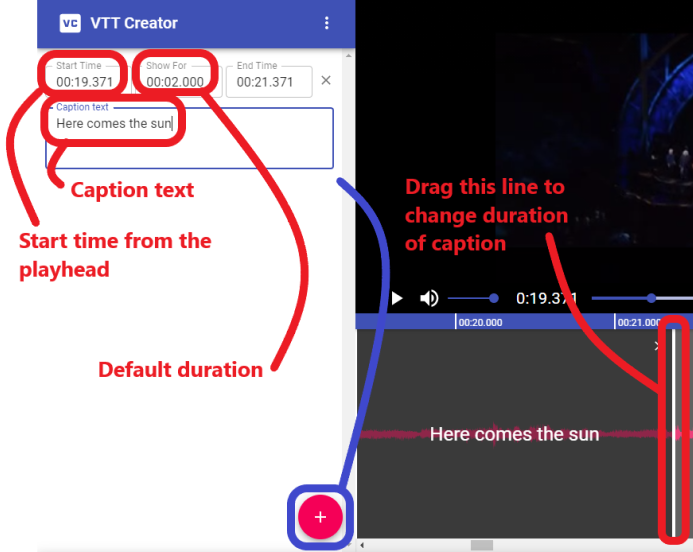
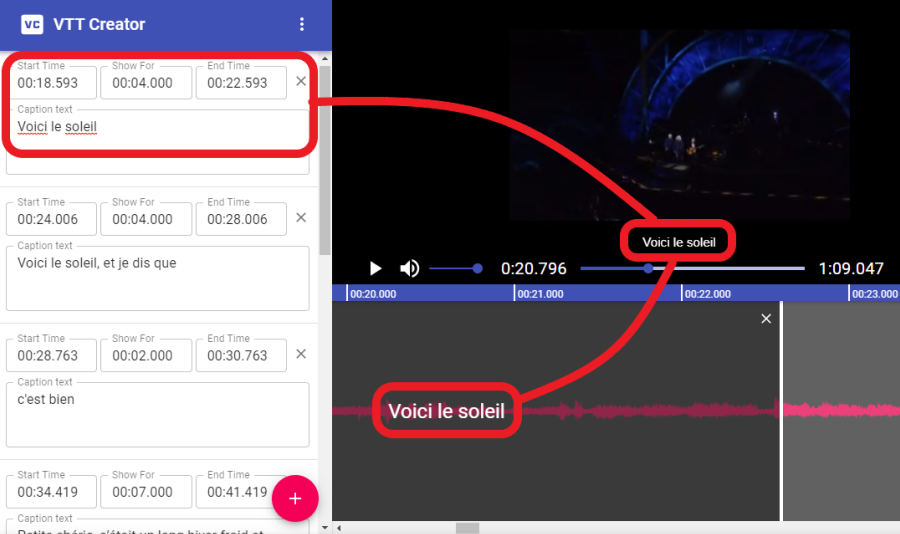
You will notice that the action adds the option to caption at the current time-stamp in the video. Now you can add your caption to the dialogue box You can change the duration (display time) of the caption by editing the number or dragging the line below the video (figure 7).
Figure 7
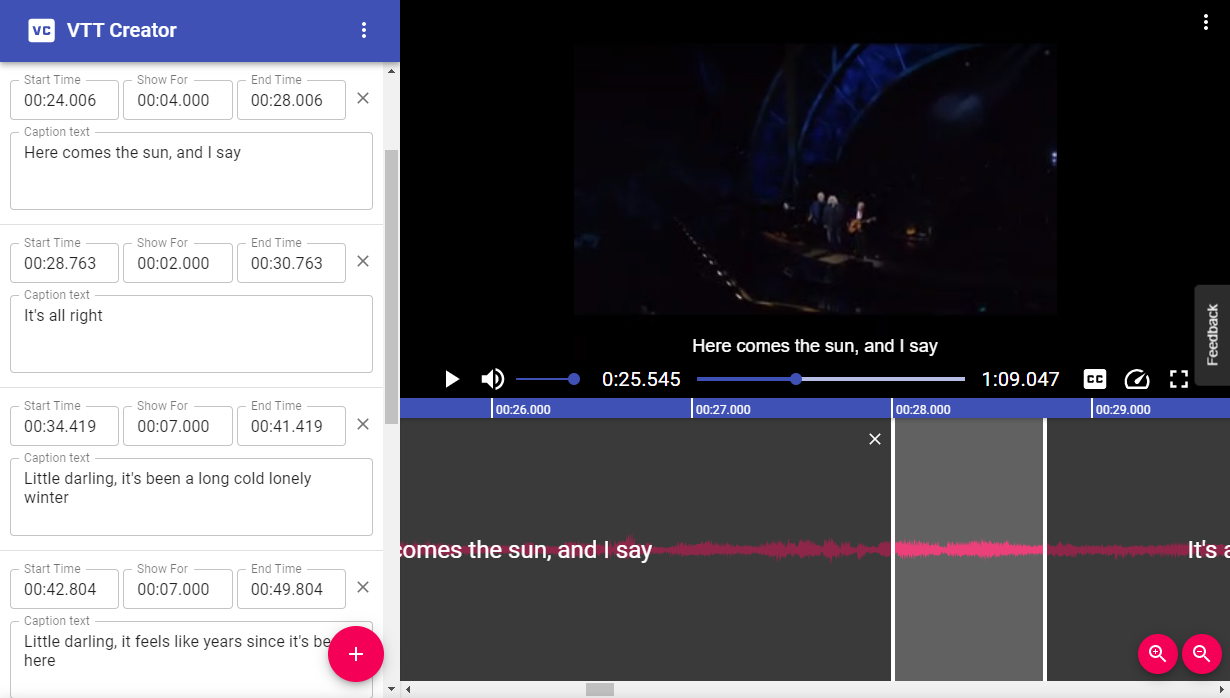
Click the play button again and repeat the process above to add all of your captions (see figure 8 for an example of a completed captioning).
Figure 8
When you are done, click on the ‘three dots’ (‘Cue Options’) menu and ‘Save to VTT file…’ (figure 9). I suggest you include the type of captioning/subtitles in the file name (‘hcts-en’ for example).
Figure 9

Adding other languages – Once you have done the initial hard work of adding and timing the subtitles to the video, you can just load the English .vtt file and change the words from ‘Here comes the sun’ to ‘Voici le soleil’…all of the timings and durations will remain. Resave .vtt the file as ‘mhcts-fr’. Repeat as necessary.
Figure 10
Create a JSON file – This file essentially binds the MP4 and the .vtt subtitles files together in Connect. The format of the JSON file I used in my example is below between my ‘snips’, (you can copy this text).
You can see that the file has the title of the subtitles in the Connect room and the name of the .vtt file related to those subtitles.
—snip—snip—
{
“English” : {“filename” : “hcts-en.vtt”},
“French” : {“filename” : “hcts-fr.vtt”},
“German” : {“filename” : “hcts-ge.vtt”}
}
—snip—snip—
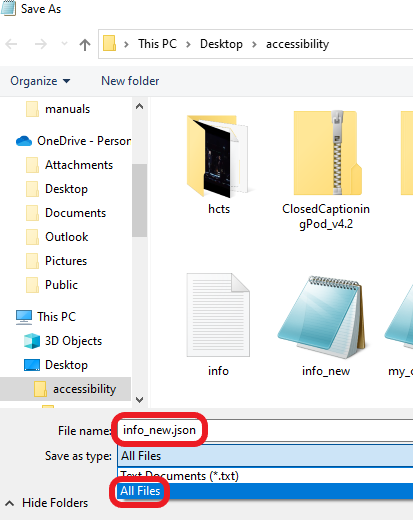
You can create this file in a text editor (such as Notepad), but there is a trick to saving this file successfully (for dummies like me anyway). Essentially you need to be sure it is not saved as a .txt file.
On your Windows PC in Notepad…’Save As…’ and give the file a name (‘info’ seems to be the right approach), under ‘Save as type:’ change this to ‘All Files’. Name the file you are saving ‘info.json’ (figure 11).
Note – If you do not do this, the file will be saved as a text file and named ‘info.json.txt’ and that will not work.
Figure 11
Compile the file for loading into your Connect room – Now move all of the files you need into a folder (figure 12) and compress/zip all of the components together (info.json, the .vtt files, the MP4 file).
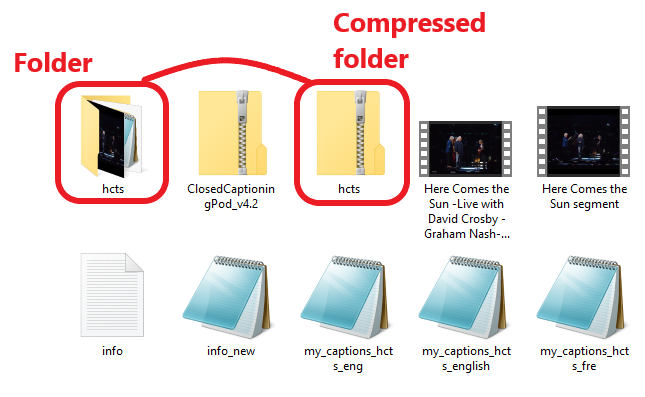
You should now have a single compressed file (figure 12a).
Figure 12
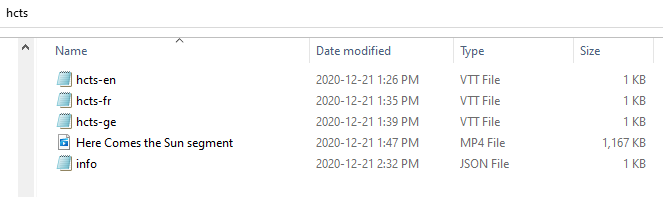
Figure 12a
Now you can load the compressed folder into your Connect Room ‘Share Pod’ (drag & drop or ‘Document’>Browse My Computer’). Provided the steps above are in order, you and your users should be able to use the video as described at the start of this post.