Below are the steps I use to start and run an Arkadin/NTT conference within your Connect room.
Overview
Before getting into the weeds, let’s discuss what is actually happening here with the integration to Adobe Connect. Essentially, your Adobe room is sending the same phone keypad ‘presses’ that you would use from just a traditional phone to the phone conference.
So if on your phone you would press ‘*1’ to mute or un-mute your own line, when you mute yourself in the Connect room Attendee List pod, you are telling your Connect room to send ‘*1’ to the conference on your behalf.
That’s it.
Overall Process
Let’s look at the overall, high-level process *I would suggest* to start and run a conference in your room. Below this you will see the more detailed explanation:
- Start your Connect room
- Start your Arkadin/NTT conference from within your room (either automatically or by selecting ‘Start Audio Conference’)
- Join your conference by entering your phone number into the dialogue, your phone will ring…answer it and follow the instructions
- Other attendees will join in the same manner
- Run your session, record, use breakout rooms, stop recording
- ‘From within your room, select ‘Stop Audio Conference’
- Close your Connect room
Detailed Process and Explanations
Integrate you conferencing with your Connect Account and you Connect Room – You will need to integrate your conference information with your account, create an ‘Audio Profile’ and link the audio profile to your room. You can see instructions on how to do this from my interactive guide below. See section ‘Configure my Telephony’, button #4:
Getting Started with Adobe Connect – Interactive https://getconnect.adobeconnect.com/gettingstarted
Enter your Connect Room and Start the Conference – Open your Connect room and you may immediately see the prompt to ‘Start Audio Conference’ if this is how your room was configured. if you want to get started then you can click ‘Start audio conference’ (figure 1). You can also defer starting the conference by clicking ‘Cancel’.
Figure 1
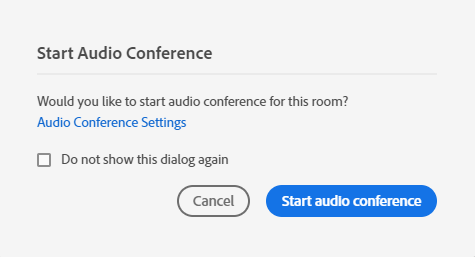
It is also possible that you room has been set up to automatically start the audio conference. Personally, I don’t think this is necessary as you will want to prep your room and there is no need for the conference to start every time you open your room.
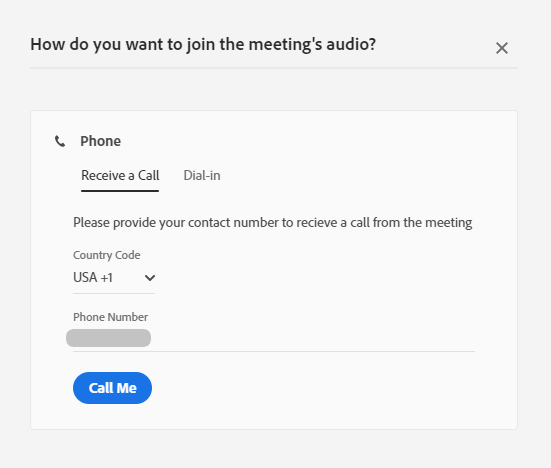
If your room has been configured to automatically start the conference, you will immediately see the dialogue to join the conference shown in figure 2 below.
If you start the audio conference from the initial dialogue shown in figure 1, or later in your session, then you will also see the options shown in figure 2.
Figure 2
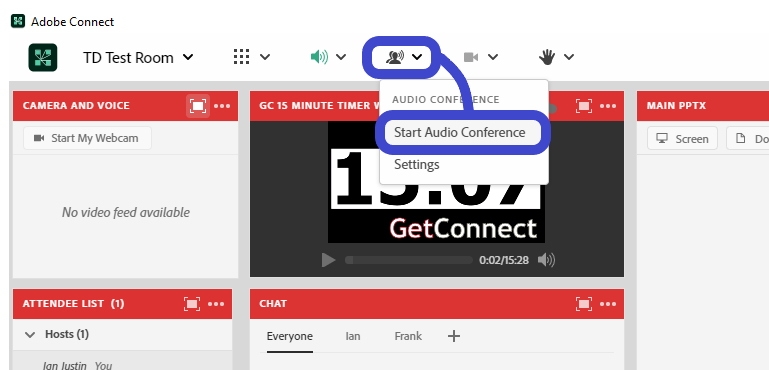
To start your conference later in your session, select the ‘Start Audio Conference’ from the audio menu on the top-bar of your room (figure 3). What you see in the options for figure 2 above will depend on what settings you have chosen in the audio icon on the top-bar of your room and ‘Settings’.
Figure 3
When the conference starts, you will have the option to enter your phone number into the dialogue shown in figure 2 (above) to have the room call your direct line. When you phone rings, follow the instructions to join the conference.
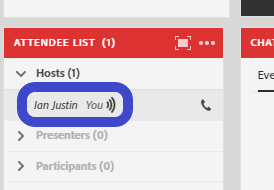
As attendees have your room call their phones, you will see the icon in the Attendee List pod change to show an arrow, indicating that the room is calling their phone line (figure 4a). Once they have joined the conference, the icon will change to a phone (figure 4b). When the attendee is speaking, you will also see a ‘sound’ icon next to their name (figure 4c).
Figure 4a
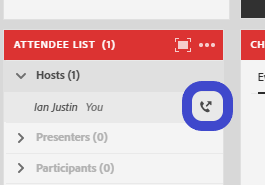
Figure 4b
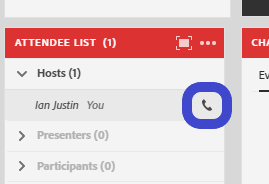
Figure 4c
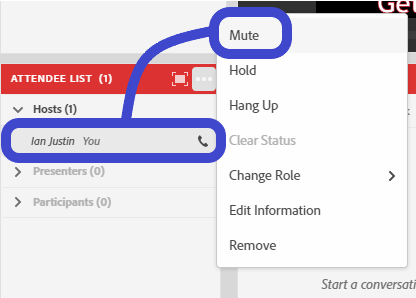
You can mute an attendee by mousing-over their name in the Attendee Pod and selecting ‘Mute’. You can selectively mute multiple attendee in this manner by clicking on multiple names in the Attendee List pod and again, selecting ‘Mute’.
Figure 5
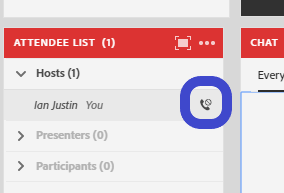
When you mute an attendee (or a group of attendees) you will see the phone icon add a small mute symbol to the attendee information (figure 6).
Figure 6
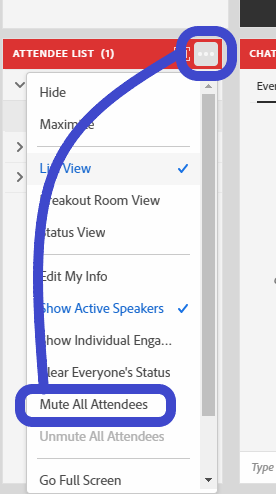
To mute everyone (including yourself), use the ‘Pod Options’ menu to the top-right of the Attendee List pod (the three dots) and select ‘Mute All Attendees’ (figure 7).
Note – Typically when I do this, I then unmute myself. I am just ‘helping’ the attendees to mute as a group essentially.
Figure 7
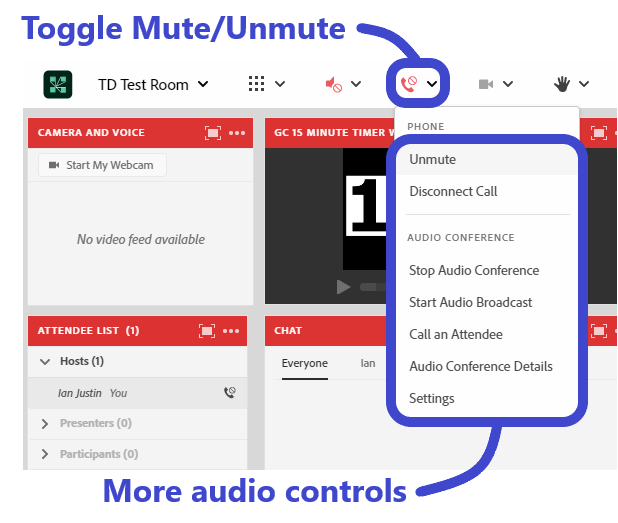
You can also toggle mute/unmute for yourself and see other controls from the audio menu on the top-bar in your room (figure 8)
Figure 8
Best Practice – I would strongly suggest that you try to push your attendees to use the ‘Call Me’ option shown in in figure 2 above. This option automatically merges the caller’s line with their in-meeting ‘persona’.
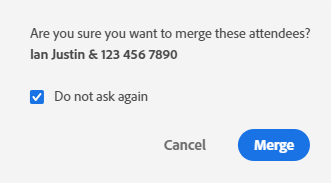
If a caller does not have a direct line and they need to use the conference phone number from their phone (‘Dial-in’), then their phone line will essentially be an ‘orphan’ in the room (see figure 9a below). Drag their phone number ‘over’ their in-meeting presence, you will see a pop-up asking if you want to merge the phone line and the in-meeting presence, select ‘Merge’ (figure 9b).
The phone line and the person are now connected in the room. As you can see, ideally, you want attendees to have the room call their phone to make this easier.
I instruct attendees to use the ‘Call Me’ option and I give out the conference number and PIN codes very selectively.
Attendees do see instructions on how to merge their lines, but I assume that none of them pay attention to the instructions.
Figure 9a

Figure 9b
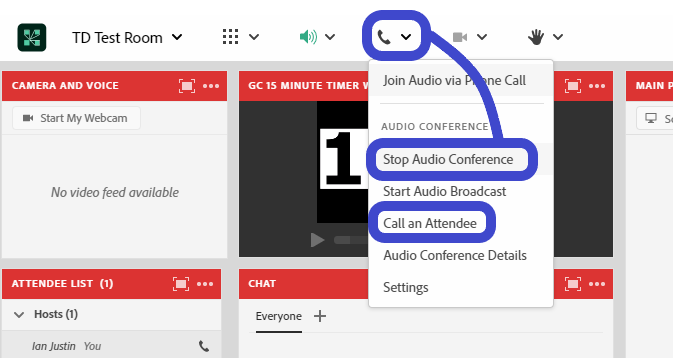
End the Conference and Close your Connect Room – When you are done, end your recording (if necessary), stop the conference from the audio menu on the top-bar of your room (figure 10).
Figure 10
Call an Attendee from your Connect Room – If one of your attendees is confused but has a direct line, you can have the room call them directly.
If you mouse-over an attendee in the Attendee List Pod and select ‘Call Selected User’, you can enter their direct phone information into the pop-up.
Their phone will ring and they can just follow the instructions. In this case, their phone line *will* automatically be merged with their presence in the room
Figure 11

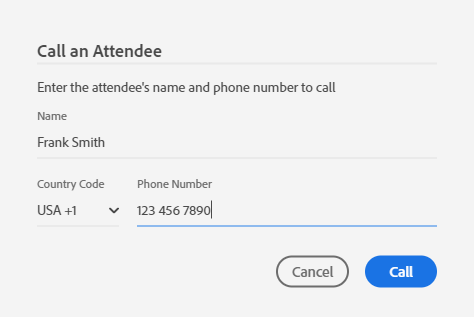
Alternately, you can go go the audio menu on the top-bar of your room and this time select ‘Call an attendee’ (see also in figure 10 above). You can enter the attendee direct line information and remove that step from them.
Their phone will ring and they can just follow the instructions. In this case, their phone line will *not* automatically be merged with their presence in the room (figure 12).
Figure 12
Using Arkadin/NTT Moderator Codes
It is worth understanding that you can absolutely still use the regular phone codes that you would push on your phone to manage the conference while you are in the room. You can find the list of codes from your provider…in the case of Arkadin/NTT the codes can be found on the Arkadin/NTT Lounge here: https://www.anywhereconference.com/
Login with your conference web login and moderator code and go to ‘User Guide’ in the left column and download the guide.
Some useful codes you might consider using are listed below (correct at the time of writing this document, please check the latest guide to confirm these codes):
*1 – Mute/Un-mute your own line
*2 – Mute/Un-mute participant lines (participants cannot press *1 to un-mute themselves)
*3 – Activate/deactivate tone on participant entry and exit
*5 – Mute/Un-mute participant lines (participants can press *1 to un-mute themselves)
Note – You do not need to use the recording options form these codes, Connect will cover that for you.