Adobe Connect rooms are all ‘assembled’ from the same components:
- Pods – The ‘building blocks’ we use to make our rooms
- Layouts – A collection of pods
- Rooms – A collection of layouts
Using the pods and layouts intelligently allows you to build very sophisticated rooms and it saves you a huge amount of time in the long run. This post discusses some of the basics in using pods and layouts.
Note – You can see more on how to use your Connect rooms effectively in my Blog Post here.
Building a new Room – First we will build a new meeting room (classrooms and webinar rooms will follow the same process). To get the most form your room, build it in the ‘Meetings’ tab, although you may not use this for your full meetings, this is the best place to build a room that cam be ‘cloned’ into other licenses. Build a room and select your ‘Shared Templates\Default Meeting Template’ from the ‘Select Template:’ option (Figure 1). Open the room.
Figure 1
![]()
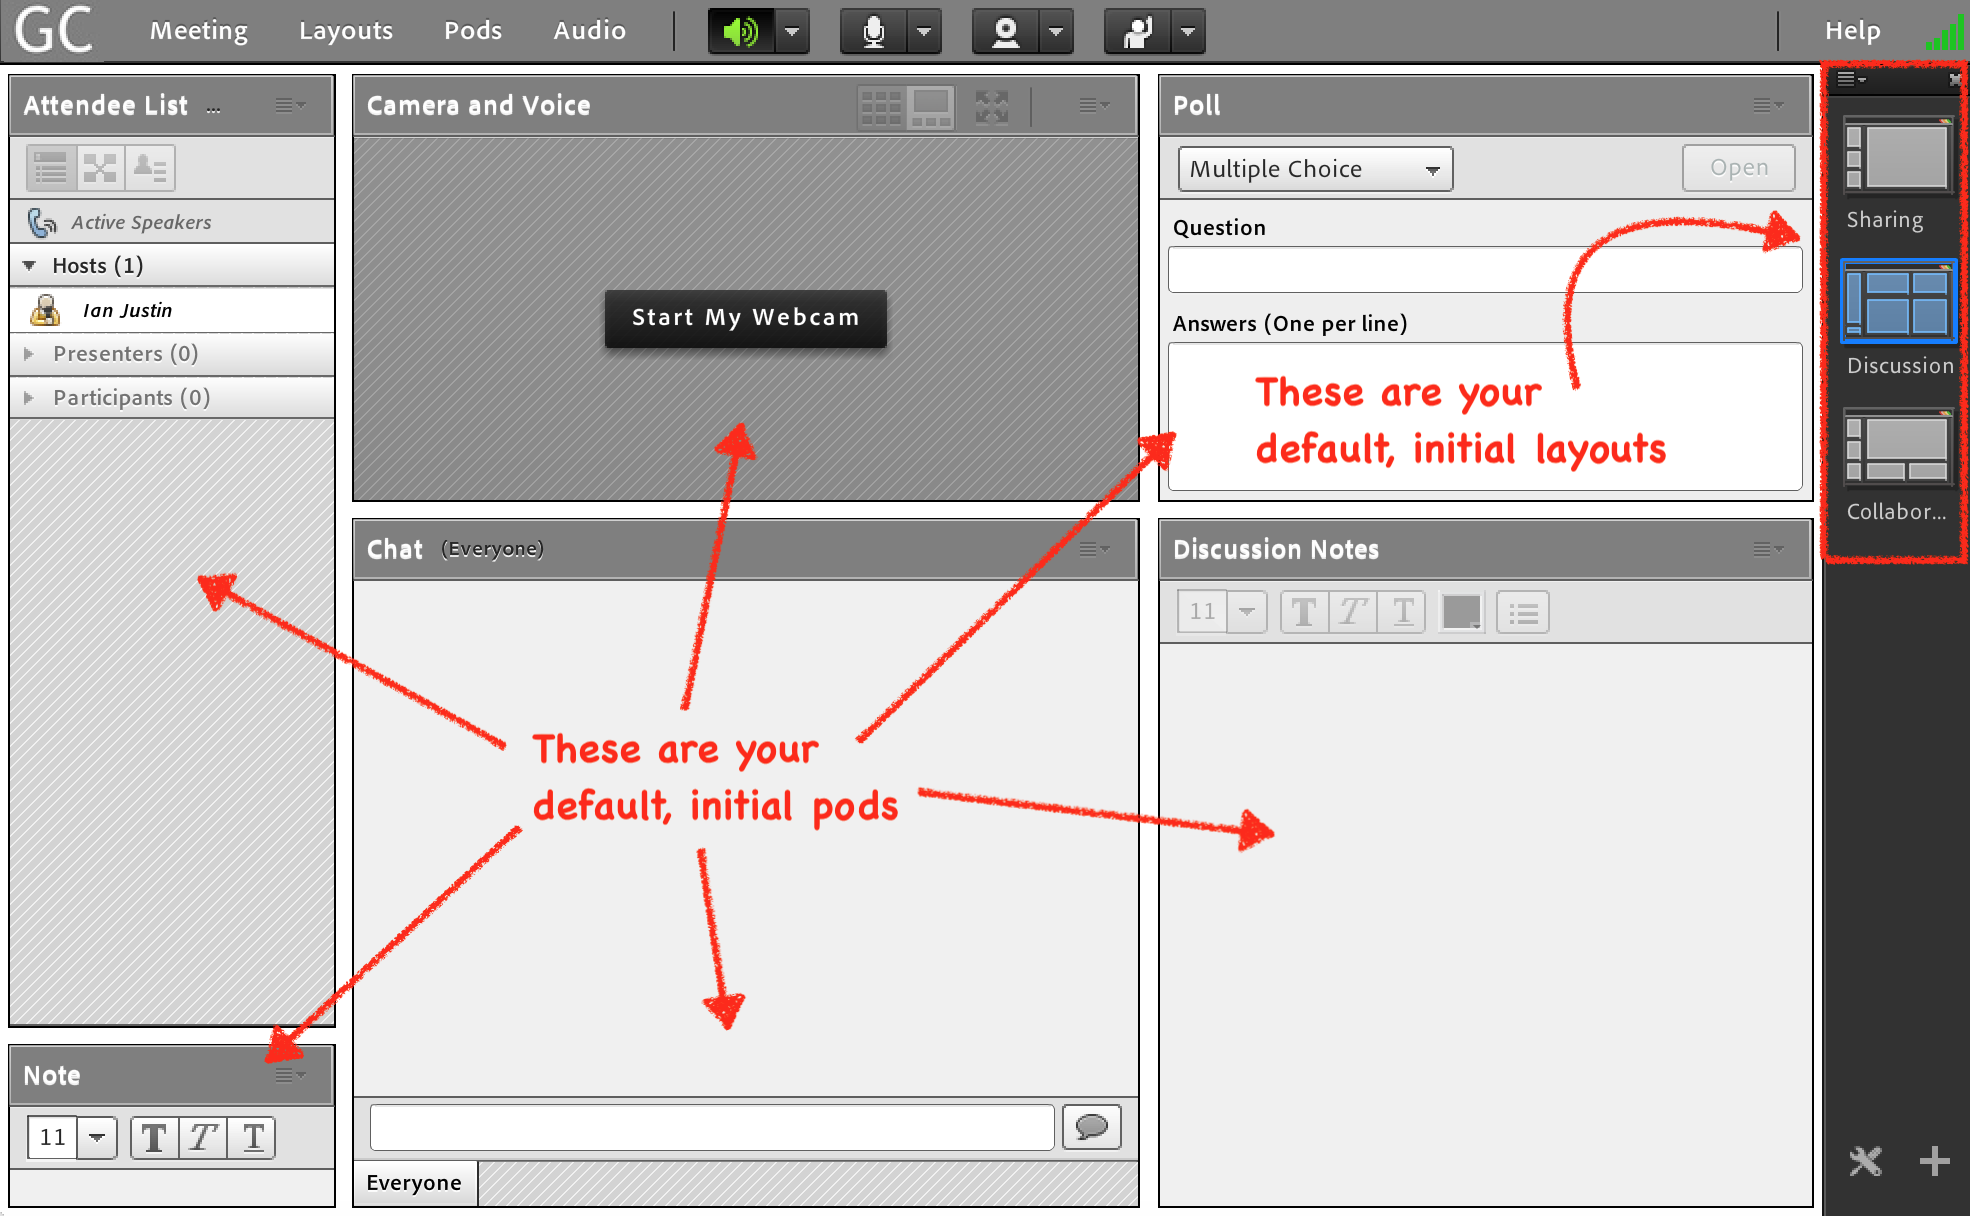
Your room will not look the same as my room below as I have edited my default template, but it will be similar. As you can see from Figure 2 below, the room is empty of content or text but you do have pods there ready to go.
There are three layouts by default and typically they will be labelled ‘Sharing’, ‘Discussion’ and ‘Collaboration’. If you click on the layout thumbnails on the right-hand side you can inspect each layout. As you might imagine, they are intended to focus on the different scenarios above.
Figure 2
Persistent vs. Unique Pods in Layouts – There are times when you want a pod to be consistent and persistent across layouts…you may want your Camera Pod visible on every layout so that you can maintain contact with your audience. You may want a Chat Pod to be persistent so that conversation continues as you move through content.
Other pods you may want to only appear on certain layouts such as poll questions or PowerPoint presentations. In fact of course you may want some Powerpoint presentations to completely change in different layouts such as when you change presenters.
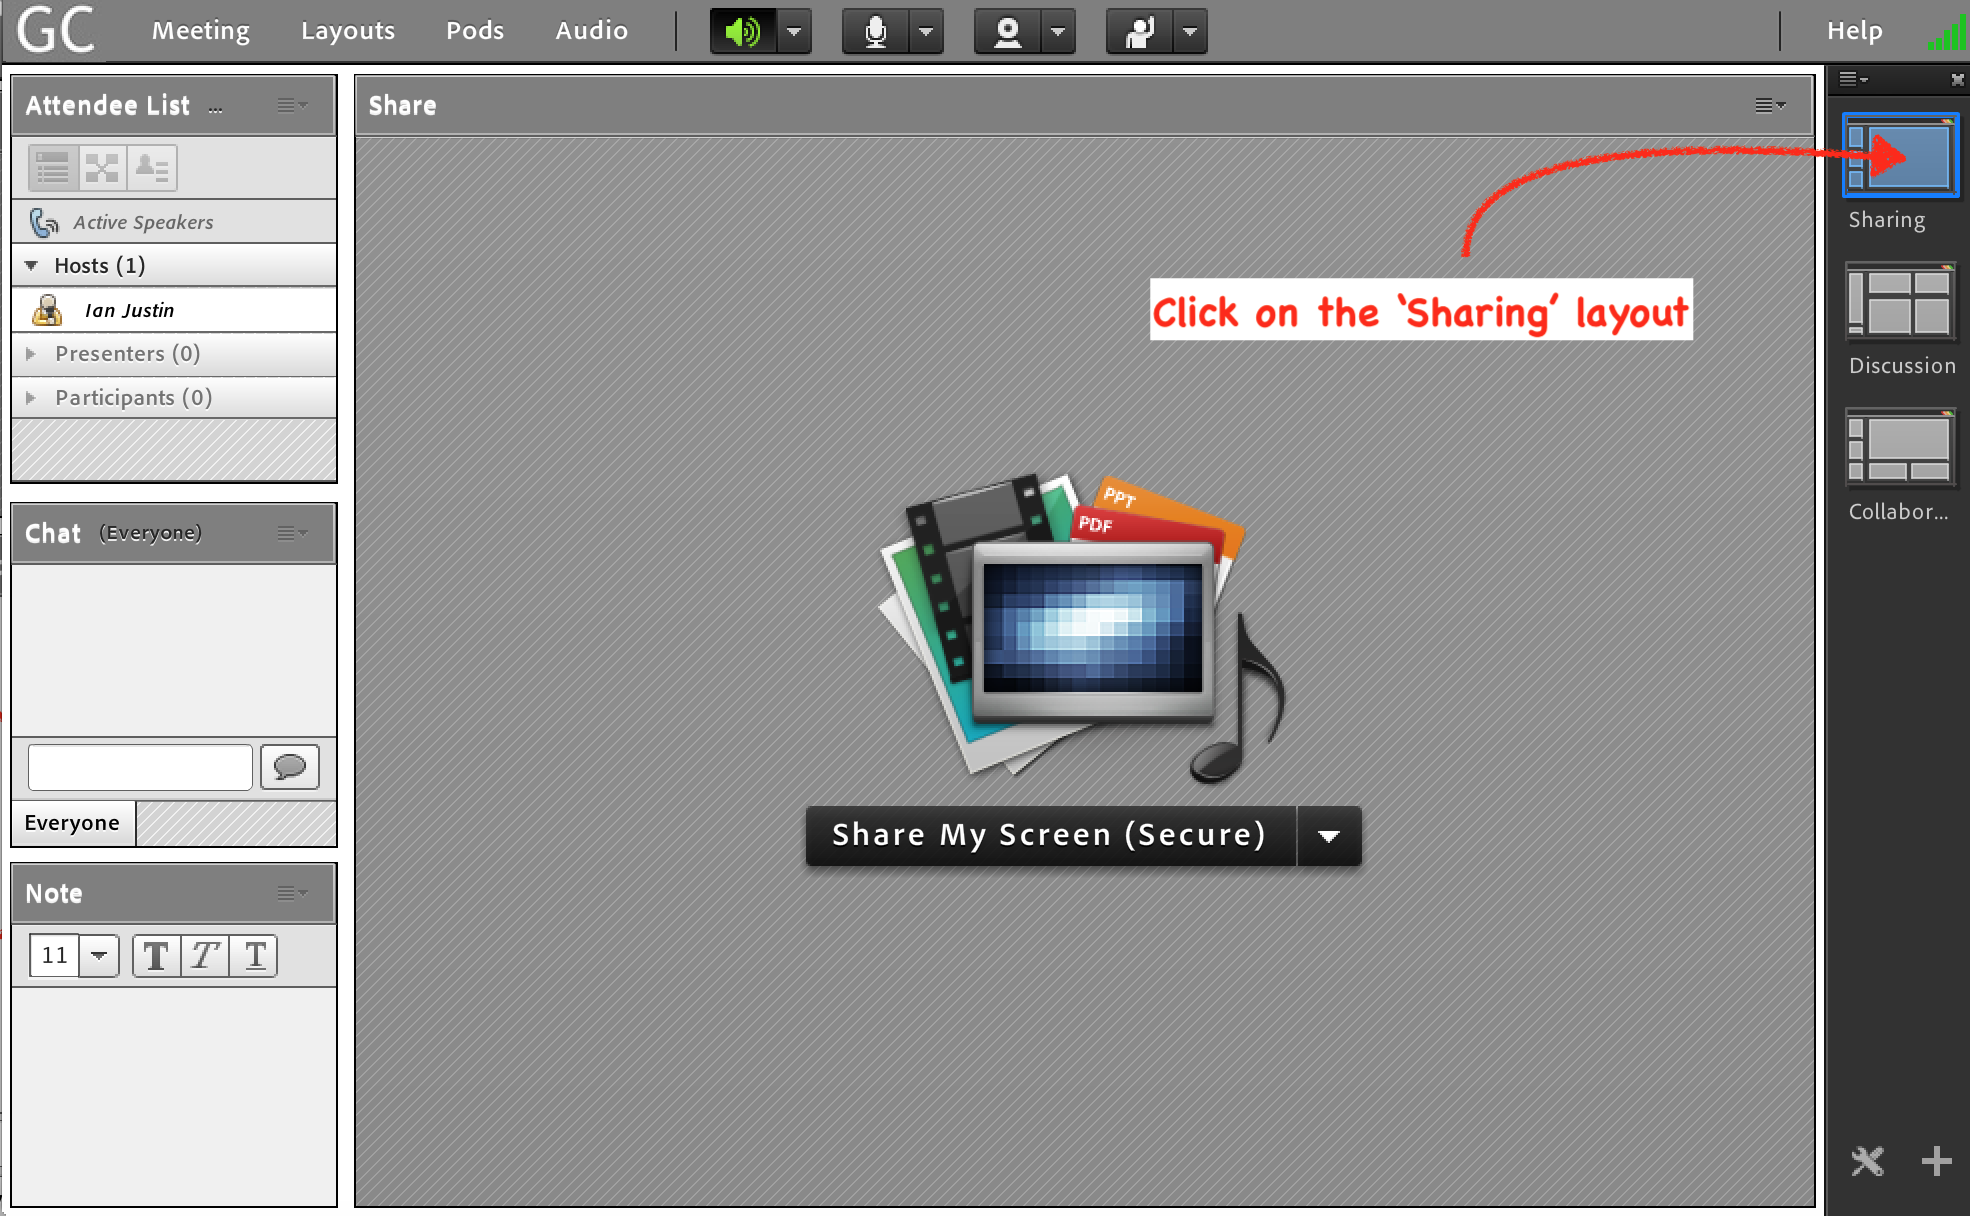
You can have either option above, but it is worth reinforcing how this works in a little more detail. We will start in my ‘Sharing’ layout (Figure 3). Click on the ‘Sharing’ layout thumbnail.
Remember – Your default room may be different to mine, but the layouts etc. will still be there.
Note – You will not see the ‘(Secure)’ caption after the ‘Share My Screen’ text…this is in my room as a I have deliberately blacklisted some applications from sharing.
Figure 3
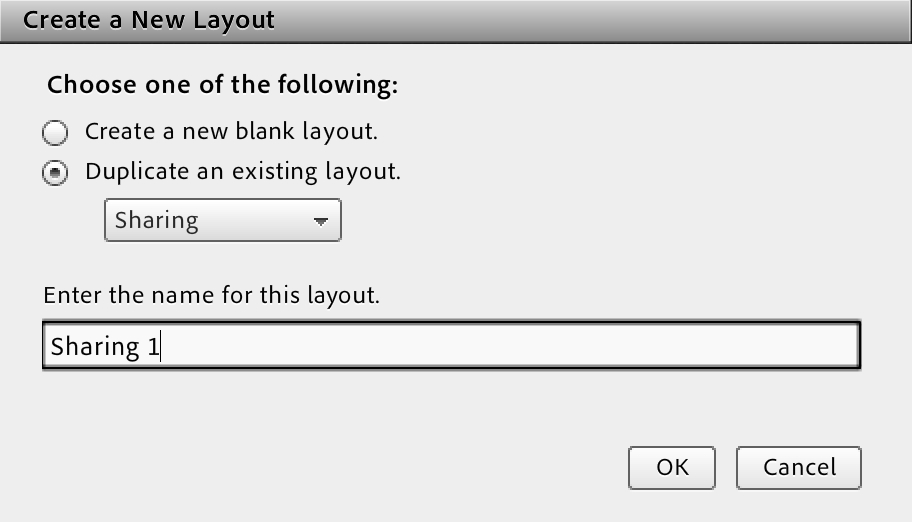
Duplicate a Layout – First we will simply duplicate a layout and create an exact copy. Go to the ‘Layouts’ menu and select ‘Create New Layout…’ (Figure 4). Then in the next dialogue select ‘Duplicate and existing layout, select ‘Sharing’ from the drop-down menu and change the name of the new layout to ‘Sharing 1’ (Figure 5). Click ‘OK’.
Figure 4
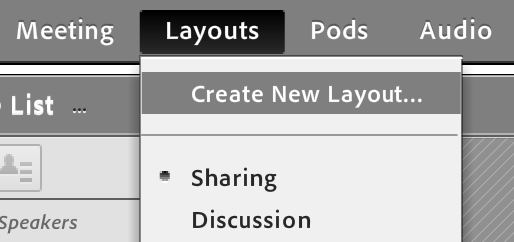
Figure 5
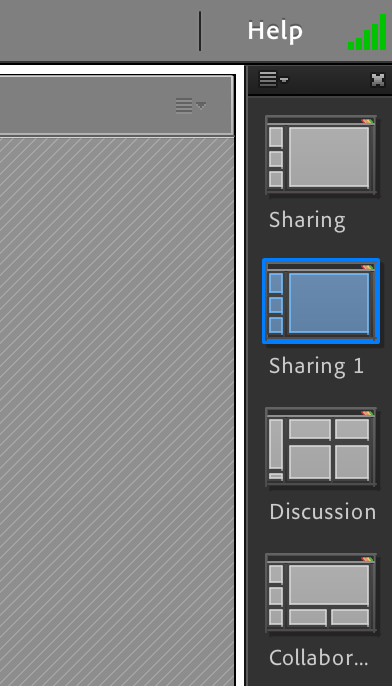
Your new duplicate layout will appear at the bottom of the thumbnails on the right-hand side, drag the layout up to below the original ‘Sharing’ layout (Figure 6). Now change between the ‘Sharing’ and the ‘Sharing 1’ layouts. The are duplicates so they will be identical.
Figure 6
Let’s make some changes to ‘Sharing 1’. Change to ‘Sharing 1’ make the ‘Share’ pod smaller by dragging the corners. Move the Chat Pod and the other pods around to change the context of the layout, you can see my new layout in Figure 7 below. Note that the thumbnail reflects the changes to the pods live.
Now change between the two sharing layouts and you will see the pods ‘slide’ into their new setup. So we now have the same pods on two different layouts but in a different configuration.
Figure 7

Now we can add some content to the ‘Share Pod’. If you look at the top-left title of the ‘Share Pod’ on both layouts you will see that it is the same (probably just ‘Share’). It is the same ‘Share Pod’ on different layouts, so anything we load into one share pod will appear in the other layout too…it is the same pod duplicated.
In the layout ‘Sharing’, load a PPT deck into the ‘Share Pod’…anything will do. If you need to know how to load a PPT deck see my Blog Post here.
You will see the PPT in your layout (Figure 8). Now change to the ‘Sharing 1’ layout and you will still seer the PPT deck but in the new pod configuration (Figure 9). You have changed the context of the room by changing layouts, but retained the content as persistent across layouts.
You would use this to change the focus from the PPT deck to more of a chat and conversation for example. You might also use a ‘Camera Pod’ and make the slides smaller and the camera bigger on the second layout to focus on your live feed vs. the PPT slides etc.
Figure 8
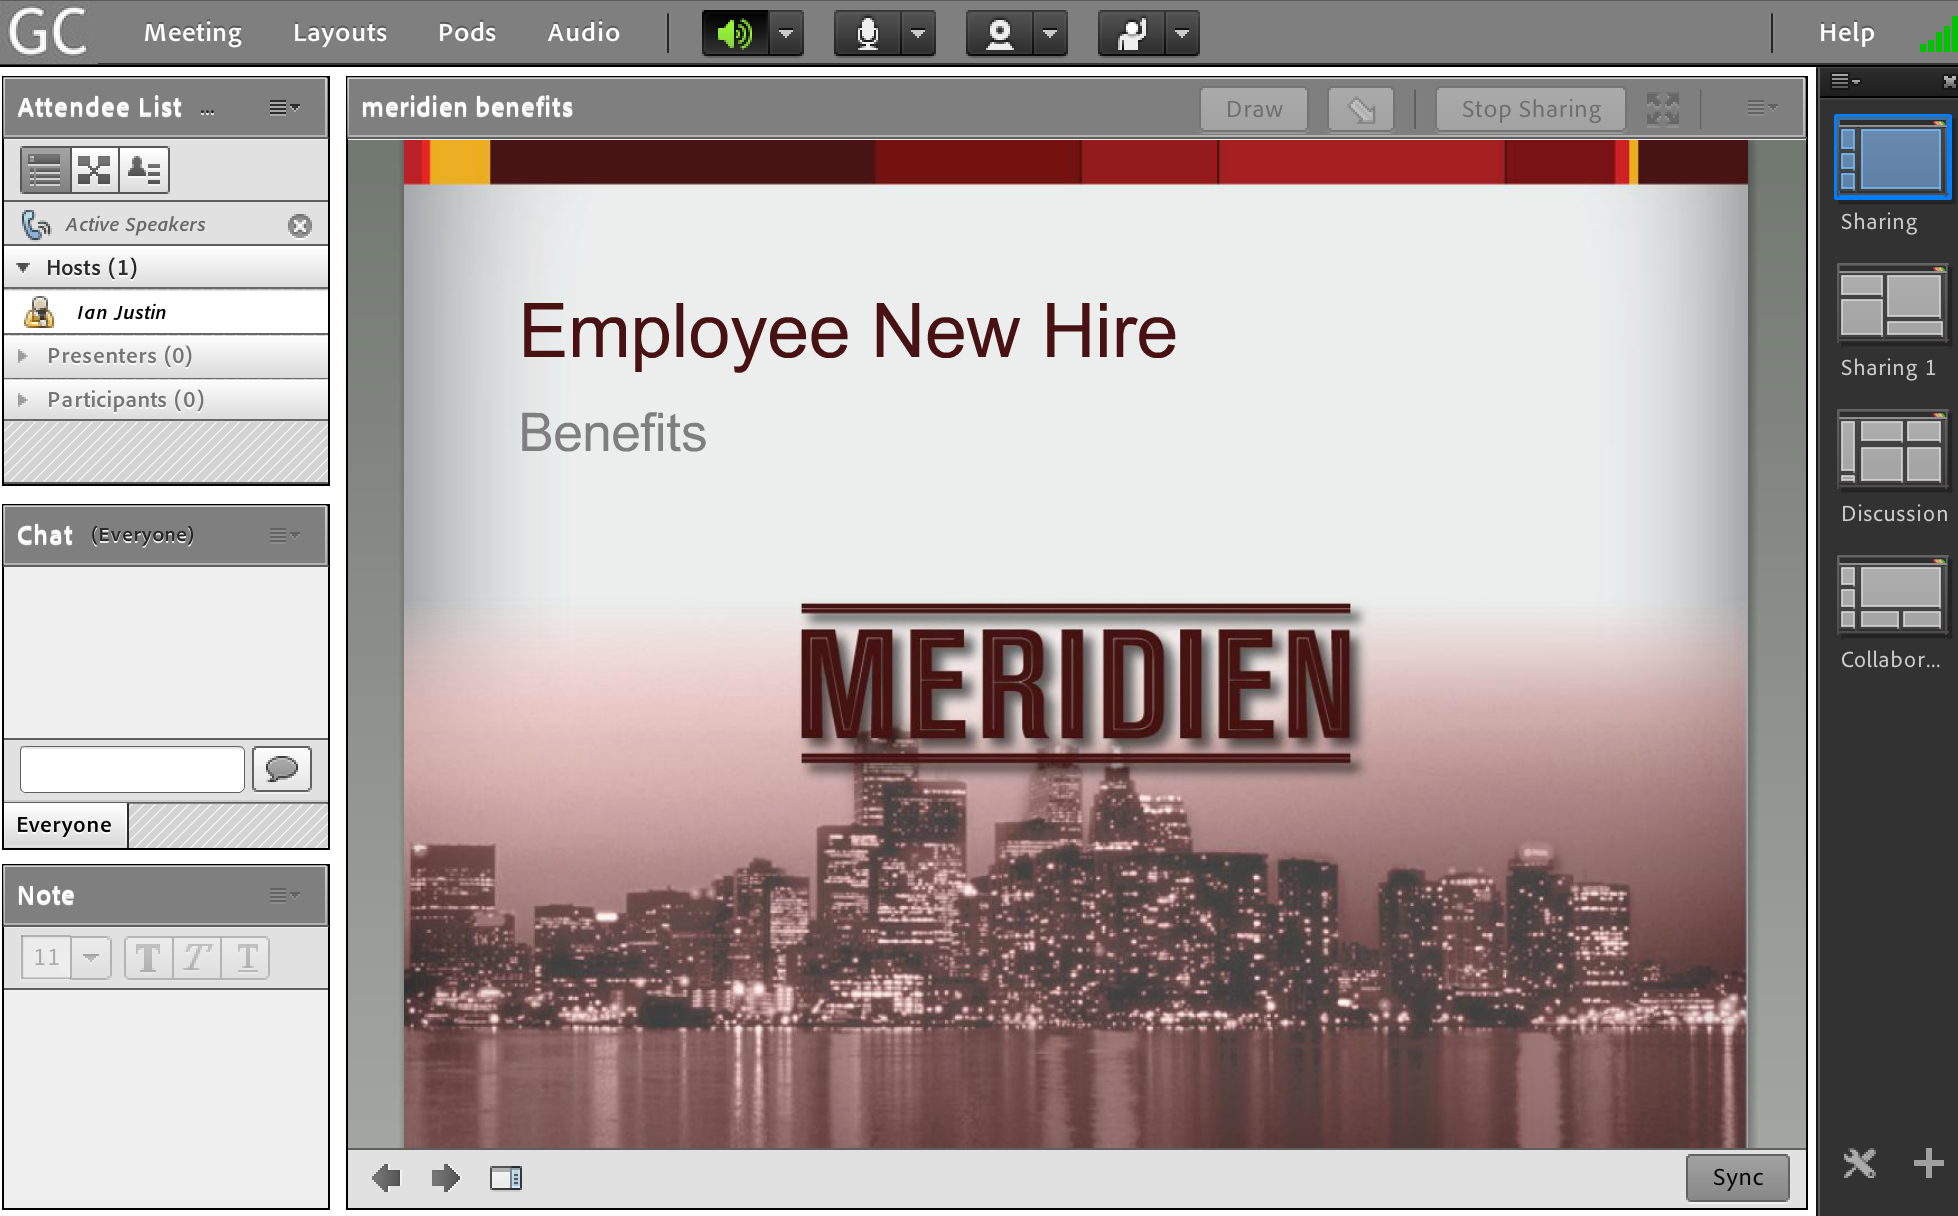
Figure 9
Same Layout configuration, different content? – In this scenario, we want to have the same layout as ‘Sharing’ *but* we want to have a completely different PPT in the new layout ‘Sharing 2’. We would use this if we wanted switch to the content of a new presenter for example and keep the same chat and look and feel in the room.
First, follow exactly the same process in the section ‘Duplicate a Layout’ above, copy the ‘Sharing’ layout *but* call the new layout but call the new layout ‘Sharing 2’. As before it will be identical and have the PPT already populated in the ‘Share Pod’.
One common mistake is to now delete the PPT from the ‘Share Pod; in the layout ‘Sharing 2’ and add a new PPT…but the problem here is that this is the same ‘Share Pod’ on all three layouts so you will also be changing the PPT in the other 2 layouts as well. This is a perfectly legitimate use-case as you might want to update the PPT in al layouts with one new PPT.
We however want a new, independent ‘Share Pod’ in the layout ‘Sharing 2’.
Switch to layout ‘Sharing 2’ and then select the ‘Pod Options’ menu to the top-right of the ‘Share Pod’ containing the PPT…select ‘Hide’ (Figure 10). The pod still exists, you have only ‘hidden’ it or removed it form the ‘Sharing 2’ layout. If you change to the other 2 layouts you will see that the content is all still there.
Figure 10

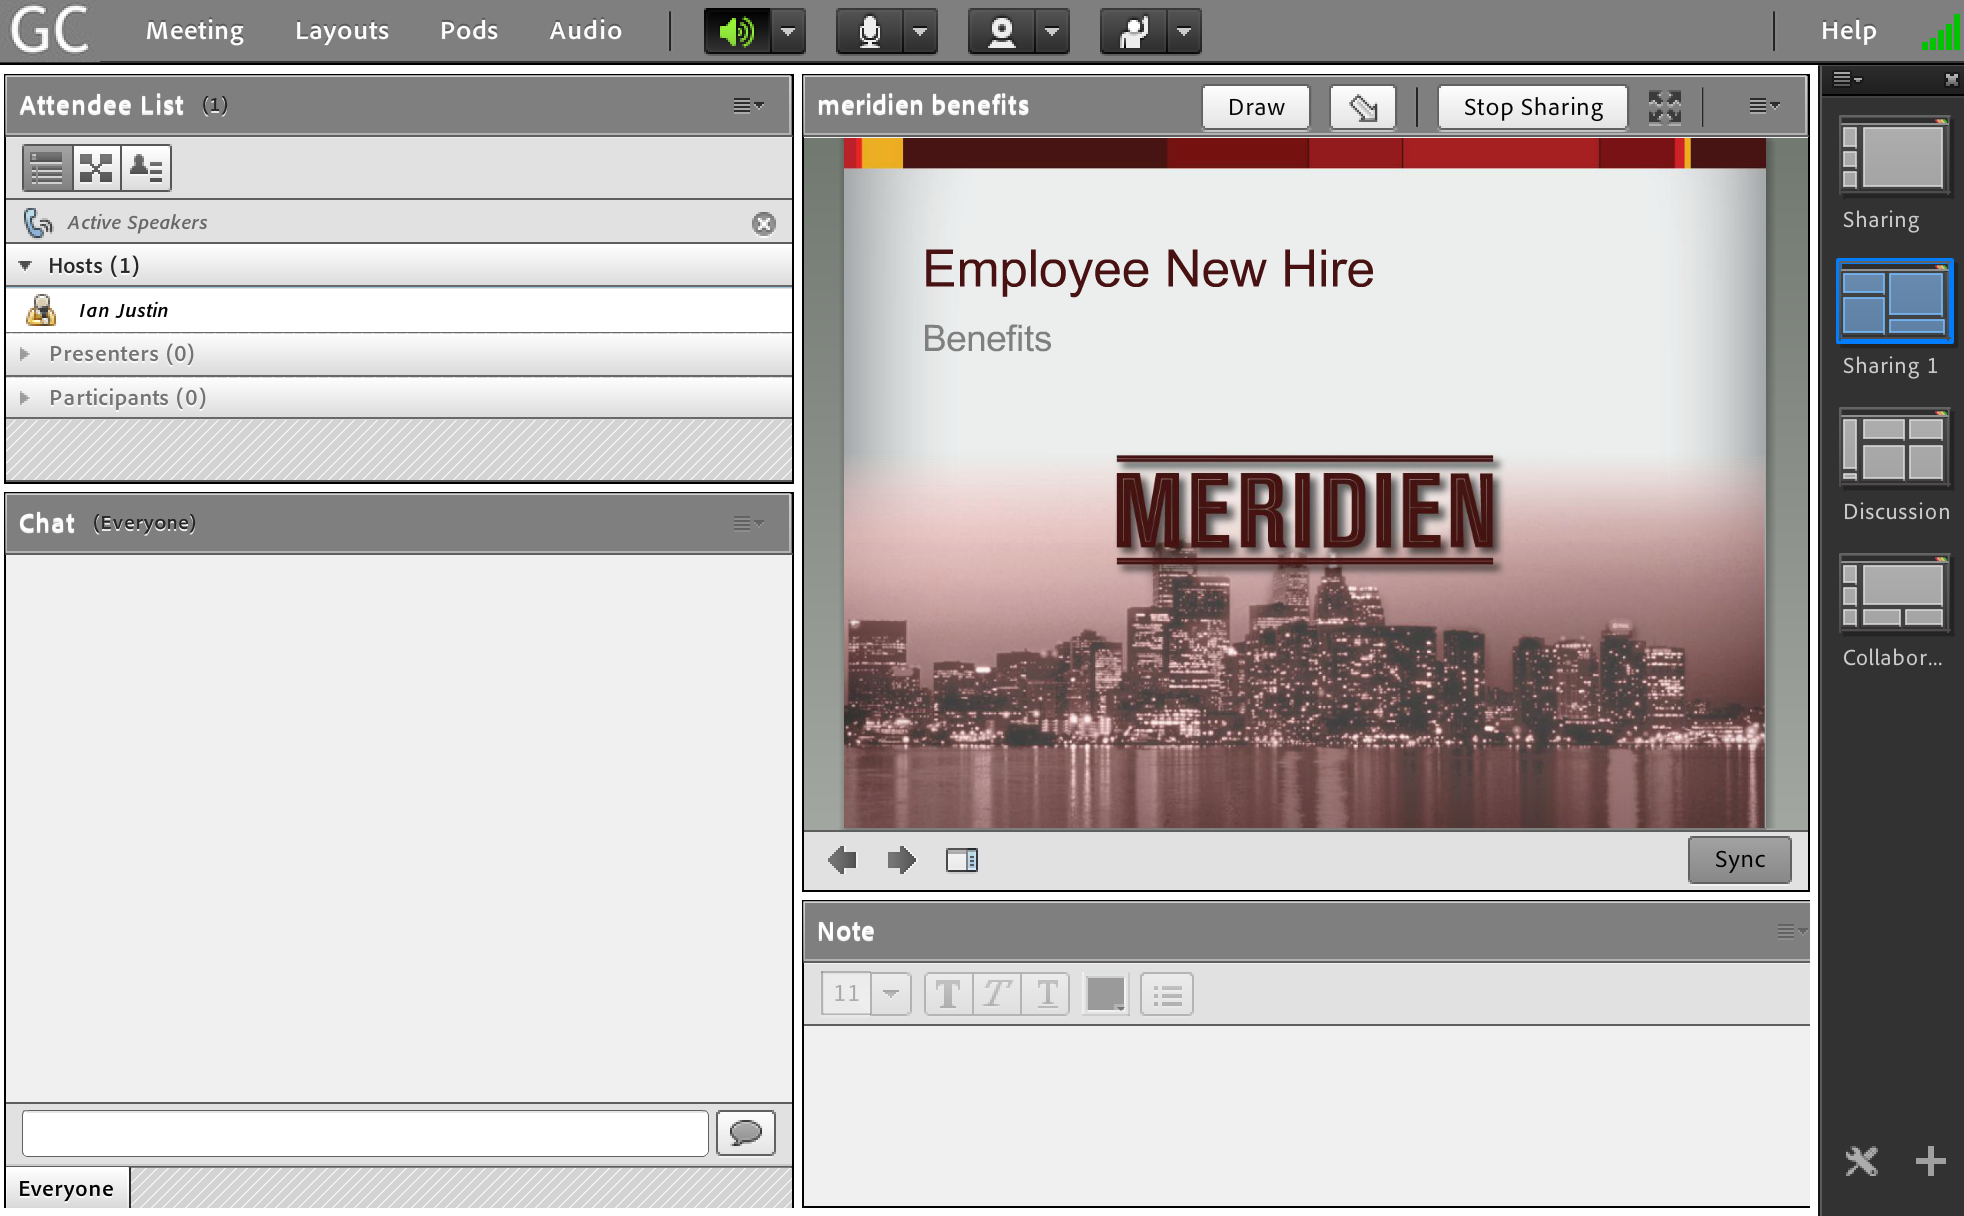
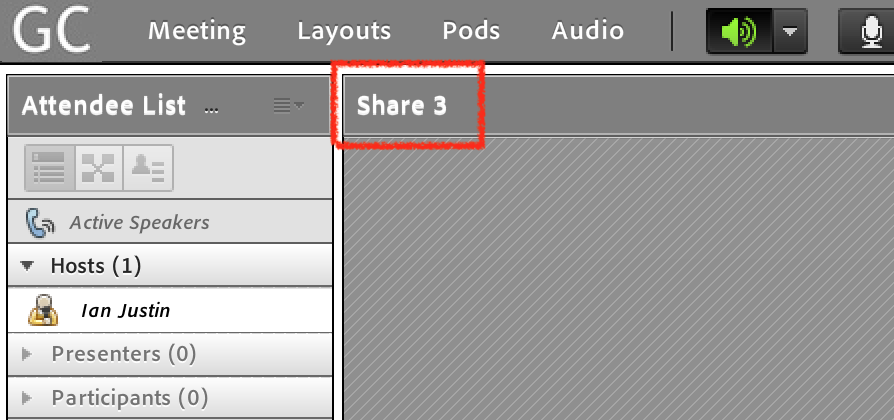
Now add a new ‘Share Pod’ to the ‘Sharing 2’ layout. Go to the ‘Pods’ menu and mouse-over ‘Share’ and you will see the option to ‘Add New Share’. Select this and you will see the new, independent ‘Share Pod’ appear in your room and it will try to ‘fill’ the available space. Note that the new ‘Share Pod’ will have a unique name such as ‘Share 3’ as t his is a new pod (Figure 12).
Figure 11
Figure 12
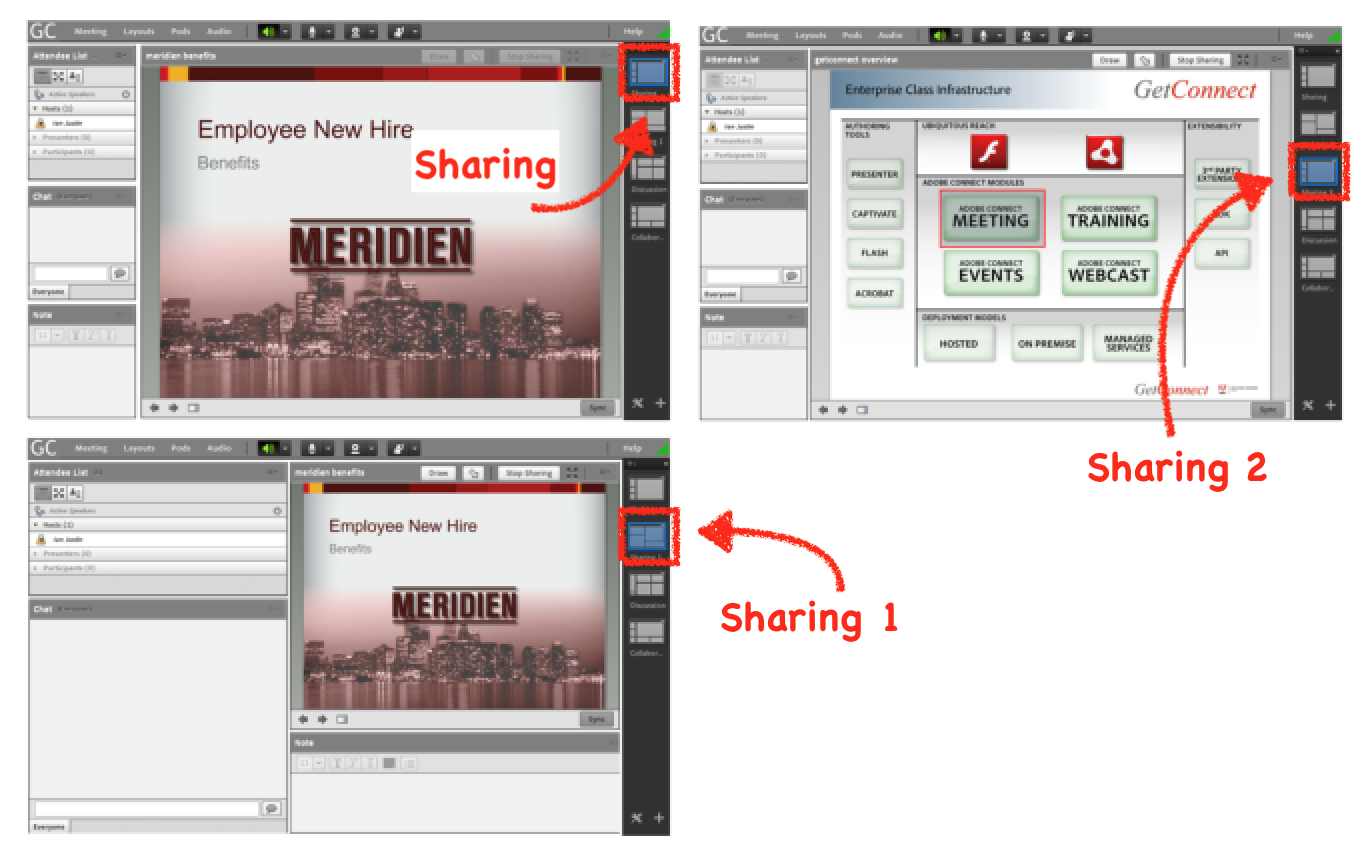
Now load something different into the new, empty ‘Share Pod’. I am going to load a different PPT deck, but you could load a PDF, MP4, whiteboard…whatever you like. You can see in Figure 13 below that in ‘Sharing 1’ and ‘Sharing 2’ the content is the same but the context of the layout changes. In ‘Sharing 2’ the context is the same as ‘Sharing 1’ but the content has changed.
Figure 13
You can repeat this process as often as you like to create layouts that maintain content or use new content.
How to avoid doing this more than once – The process above actually only take a few seconds in real-time, but it is good to avoid this entirely. You can do this by building a new template with all of your layouts ready to be populated with content..when you create a new room, all of the work above will be done for you and you simply drop in your PPT and other files.
The process of creating and using templates is covered in my Blog Post here. Below we will cover the process to build the templates without any pre-populated content, the ‘framework’ of a room for example.
The process is the same as outlined above, but we will not use any PPT files, here it is:
- Create a room
- Duplicate the layout ‘Sharing’ and call it ‘Sharing 1’
- Duplicate the layout ‘Sharing’ and call it ‘Sharing 2’
- In ‘Sharing 2’, ‘Hide’ the ‘Share Pod’ and replace it with another ‘Share Pod’ from the ‘Pods’>’share’>’Add New Share’ menu
- …repeat as necessary.
Even though there is no content in these ‘Share Pods’, they will have unique names (‘Share 1’, ‘Share 2’ etc.) and when you drop content into them thy will behave as the populated pods above behave…either unique content on a layout or content that spans across multiple layouts.
If you build a template using the technique above it can be cloned and all of this work will already be in place for your hosts.