It is good to understand how Connect Meeting Rooms display PowerPoint before sharing it with your audience.
Note that I will use the acronym ‘PPT’ here, for the purposes of this note we will assume ‘PPT’ also refers to ‘PPTX’ as there is essentially no difference in Connect
Note that there are some known limitations when a PPT or PPTX is converted for use inside of Connect, these known issues are outlined in the document below:
http://getconnect.adobeconnect.com/p43i5czuxik/
http://getconnect.adobeconnect.com/p43i5czuxik/
The most simple option is to share the content from your desktop, if you share your whole desktop (‘Share my Screen’>’Desktop’) then you can just open up PPT and then go into ‘Slideshow’ mode, the full slide will be shared
The advantages of this method are that it is consistent, simple and already very familiar to your SME as you do not have to teach them how to change slides, use the whiteboard. All of this functionality is just regular PPT
The disadvantages are that you are exposing your desktop to your audience as they will see your e-mail or IM client or anything that is seen by you on your desktop until you actually share PPT. You can mitigate some of this by sharing the application PPT rather than your whole screen (‘Share my Screen’>’Application’ and select PPT). This will only share PPT with the audience, but it adds a degree of confusion on occasion as many ‘occasional’ presenters share web pages as well and Connect will correctly not show these to the audience
When you share a PPT from your desktop you are also just sharing an ‘image’ of your presentation, so any interactivity such as a Hyperlink on a slide or navigation on the PPT slides is not exposed to your audience
The key disadvantage is that sharing a PPT from your desktop uses a relatively large amount of bandwidth as you are ‘streaming’ the content images and that is potentially both unnecessary and disrespectful of the bandwidth of your audience. Similarly the stream you are sharing content at anything from say 3-8 frames per second…the subtleties of transitions and animations are lost, certainly compromised in these cases. Fades for example are ‘jerky’, motion-paths would display as relatively inconsistent ‘appearances’ along the path
This does work well, sharing a PPT from your desktop is absolutely an option, but it is good to be aware of the compromises and the lost opportunity vs. loading a PPT natively into the Connect Meeting
With Connect 8 the process to load a PPT into a connect Meeting is considerably more friendly, just drag the PPT onto the ‘Share Pod’ in your Meeting Room. The PPT will convert and upload into the ‘Share Pod’. This process might take 15 seconds, maybe more (depending on the size of the file and the bandwidth you have available. During this process your PPT is being converted into Flash and then loaded into the Meeting Room
Your PPT will appear in the ‘Share Pod’. To change slides you click on the right-arrow or the left-arrow to the bottom-left of the ‘Share Pod’ (See Figure 1). Each click will bring up the next animation in the slide sequence. There are also some shortcut keys that you can use in your Connect Meeting and these are outlined o the help page below:
The most useful and common shortcut in these cases is to use the keyboard right-arrow and left-arrow to advance to the next animation and to move to the previous animation respectively
Figure 1
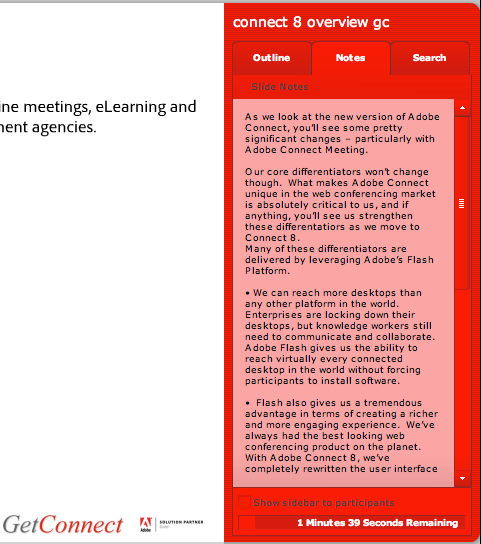
If you wish to jump to a specific slide then you can use the ‘Show Side Bar’ button to the bottom-left of the ‘Share Pod’ (See Figure 2). This option will open up an index on the right-side of your slides that you can use to navigate to a specific slide (Figure 3). From this Side Bar you can also click on the ‘Notes’ tab to see the script for your slides (these are the notes you added to your PPT in the Microsoft PowerPoint application). This is very useful if you want to read your notes as you present (Figure 4)
You will also notice a checkbox at the bottom of the Side Bar that says ‘Show sidebar to participants’. As you may imagine, if this is unchecked then you and other presenters can see the Side Bar, if it is checked then participants also see the list of slides or the notes (see notes on ‘Sync’ below to explain why you might use this option)
Figure 2

Figure 3

Figure 4
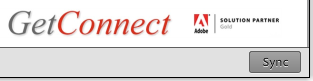
With the PPT presentation loaded into the ‘Share Pod’, you also have the option to use the ‘Sync’ and ‘UnSync’ options in Connect. There is a small button to the bottom-right of the ‘Share Pod’ that is called simply ‘Sync’ (Figure 5). If this button is depressed (not ‘unhappy’, just pushed and dark-gray in color) then the slides and animations in the PPT will all move together with the changes made by the presenter. As the presenter moves slide-to-slide, so d the other presenters and the participants
If this button is unchecked (light-gray in color) then each presenter and participant has the option to move through the presentation independently of one another. In this case the Side Bar will appear for everyone to see and use and they can use the arrows to navigate through the presentation
If the button is checked again (dark-gray) then the slides are ‘Synched’ again
Figure 5
Note – this state is also respected in Connect recordings, so if you make slides ‘Synched’ in the live session then they are ‘synched’ in the recording, if you ‘unsync’ in the live session, then this is also respected and ‘unsynched’ for the same duration in the recording