This could be described as a ‘career responsible decision’. You may want to share your screen as a part of your presentation, but you may not want to share sensitive applications such as your email client (Outlook on a Windows PC for example) or your messaging client (Messages’ on Mac OS for example).
Ideally, you don’t want to share anything other than your actual task at the time with your audience.
You have a couple of options here, one is controlled by you as the host/presenter in your room, the other is an account-wide setting that is controlled by your Connect Account Administrator.
Host/Presenter Controlled – Sharing ‘Applications’ or ‘Windows’ vs. sharing your whole screen
It can be easier to share your whole screen (or one of your monitors) and just shuffle content around on the monitor. If you are switching between multiple applications then sharing your whole monitor may be the only practical option for you. But if a compromising or private message or email notification appears on your screen then you are, of course, sharing that with your whole audience too.
When you start screen sharing, you have not only the option to share your whole monitor, but also some additional tabs where you can choose to share an application (or applications) or a window (or windows).
Sharing Applications – Just select the tab and then select any applications you want to specifically share with your audience (figure 1 below). In this example I am sharing the application of Excel, so I have checked that box. I could check more than one box to share multiple applications.
Note – When you choose to share an application, any window using that application can be shared, in the case of Excel, any workbook can be shared.
Note that the applications must be open at the time you start screen sharing to be able to select them.
Figure 1

In the example above, the Excel spreadsheets on my computer will show during a screen share, but if *any* other application is opened over these spreadsheet, it will appear as an occluded blue-hatched box to your audience (figure 2a, 2b and 2c below show the manner in which this is seen by all parties).
Note – All of the applications will appear as normal for the person sharing their screen, but the non-selected applications will be obscured for the audience.
Figure 2a – This is what is being shared and seen by the audience initially, just the Excel workbooks
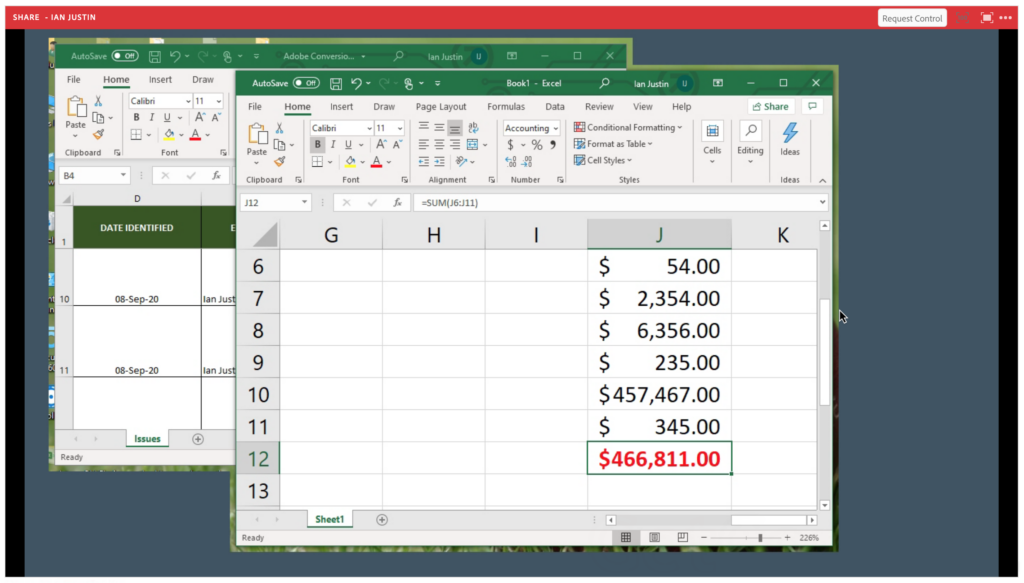
Figure 2b – This is what is seen by the *presenter* when they open Outlook on their shared monitor
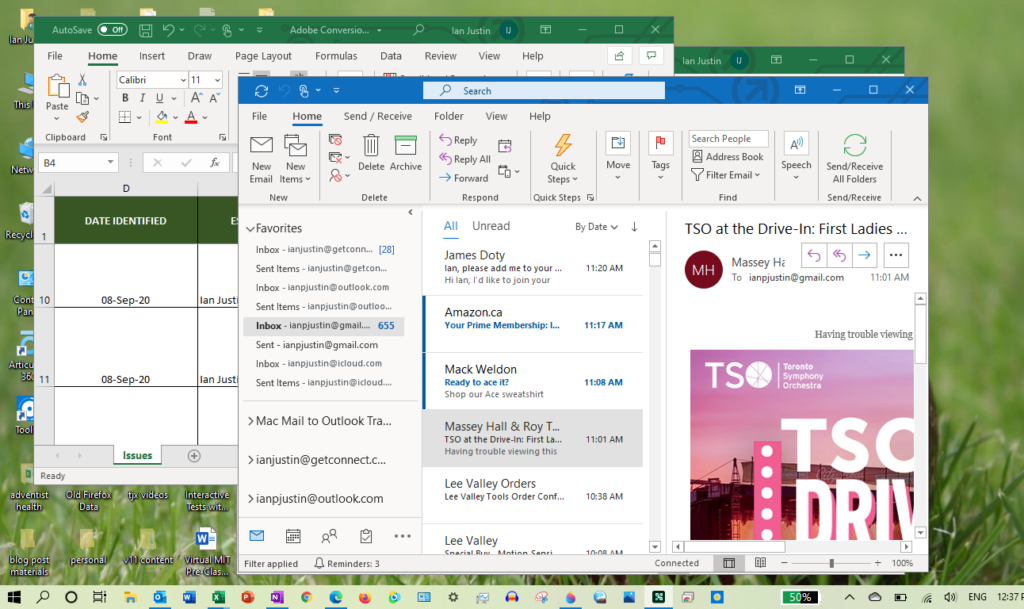
Figure 2c – This is what is now seen by the audience, Outlook is obscured as it is not specifically chosen to be a shared application
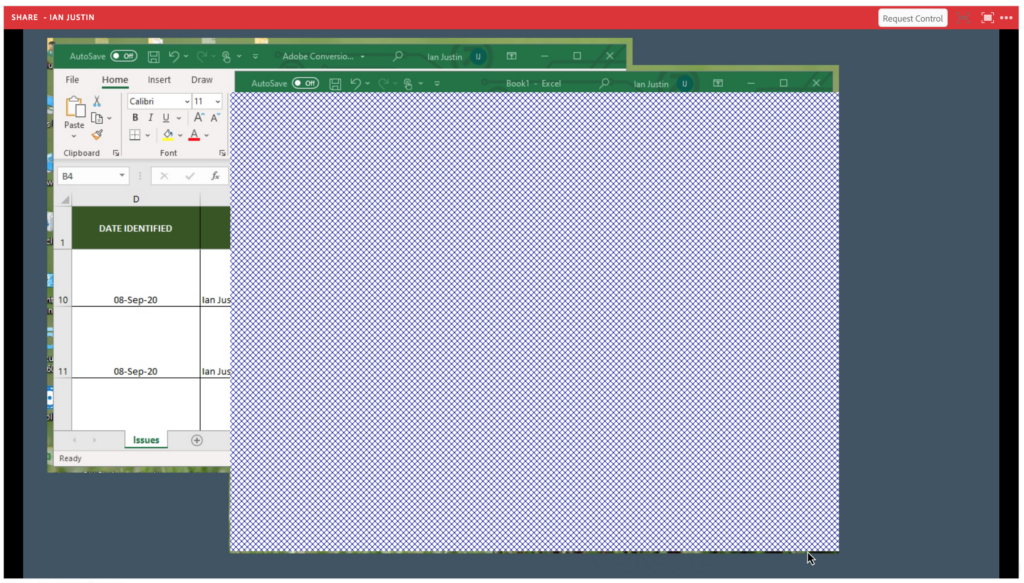
Conclusion – As Outlook was not one of the chosen applications to share, it is fine for the presenter, but obscured for the audience
Sharing Windows – In this case, you can be more specific about what specific windows you share, in the Excel example, you can choose to share just one workbook. In the example below (figure 3) I have chosen to share one Excel workbook, but not the other.
The chosen spreadsheet will be shared with the audience, the other spreadsheet can be opened by the presenter and viewed by the presenter, but just as in the Outlook example above, if any windows or applications are opened by the presenter, they will be obscured (blue-hatched boxes) for the audience.
Figure 3

Conclusion – As the only window to be shared was the specific Excel spreadsheet, any other windows or applications will be fine for the presenter, but obscured for the audience.
Administrator Controlled – Allowing or disallowing the sharing or specific applications
These are account-wide settings and require the rights of your Connect account administrator. You can either choose to ‘prevent’ the sharing of applications (never allow them to be shared), or ‘allow only’ applications (allow only these to be shared). Logically, you should do only one of these choices. We will cover the most common ‘prevent’ the sharing of applications below.
Note – Although you can use the ‘allow only’ option to limit only a list of applications to be shared, this would be a very locked-down environment indeed, and as such not common. It can be very frustrating to lock-down the infrastructure in this manner as presenters can be confused as to why their content is not showing in the screen share. That said, the process for ‘allow only’ is the same as described below.
Note – A reminder that this is an account-wide setting. This cannot be managed on a room-by-room basis.
To prevent the sharing of an application (or applications), follow the process described below:
- Login to your Connect account as an administrator
- Navigate to ‘Administration’>’Compliance and Control’>’Share Settings’
- Scroll down and check the option ‘Restrict screen sharing to specific processes (check to define process lists)…’
- Select the radio button ‘Prevent the sharing of the following processes’
- Windows – Add the name of the program(s) to ‘prevent’ from being shared on your PC to the top text entry box (in this example, ‘Outlook.exe’)
- Mac OS – Add the name of the program(s) to ‘prevent’ from being shared on your Mac computer to the lower text entry box (in this example ‘chess’ and ‘messages’). Note that the program names are separated by a colon.
- Scroll down and ‘Save’
Note – This setting will affect all *new* sessions…not sessions currently running on your account. It is likely that a room will need to be closed and ‘dormant’ for more than 10 minutes for this change to take effect. This is to stop anyone from compromising room that is already in session.
In the example below (figure 4) you can see the settings described above.
Figure 4

Now when I share my whole monitor, or applications or windows, there will be an overriding rule that no matter what, the applications listed above cannot be shared and although they will still appear perfectly to the presenter, they will be obscured (blue-hatched box or boxes) for your audience.
You can see a full screen share in figure 5a below from the perspective of the audience, everything is shown.
Figure 5a – Full screen share as seen by the audience
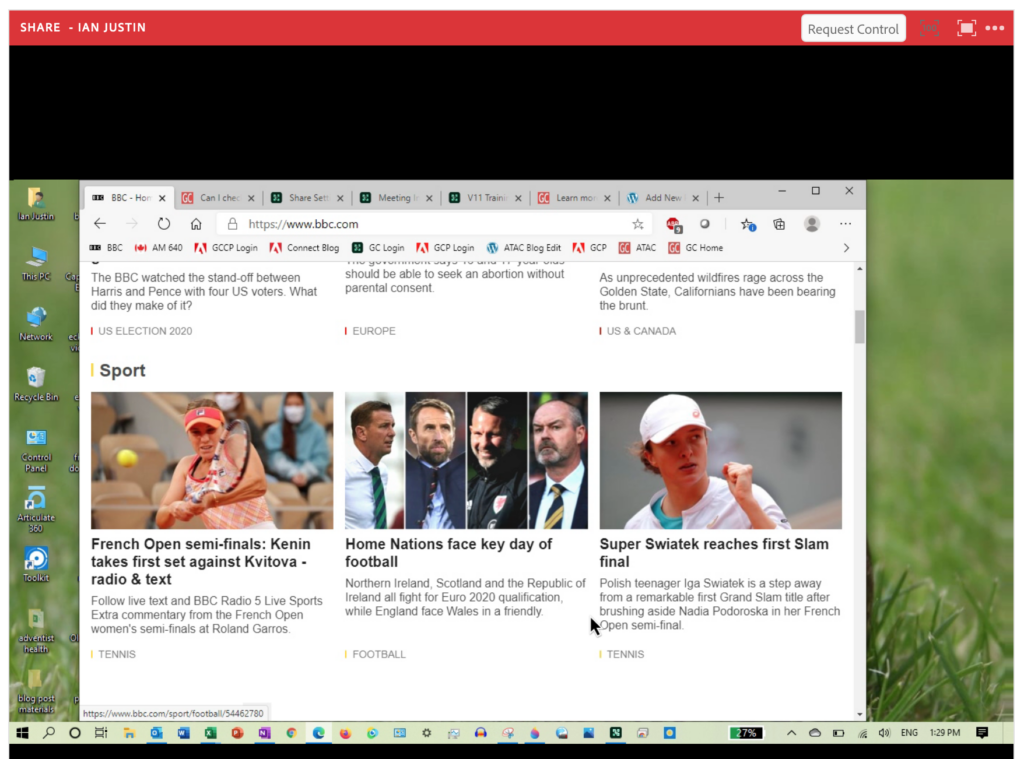
Figure 5b – This is the presenter full screen share with Outlook popped up over the full screen share. For the presenter, everything looks normal
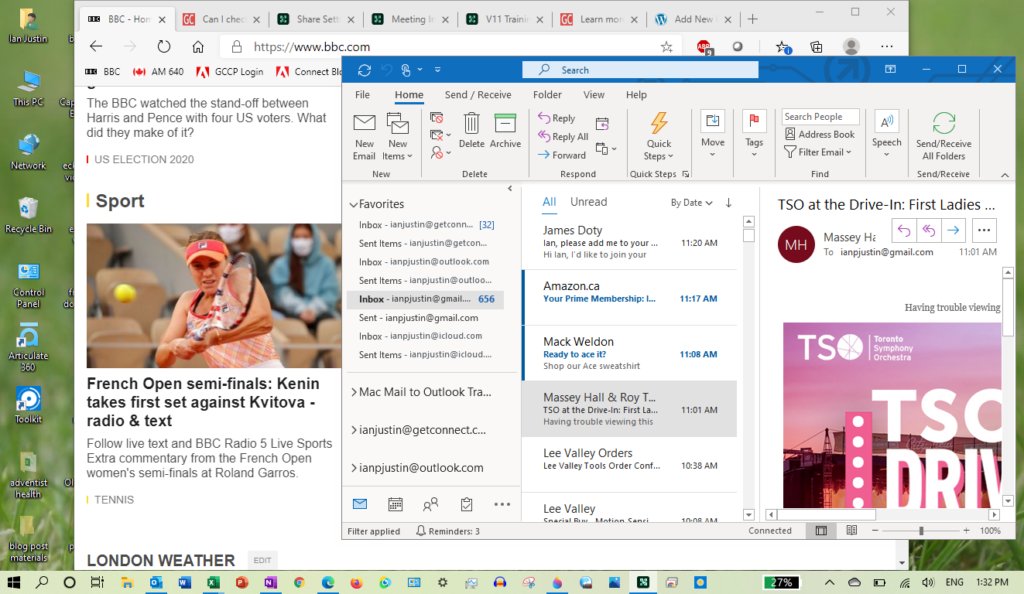
Figure 5c – Full screen share as seen by the audience, but in this case, Outlook has been ‘prevented’ across the account by the Connect account administrator. The Outlook application is fine for the presenter, but obscured (blue-hatched box) for the audience.
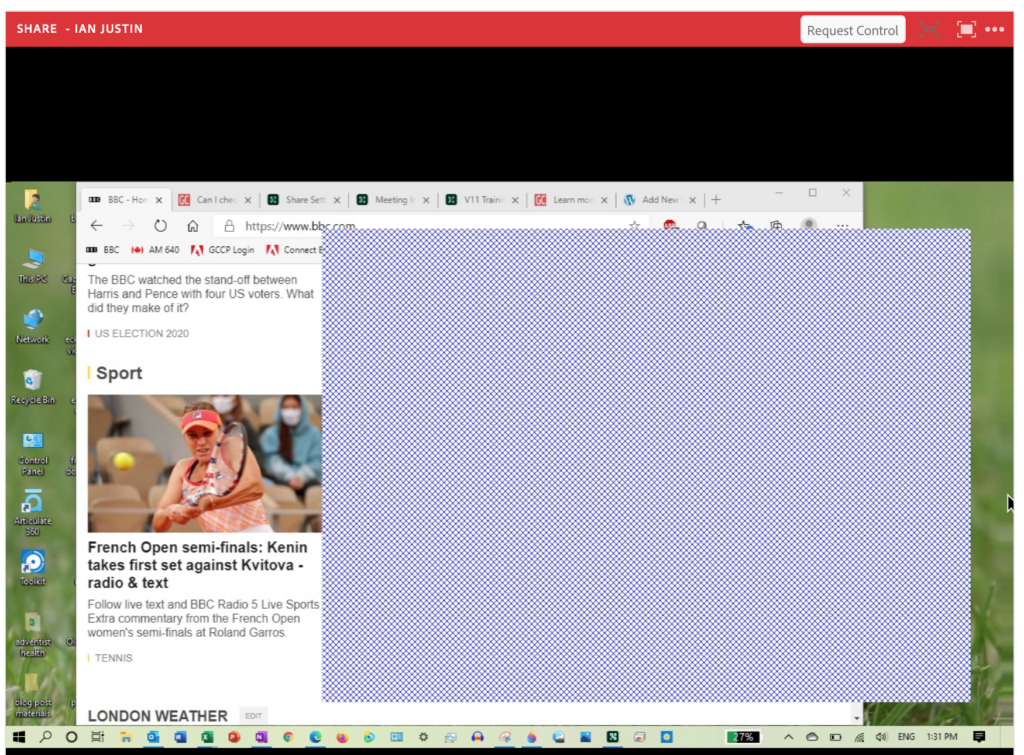
Conclusion – As Outlook has been added to the ‘prevent’ list of applications to be shared across the account, it cannot be shared under any circumstances.