On occasion, you as the administrator of the Connect Account will want to make rooms for other Meeting Hosts rather than have them do this themselves. You might use this to build rooms for faculty for example if you want them to be able to log in and start with a room already in their account.
Note – The instructions below relate to the ‘Meetings’ tab, but this process should work equally well for rooms under the ‘Seminars’ tab and if you are building rooms in the ‘Shared Meetings’ or ‘Shared Templates’ folders.
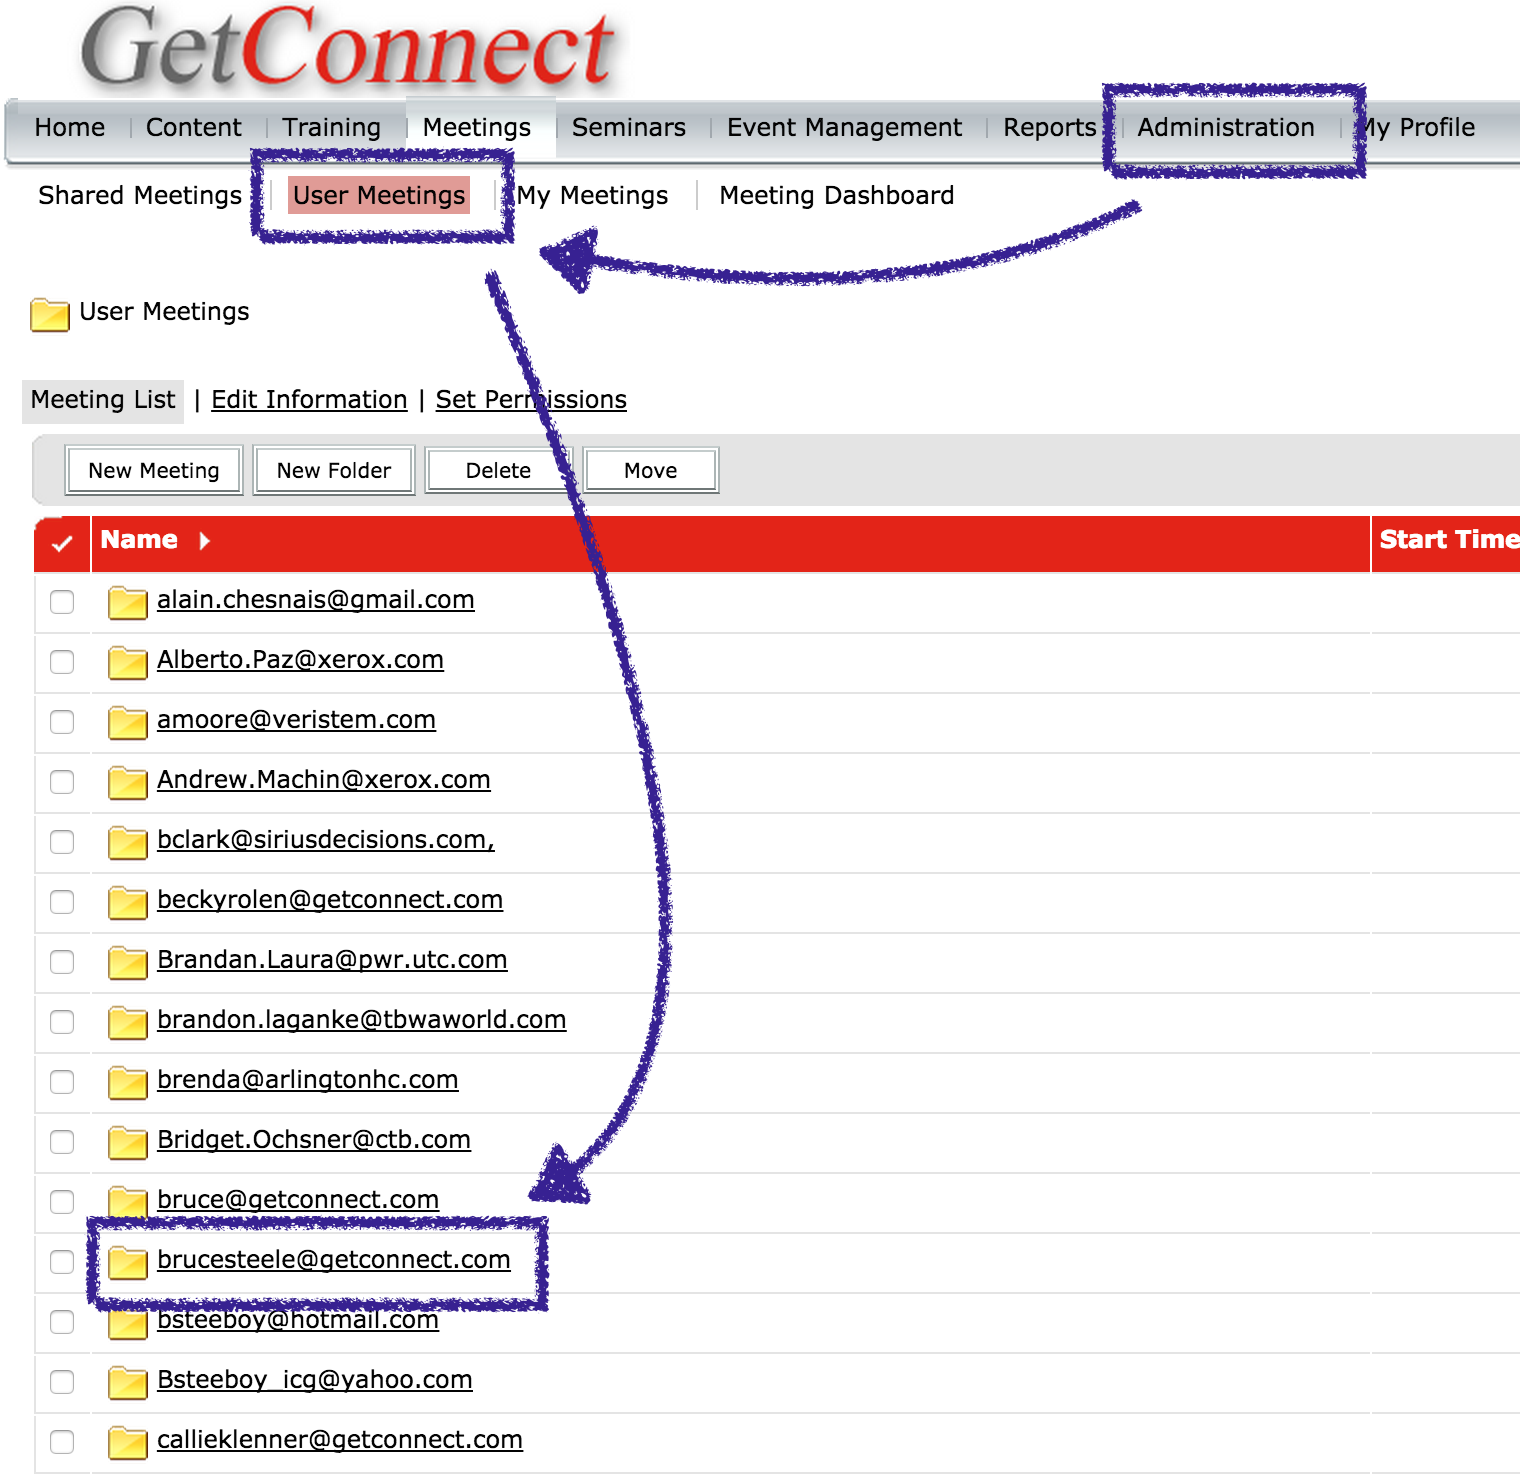
As an administrator, go to the ‘Meetings’ tab, then ‘User Meetings’ and then find the email/name of the user for whom you want to create a meeting room, click on that user name. (Figure 1).
Figure 1
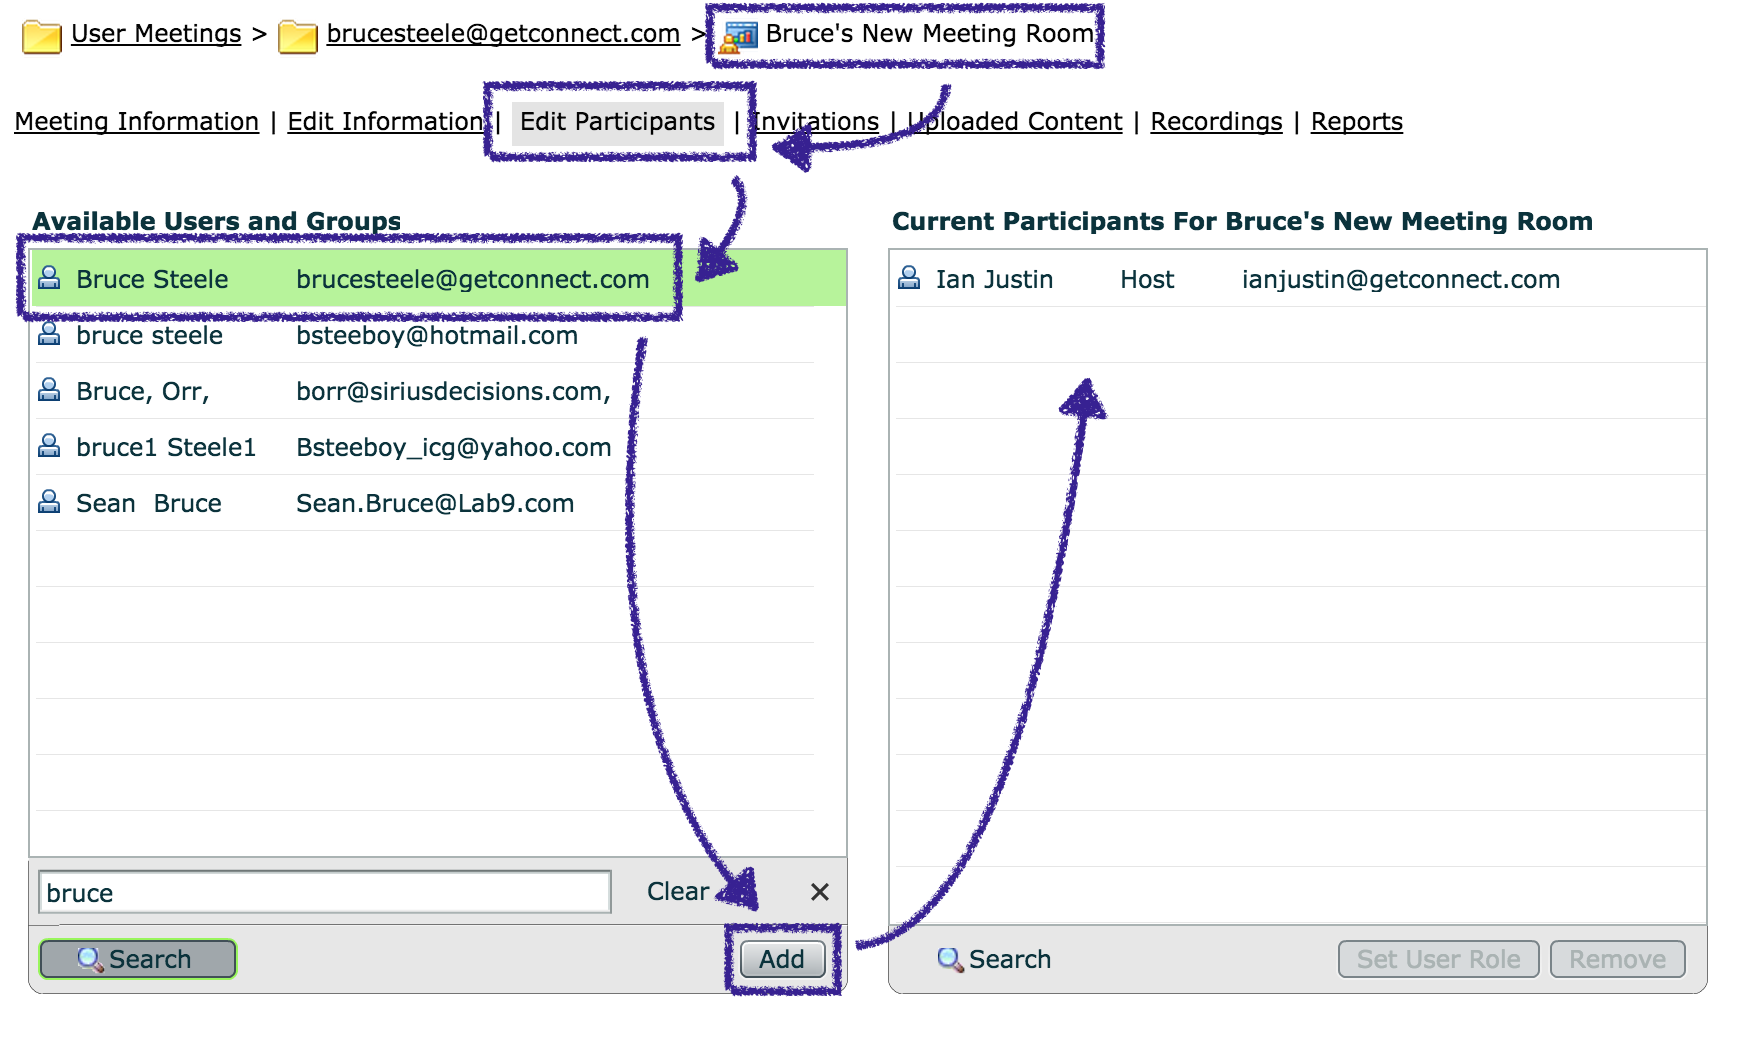
Click ’New Meeting’ in that area and then make the new meeting room. Now as the admin made the room, the admin will be the host of the room so the you now needs to make the user a host as well. Click on the room in Connect Central and then ‘Edit Participants. Select the user from the left-hand pane and add him/her to the right-hand pane (Figure 2).
Figure 2
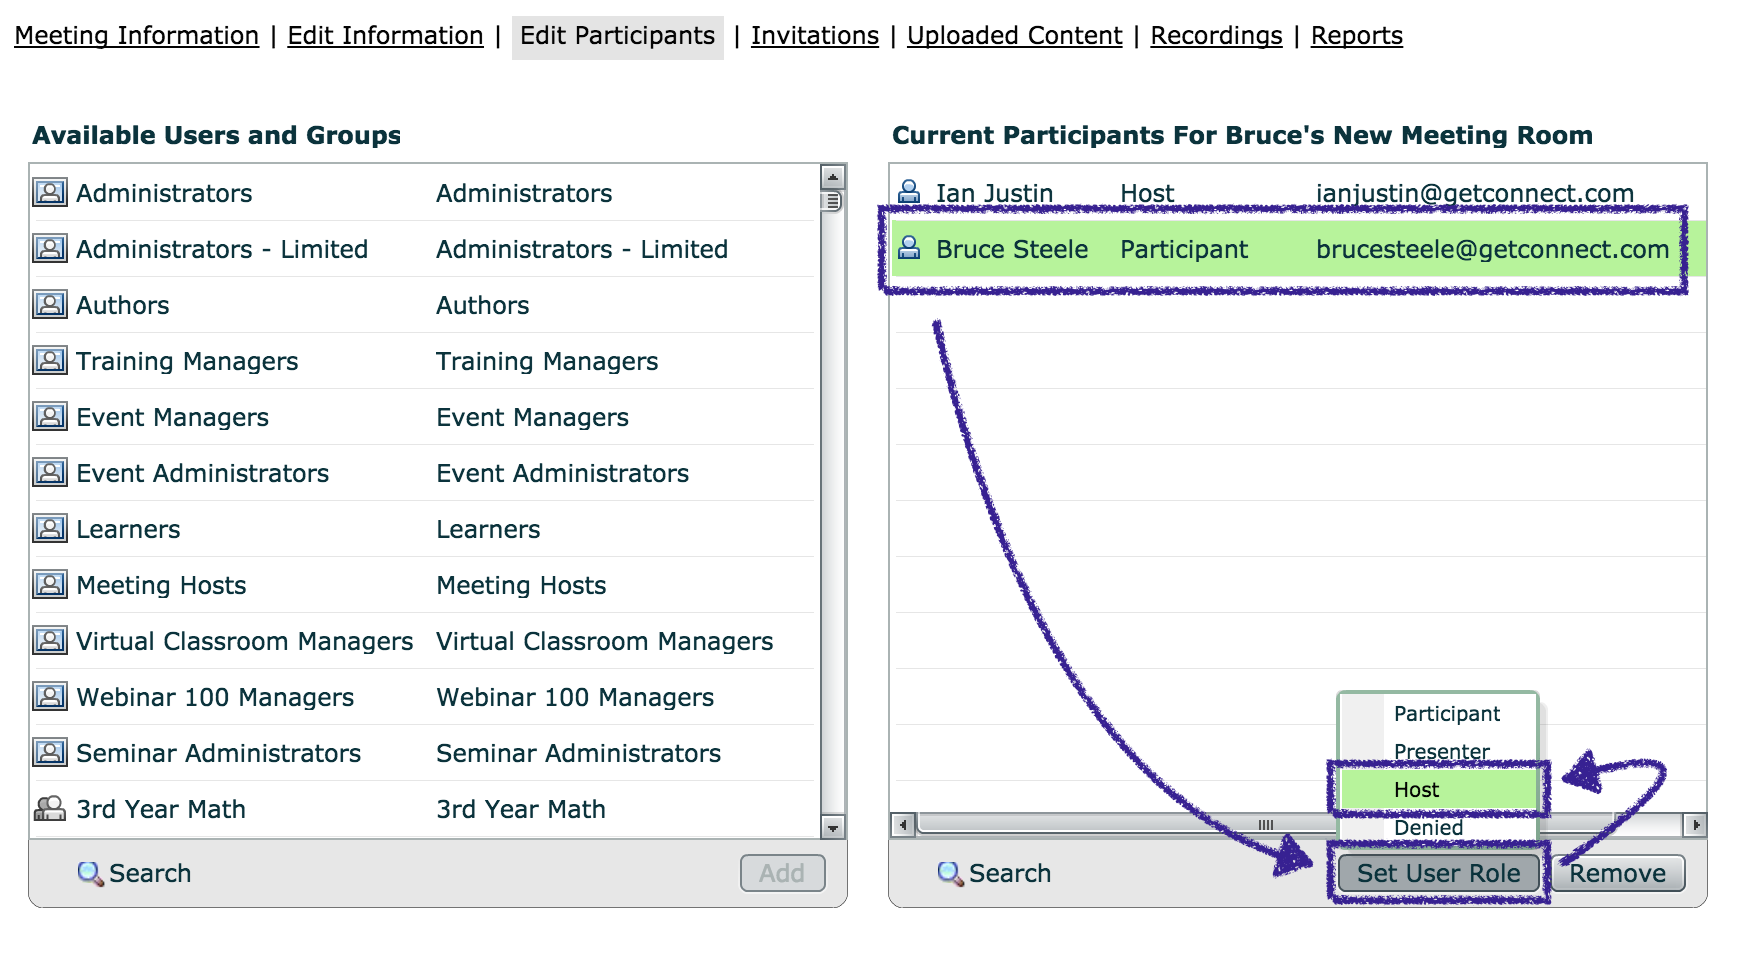
The user will be a participant by default, so in the right-hand pane select the user and then at the bottom of the right-hand pane select ’Set User Role’ and make the user a ‘Host’ (Figure 3).
Figure 3
If there are issues with permissions for the administrator to make the room then the administrator either needs to be in the ‘Meeting Hosts’ group but as I recall it should just work with the default permissions for an administrator. You should not be able to open the room to test it as an administrator if you are not in the ‘Meeting Hosts’ group though.