This blog post is a summary of the free Connect Extensions available from this link as of June 19th 2017:
http://www.adobe.com/products/adobeconnect/apps.html
IMPORTANT – GetConnect does not create, test, support or guarantee the quality and stability of these extensions and you use them at your own risk.
Note – There are also of course paid extensions, but I often get asked how many of the free extensions are useful in a session and how they can be used. It is important to also note that in these cases you should pay heed to the adage ‘get what you pay for’…these extensions are free and as such the diligence on versioning and QA may not be consistent.
I would suggest you test these extensions with your specific use-case in a ‘disposable’ room before going live.
Also please note that there may be a big difference between using an extension in a room with 5 people and a room with 500 people. Some of these tools may not scale and I often prefer to keep things simple in larger sessions. I will also discuss some simple ‘scalable’ options during this blog post.
Note on Terminology – For the purposes of this blog post the words ‘extension’ and ‘pod’ are essentially the same. The ‘extension’ is loaded into the room and it becomes a ‘pod’.
Note on Compatibility – I have not considered any extensions that are not compatible with Adobe Connect version 9.
Note on Naming the Pods – Remember that you can rename any pod by double-clicking on the name to the top-right of the pod. You may want to rename the pods form the actual file name you uploaded as this name is cryptic at best.
Free Closed Captioning (CC) Pod – Adobe:
http://www.adobe.com/products/adobeconnect/apps/closed-captioning.html
Note – there is a paid CC pod available from eSyncTraining as well that includes significantly more functionality:
http://www.adobe.com/products/adobeconnect/apps/cc-with-translation.html
Overview
The CC pod allows you to display closed captioning in the room during the session. You would typically use a CC service (such as Caption Colorado), but you can also use an in-meeting captioner and that is the focus for this example.
Enabling the Pod
Load the CC Extension as downloaded from the extensions site (.swf) into a Share Pod.
Process
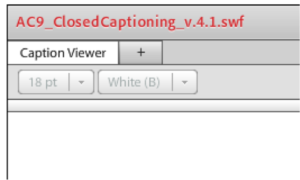
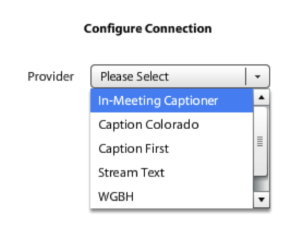
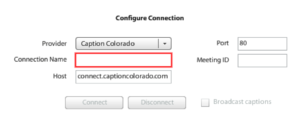
Once the pod is in the room, click on the ‘+’ sign to create a captioner (Figure 1). You will then have the option to choose an ‘In-Meeting Captioner’ (Figure 2) or to configure a service (Figure 3).
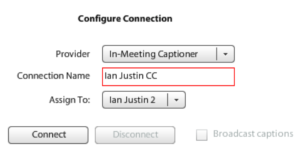
You will give the captioning a name and select a user in the room to write the CC feed. Once you are done with the configuration you need to select ‘Connect’ and then ‘Broadcast captions’ (Figure 4).
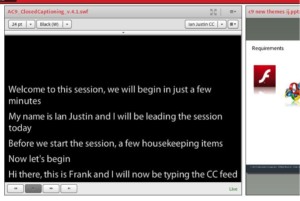
At the top of the CC Pod, click on the left-tab for ‘Caption Viewer’ (Figure 5). You will now see the prompt ‘You are the captioner’ and you can begin to caption the conversation and click ‘Send’ (or carriage return/enter) to broadcast the CC to the room (Figure 7).
Figure 1
Figure 2
Figure 3
Figure 4
Figure 5
Figure 6
Figure 7
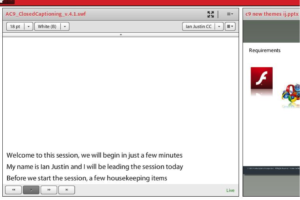
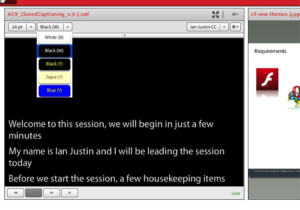
The participant view is different as of course they have fewer options, they will see your captions as you type them and ‘send’ (Figure 8). The participant has the option to configure the text size and the contrast/colour from the CC Pod menus (Figure 9).
Figure 8
Figure 9
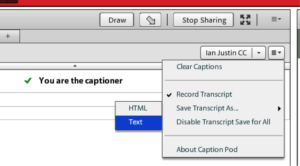
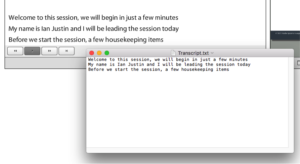
The captioner has the option to record the transcript and to save as a text or HTML file. This option can be disabled for others in the room (Figure 10). This creates a simple record of the transcript (Figure 11).
Note – If you do not select ‘Record Transcript’ at the start of the CC process, you will not have the CC text transcript up until that time.
Figure 10
Figure 11
You can turn off the ‘Broadcast captions’ checkbox and pause the effort, then turn it on again to continue (not sure why you would do this).
You can re-assign the role of captioner to another meeting attendee; to do this successfully the process seems to be as follows:
- Disconnect the CC feed
- Assign a new captioner
- Reconnect the feed
- The new person will now see the prompt ‘You are the captioner’
I re-assigned this example feed to a meeting ‘Participant’ who logged in as a ‘Guest’ and it works well (Figure 12).
IMPORTANT – The CC Pod should be on every layout in the room, otherwise you will likely (OK, ‘definitely’) lose the captions when you move from layout to layout.
When you are done with the pod, disconnect and you are good to leave the room.
Figure 12
Recording
I have recorded these CC feeds successfully, but I do not think this will play nicely with edited recordings or scrolling dynamically through a recording.
Mobile
This pod is a .swf file and it will not work for users connecting using the ‘Connect Mobile’ app.
Free Countdown Timer Pod – Alistair Lee:
http://www.adobe.com/products/adobeconnect/apps/countdown-timer.html
Note – See the end of this blog post for a simpler but more reliable and compatible timer option.
Overview
The Countdown Timer Pod shows a countdown clock to the participant in the session, particularly useful for webinars etc. where you have people waiting for the session to start.
Enabling the Pod
Load the Countdown Timer extension as downloaded from the extensions site (.swf) into a Share Pod.
Process
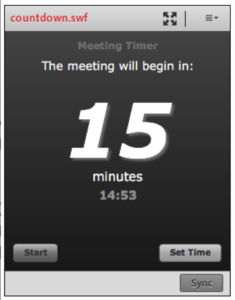
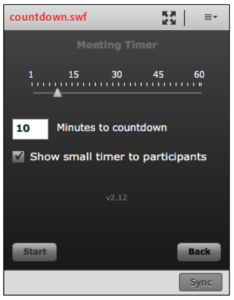
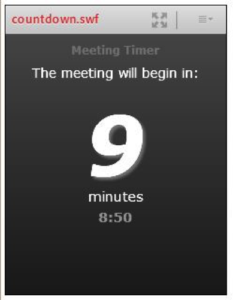
Once the pod is in the room and as a ‘Host’ you can click on the ‘Set Time’ option (Figure 13) and move the slider to the appropriate countdown duration (Figure 14). Of course the ‘Participants’ do not see these options, just the timer countdown (Figure 15).
There is another option as shown in Figure 14 to ‘Show small timer to participants’, this turns on the minutes and seconds option, otherwise the participants only see the larger minutes countdown numbers.
Figure 13
Figure 14
Figure 15
Recording
This pod will show in the recording, but it is irrelevant at best and most likely it should be edited from the recording anyway (dead-space prior to the session starting). Technically, many people would not start the recording until the session truly begins anyway.
Mobile
This pod is a .swf file and it will not work for users connecting using the ‘Connect Mobile’ app.
Alternative Timer Option – Using an MP4 in a Connect Room
Process
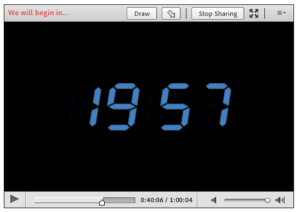
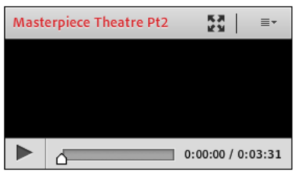
Load an MP4 countdown timer into a Share Pod in the room. This is a very simple alternative and very reliable. The MP4 timer will be synchronized across all users and you can scrub the timer play-bar to the correct time for the countdown (Figure 15a).
Recording and Mobile
This timer will also work correctly on mobile devices and in the recording.
Figure 15a
Free Adobe Connect Clock Pod – Alistair Lee:
http://www.adobe.com/products/adobeconnect/apps/clock.html
Overview
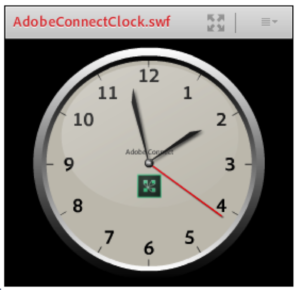
The Adobe Connect Clock Pod shows an analogue clock to the participants in the session, and displays the time based on the time on the participant computer. Nice to have in the room for timekeeping and suitably ‘in-your-face’.
Enabling the Pod
Load the Adobe Connect Clock extension as downloaded from the extensions site (.swf) into a Share Pod.
Process
Once the pod is in the room you will see the clock displayed, that’s all there is to it (Figure 16).
Figure 16
Recording
This pod will show in the recording, but it is not terribly helpful, as it will pick up the time from the local machine as you watch the recording.
Mobile
This pod is a .swf file and it will not work for users connecting using the ‘Connect Mobile’ app.
Free Digital Timer Pod – Alistair Lee:
http://www.adobe.com/products/adobeconnect/apps/digitaltimer.html
Overview
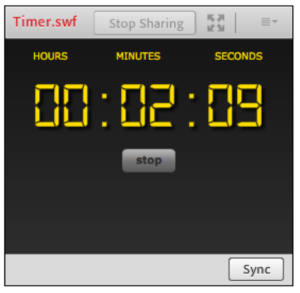
The Digital Timer Pod shows a digital timer readout that counts upwards to the participants in the session, the timer is synched across all attendees and the timer count will be correct even for late-joining attendees. Used to time an activity for example.
Enabling the Pod
Load the Countdown Timer extension as downloaded from the extensions site (.swf) into a Share Pod.
Process
Once the pod is in the room, the ‘Host’ clicks the ‘Start’ button and the timer begins counting (Figure 17). The ‘Stop’ button stops the count and ‘Start’ again restarts the count from zero.
Figure 17
Recording
This pod will show in the recording, but it is pretty messed up and not useable.
Mobile
This pod is a .swf file and it will not work for users connecting using the ‘Connect Mobile’ app.
Free Randomizer Pod – Alistair Lee:
http://www.adobe.com/products/adobeconnect/apps/randomizer.html
Overview
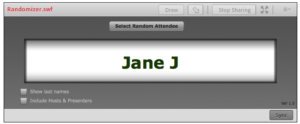
The Randomizer extension allows you to randomly select an attendee name for a prize (webinars) or maybe to answer a question or carry out a task. Good clean fun.
Enabling the Pod
Load the Randomizer extension as downloaded from the extensions site (.swf) into a Share Pod.
Process
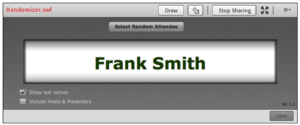
Once the pod is in the room the ‘Host will have a few options as shown in Figure 18. Checking the box ‘Show last names’ gives the full name and deselecting this option is a little more private for the attendee (Figure 19). Click ‘Select Random Attendee’ and the randomizer does its thing. The ‘Participants of course only see the ‘spinning’ and the chosen name.
There is also the option to leave the ‘Hosts’ and ‘Presenters’ in the session out of the selection so that you cannot win all of the Starbucks cards for yourself!
Figure 18
Figure 19
Recording
This pod will show in the recording, but it is irrelevant in this use-case.
Mobile
This pod is a .swf file and it will not work for users connecting using the ‘Connect Mobile’ app.
Free Social Stream Pod – eSyncTraining:
http://www.adobe.com/products/adobeconnect/apps/social-stream.html
IMPORTANT – I was unable to login to my Twitter account using this Pod and until I can do this successfully I have left the detailed explanation for this pod out of this blog post.
Overview
This pod allows you to view social media feeds from Twitter or Instagram live in the Connect room in real-time.
Enabling the Pod
Load the Social Stream extension as downloaded from the extensions site (.zip) into a Share Pod.
Process
Login to your Twitter or Instagram account to watch feeds (unsuccessful in my case and as of the time of writing this blog post).
Free Doorbell Connect Pod – Alistair Lee:
http://www.adobe.com/products/adobeconnect/apps/doorbell-connect.html
Overview
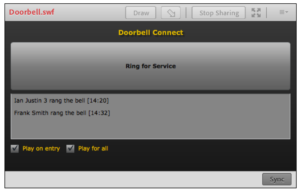
The Doorbell Connect extension allows you to have anyone who enters the room ‘ring’ the doorbell to announce themselves. This is helpful if you have a support room for example that is always running and you want to be notified if a person needs help.
You can also set this up to automatically announce anyone entering your room so that you do not have to pay close attention to the ‘Attendee List Pod’ for a drop-in session for example.
The activities can also be time stamped.
Enabling the Pod
Load the Randomizer extension as downloaded from the extensions site (.swf) into a Share Pod.
Process
Once the pod is in the room you can have it displayed in a prominent position that encourages the user to ring the bell on entry (Figure 20).
If the option ‘Play for all’ is selected then the bell will ring for all attendees in the session, if this option is not selected then the bell will only ring for Presenter and Hosts in the room.
You could also use the option to ring the bell along with time-stamps to manage a game-show use-case, the first person to ring the bell would be time-stamped.
Figure 20
Recording
This pod will show in the recording, but it is irrelevant as a use-case.
Mobile
This pod is a .swf file and it will not work for users connecting using the ‘Connect Mobile’ app.
Free Word Cloud Pod – eSyncTraining:
http://www.adobe.com/products/adobeconnect/apps/wordcloud.html
Overview
This pod allows you to create a dynamic, colorful word cloud that represents your discussions in the room.
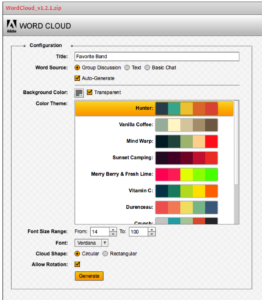
The Host has the option to configure the colors and the type of word cloud to be generated and the generated word cloud can be downloaded as a PNG file.
Enabling the Pod
Load the Word Cloud extension as downloaded from the extensions site (.zip) into a Share Pod.
Process
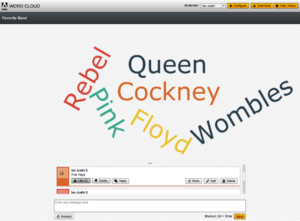
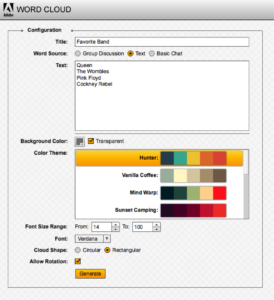
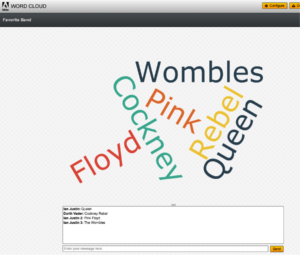
Once the pod is in the room the Host configures a word cloud (Figure 21) and selects ‘Generate’. Now all of the attendees can enter their contribution to the discussion and the word cloud is generated live (Figure 22).
In the scrolling entries below the word cloud the attendees can like or dislike contributions and the host also has the option to block users and remove their rights to contribute to the discussion (Figure 23). The host can also edit contributions (Figure 24).
The image can be saved to the users computer using the ‘Download’ button to the top-right of the pod.
The ‘Group Discussion’ is the most dynamic and engaging option for this pod and it allows everyone to be involved, that is the example shown below.
The ‘Text; option allows the Host to enter a list of words to generate the word cloud and this is a more passive option (Figure 25).
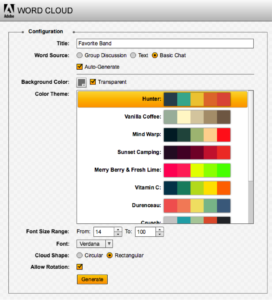
The ‘Basic Chat’ option is a clean and simple way to generate the word cloud (Figure 26) and this allows engagement and discussion, but does not have the likes/dislikes, editing and blocking capabilities (Figure 27). Very easy to use however.
Note – You can shrink the chat/contributions pane by dragging the top of the window downwards and this leaves more space for the word cloud.
Figure 21
Figure 22
Figure 23
Figure 24
Figure 25
Figure 26
Figure 27
Recording
This pod will show in the recording, but it is irrelevant as a use-case.
Mobile
This pod is a .swf file and it will not work for users connecting using the ‘Connect Mobile’ app.
Free Quiz Connect Pod – Alistair Lee:
http://www.adobe.com/products/adobeconnect/apps/quiz-connect.html
Overview
This very sophisticated pod allows you to create a quiz in your room that rewards the contestants based on the speed at which they answer the questions.
The questions can be created by editing the files contained in the .zip folder before uploading to the room (more on this below).
Enabling the Pod
Load the Quiz Connect extension as downloaded from the extensions site (.zip) into a Share Pod.
Process
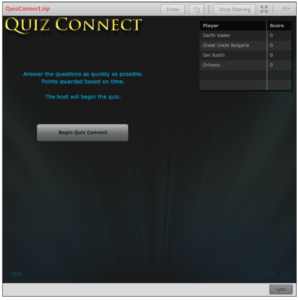
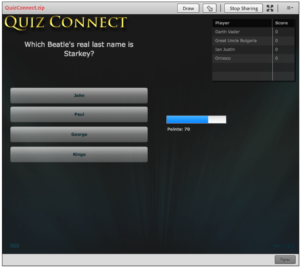
Once the pod is in the room it will list the attendees as players and the host will have the option o ‘Begin Quiz Connect’. (Figure 28) When the quiz begins the players will be able to answer the quiz and compete for the lead. The faster the player answers the more points they are awarded (Figure 29).
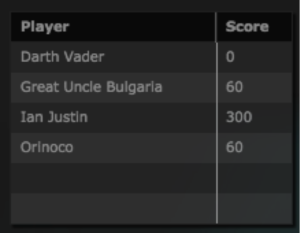
The scores are maintained in the table to the top-right of the pod (Figure 30). Each player is moving through the quiz in their own time but of course answering quickly gains more points.
Figure 28
Figure 29
Figure 30
Editing the Quiz Questions
Note – Editing the questions involves editing an XML document and this may be something you want to pass to a more technical person if you are not comfortable with tis process.
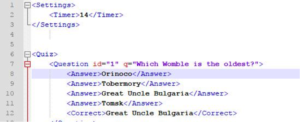
To edit the question in the quiz, first extract/unzip the folder ‘QuizConnect’ that you downloaded from the extensions page. You will now see 2 files, the ‘index’ file and the ‘questions’ file (Figure 31). You want to edit the ‘questions’ file using an XML editor or a simple text program.
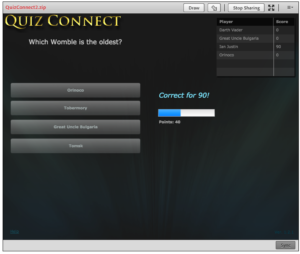
Edit the question, answers and the correct answer (Figure 32) and then save and overwrite the ‘questions’ file. Compress the ‘QuizConnect’ folder with the edited ‘questions’ file and give it a new name, load this into your Connect Share Pod and now you will have a new quiz with your own custom questions (Figure 33).
Figure 31
Figure 33
Recording
This pod will show in the recording, but it is irrelevant as a use-case.
Mobile
This pod is a .swf file and it will not work for users connecting using the ‘Connect Mobile’ app.
Free Connect Roshambo Pod – Alistair Lee:
http://www.adobe.com/products/adobeconnect/apps/connect-roshambo11.html
Note – This pod is listed as being compatible with Connect 8, but I have used it in Connect 9 with no issues so far.
Overview
This very simple pod allows your attendees to play rock/paper/scissors against each other in the room, a good ice-breaker and useful in the ‘lobby’ layout while people wait for the session to begin.
Enabling the Pod
Load the Roshambo extension as downloaded from the extensions site (.swf) into a Share Pod.
Process
Once the pod is in the room the participants select ‘Player 1’ or Player 2’ and then the Rock, Paper or Scissors option, the winner is displayed each time.
Note for Hosts – Do not play this with your Host cursor turned on, it is a bit of a losing strategy to let the other player see your selection!
Recording
This pod will show in the recording, but it is irrelevant as a use-case.
Mobile
This pod is a .swf file and it will not work for users connecting using the ‘Connect Mobile’ app.
Free Connect MP3 Player Pod – Alistair Lee:
http://www.adobe.com/products/adobeconnect/apps/mp3-player.html
Note – I do not recommend using this pod. I have seen issues where the music continues to play over a recording or over multiple layouts and it cannot be turned off. I would suggest instead that an MP3 be loaded into a Share Pod and played from there. This is a very simple option and in my experience it is foolproof.
Alternative MP3 Player Option – Using an MP3 in a Connect Room
Process
Load an MP3 into a Share Pod in the meeting room, shrink the Share Pod to a smaller size that displays the play controls (Figure 34). Use the controls to play, pause and scrub through the audio file.
The music will be synched across all attendees and in the recording.
If you desire a longer track, use a tool such as ‘Audacity’ to links MP3 files together before loading into the room.
Note on music rights – You can download royalty free music from various sites on the Internet. Below is a useful site that I have used in the past. Whenever you download a file form the Internet, please ensure you have appropriate virus checking software installed to protect your computer and network:
http://incompetech.com/music/royalty-free/
Recording and Mobile
This timer will also work correctly on mobile devices and in the recording.
Figure 34
Free Enhanced Chat Pod – Max Vasic/xpertCast:
http://www.adobe.com/products/adobeconnect/apps/tabbedchat.html
Overview
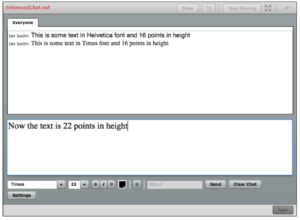
This is a chat pod with far greater control over format and fonts etc. The pod is not as simple to use as the regular Connect chat pod so it may be more than most attendees can reasonably handle, but it is a good tool for Hosts and Presenters if you want to have a more engaging way to transcribe a conversation.
Enabling the Pod
Load the Enhanced Chat extension as downloaded from the extensions site (.swf) into a Share Pod.
Process
The only real controls for the Host are via the ‘Settings’ option to decide whether to enable tabbed private chat for the participants in the room.
The process for sending a text chat and controlling the formatting is as follows:
- Set the font type, height, color etc. and then type your message and ‘send’ (Figure 35)
- The text will appear in the chat pane based on those settings
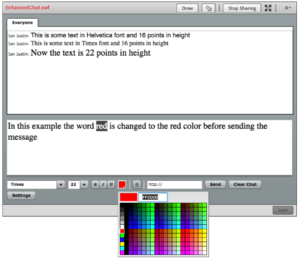
- Alternately, type your text, select it and change the settings and then ‘send’ (Figure 36).
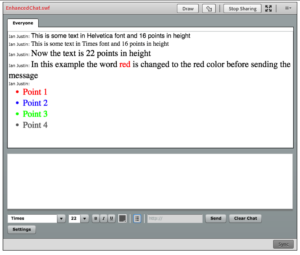
- Similarly you can use bullet points and create more dynamic text displays in the chat (Figure 37)
You can work out the rest of the controls for yourselves, but the process is as noted above.
Recording
This pod will show in the recording and the viewer can type into the chat pod, but it is irrelevant as a use-case.
Mobile
This pod is a .swf file and it will not work for users connecting using the ‘Connect Mobile’ app.
Figure 35
Figure 36
Figure 37
Free Stage Lights Pod – Alistair Lee:
http://www.adobe.com/products/adobeconnect/apps/stage-lights.html
Overview
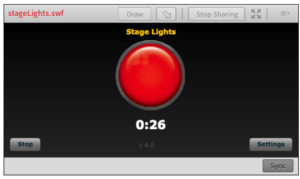
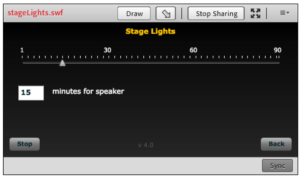
This is the digital equivalent of the lights that are shown in front of a speaker at a debate or a hearing and intended to keep the speakers on time. The duration can be set by the Host and the countdown will change the lights from green to amber to red as it counts down. Red of course means that the speakers’ time is almost up.
Enabling the Pod
Load the Stage Lights extension as downloaded from the extensions site (.swf) into a Share Pod.
Process
The only real controls for the Host are via the ‘Settings’ option to decide on the duration of the countdown (Figure 39).
Recording
This pod will show in the recording but the countdown will not be correct (defaults to the 15 minutes).
Mobile
This pod is a .swf file and it will not work for users connecting using the ‘Connect Mobile’ app.
Figure 38
Figure 39
Free Anonymous Chat Pod – eSyncTraining:
http://www.adobe.com/products/adobeconnect/apps/anonymous-chat.html
Note – At the time of creating this blog post, there was not visible link on the extensions page to download this pod so I am leaving this out of the blog post until it is made available.
Overview
This Chat Pod allows you to hide the names of the attendees and still maintain the context of the conversation.
Free UpVote Pod – Alistair Lee:
http://www.adobe.com/products/adobeconnect/apps/upvote.html
Overview
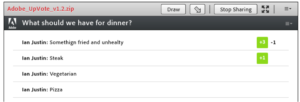
This pod allows suggested topics or options to be ranked dynamically based on votes form the meeting attendees.
Enabling the Pod
Load the Adobe UpVote extension as downloaded from the extensions site (.zip) into a Share Pod.
Process
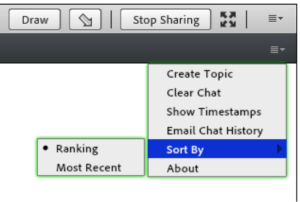
The Host can create a topic using the menu to the top-right of the pod…this topic is shown at the top of the pod (Figure 40). The Host also has the ability to change the method of the sorting to be by ranking or by most recent (Figure 41).
The Host enters the options for the vote one-by-one and the attendees can mouse-over the options and vote their favourites to the top of the list. The list will dynamically change as the votes are cast and changed (Figure 42).
Recording
This pod will show in the recording but it will be irrelevant as a use-case.
Mobile
This pod is a .swf file and it will not work for users connecting using the ‘Connect Mobile’ app.
Figure 40
Figure 41
Figure 42
