This post is intended to help meeting hosts and account administrators to give appropriate instructions to attendees on how to join the Connect Room successfully using Flash Player (‘FP’). This post is driven by the changes in browsers that disable FP by default.
Remember that the note you would send to attendees is far less involved, this post is intended to give hosts and administrators a better understanding of what is happening ‘under the covers’. An example attendee note is at the bottom of this blog post and a blog post purely for attendees can be found here.
Note on compatibility – These instructions apply equally to the Chrome Browser Windows OS and Mac OS.
Useful Resource on Enabling Flash Player – There is a very useful ‘Flash Player Help’ page here. This page tests for Flash Player and gives instructions on how to enable FP on any browser or OS.
Default Connect Room Behaviour
By default, when you click on the link to join a Connect Room, Connect will check to see if FP is installed, if it is installed then the room will open using FP and you are set. The only time you would need to install the Connect Meeting Add-in (‘Add-in’) is if you want to share your desktop.
If you do not have FP installed, Connect will ask you to install the Add-in. Note that this Add-in currently requires admin rights to install and as such the Add-in may not be something all users can install.
Note on recent changes – This behaviour has changed only in recent versions of Connect, previously the default behaviour was to suggest the install of FP as the first option, that has changed to suggesting the install of the Add-in initially and this can be challenging for attendees without admin rights on their computer. I expect Adobe to address this workflow as a priority BTW.
Find the Correct Meeting Test Link for your Connect Account
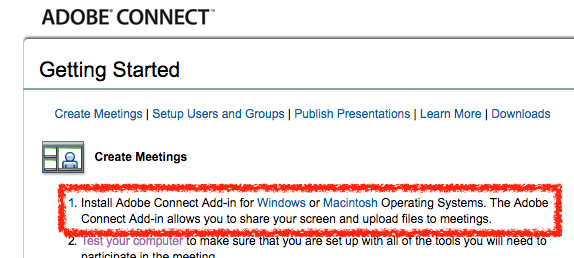
One of the easiest ways to be sure an attendee can enter your particular room is to send them the Connect Meeting Test Link. The correct way to do this is to send them the specific link for your Connect account and you can find it by first going to the ‘Home’ tab in your account, then click ‘Open’ in the ‘Getting Started’ section. You will see the page shown in Figure 1 below. Click on the ‘Test Your Computer’ link beside point #2.
Figure 1
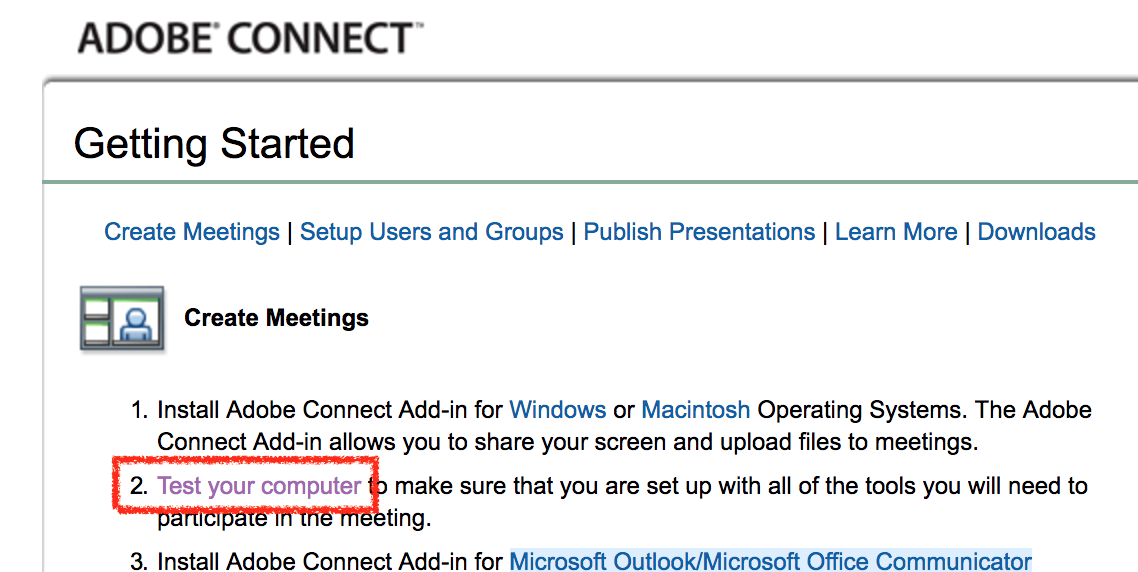
This will open the test page as shown in Figure 2 below. Figure 2 shows a successful test for both Flash Player (point #1) and the Connect Meeting Add-in (point #4).
Figure 2
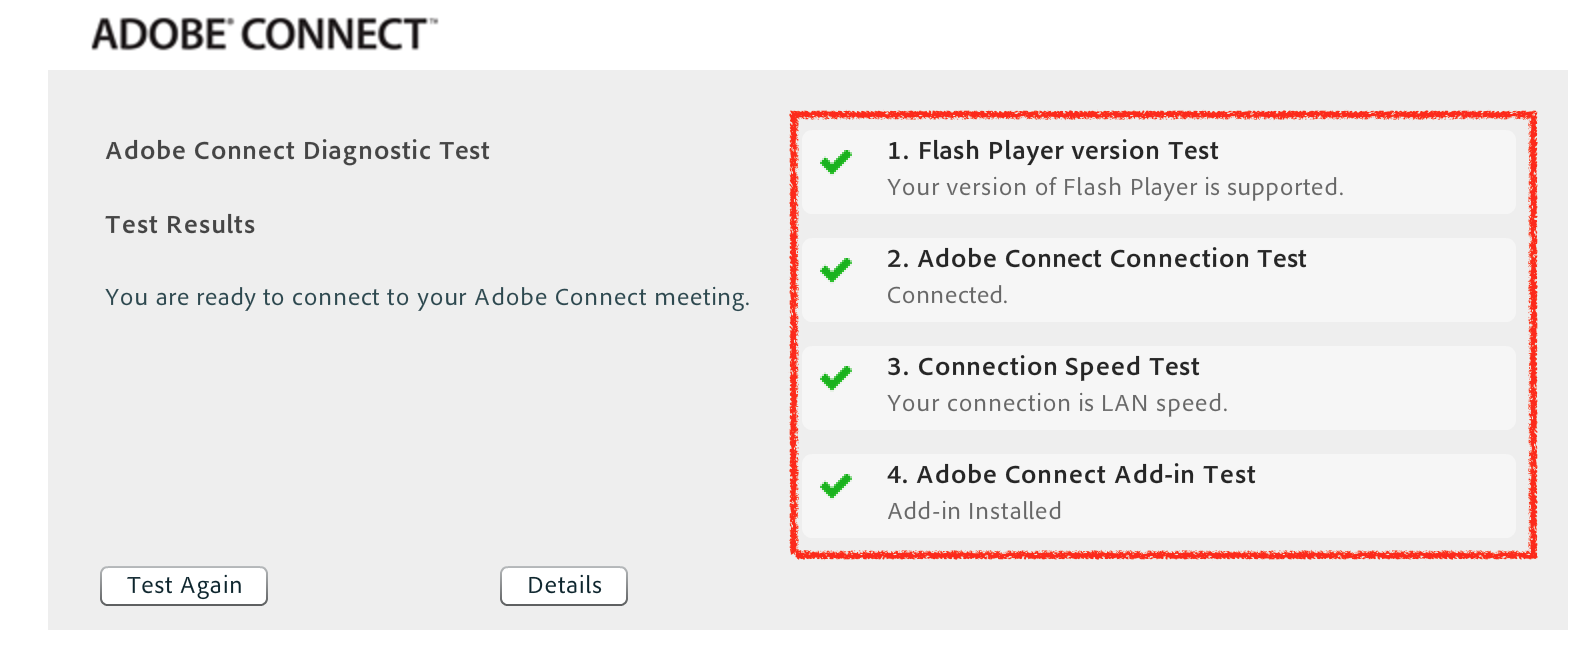
The link in the address bar is the correct test link for your account, in my case the specific account link is below. You can probably see that all you need to do is replace the company specific domain (in my case ‘getconnect’) with your specific company domain to see the correct link for your account.
https://getconnect.adobeconnect.com/common/help/en/support/meeting_test.htm
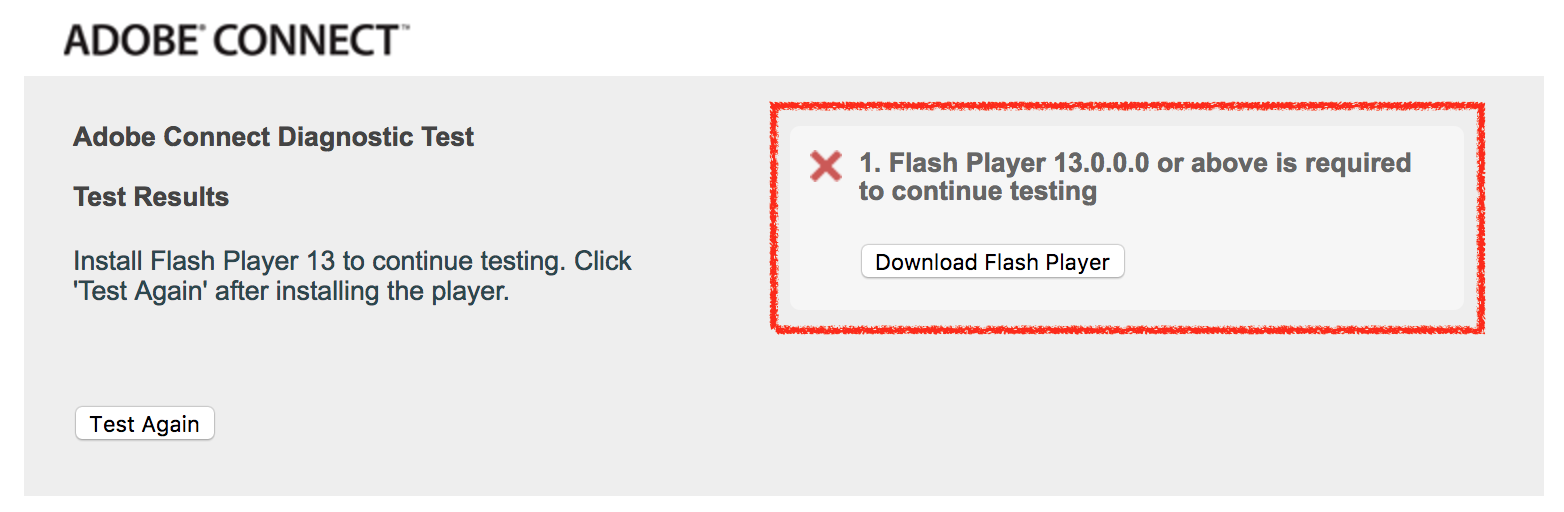
So the test in Figure 2 was a success on all counts, but what if FP or the Add-in are not installed? For this example I have uninstalled and removed FP and the Add-in from my computer and the results of the test are in Figure 3 below.
Figure 3
Using Flash Player to join the Meeting Room
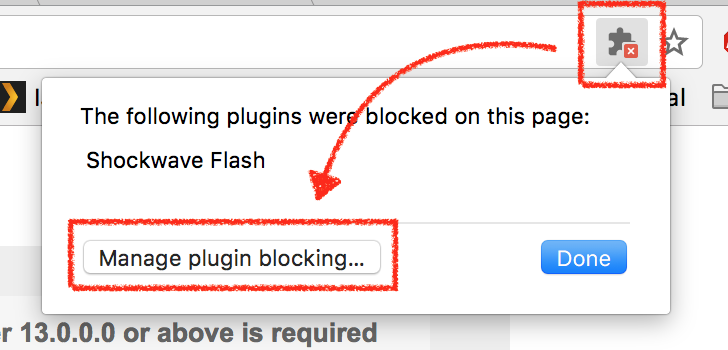
You would naturally now want to click on the ‘Download Flash Player’ button, but chances are that as FP is not installed it is blocked and you would see a small pop-up message in the address bar that says ‘Plugin Blocked’. You can see the message by clicking on the little ‘jigsaw piece’ to the top-right of the address bar (Figure 4). Click on the ‘Manage plugin blocking…’ button.
Note – You are not actually ‘installing’ FP, it is already shipped within the Chrome browser, you are actually just ‘enabling’ FP.
Figure 4
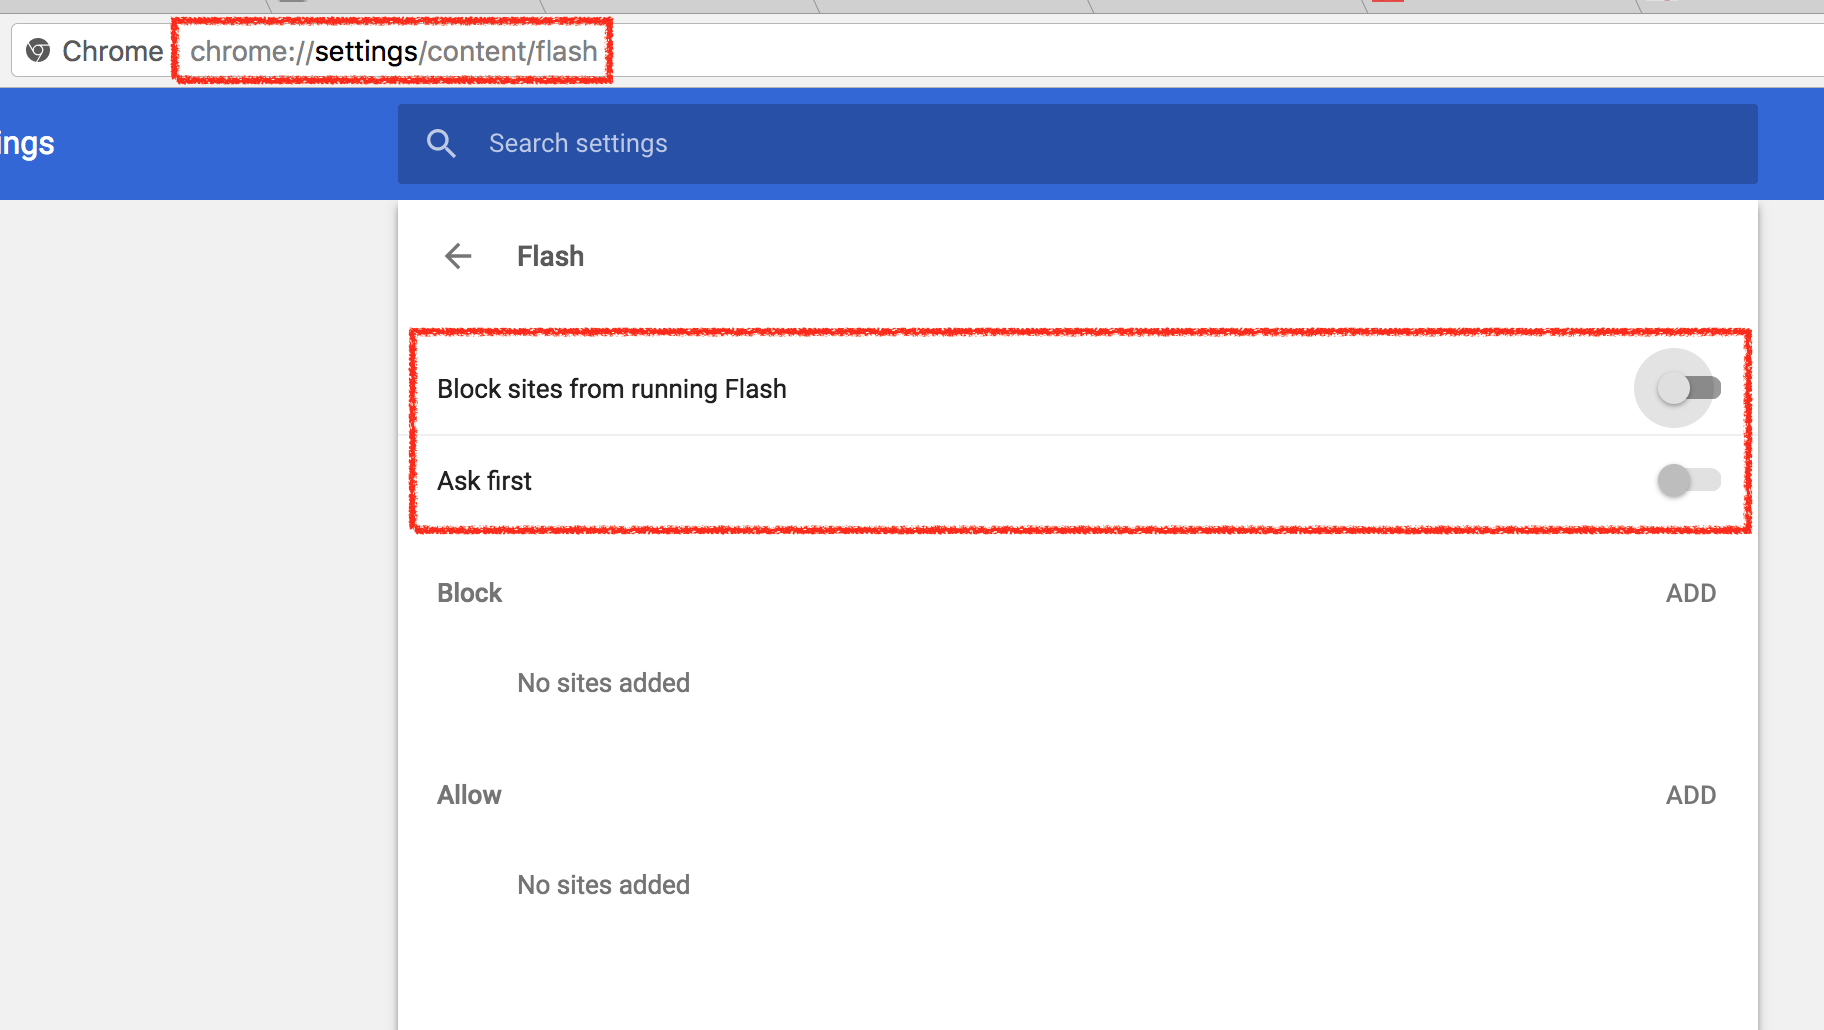
You will be taken to the ‘Settings’ page in Chrome for Flash, you can see in Figure 5 that in our case the ‘Block sites from running Flash’ option is turned off, as we would expect from the test results.
Note – You can access this page directly from your Chrome Browser by typing the following into the address bar, this is also shown in Figure 5 below: chrome://settings/content/flash
Figure 5
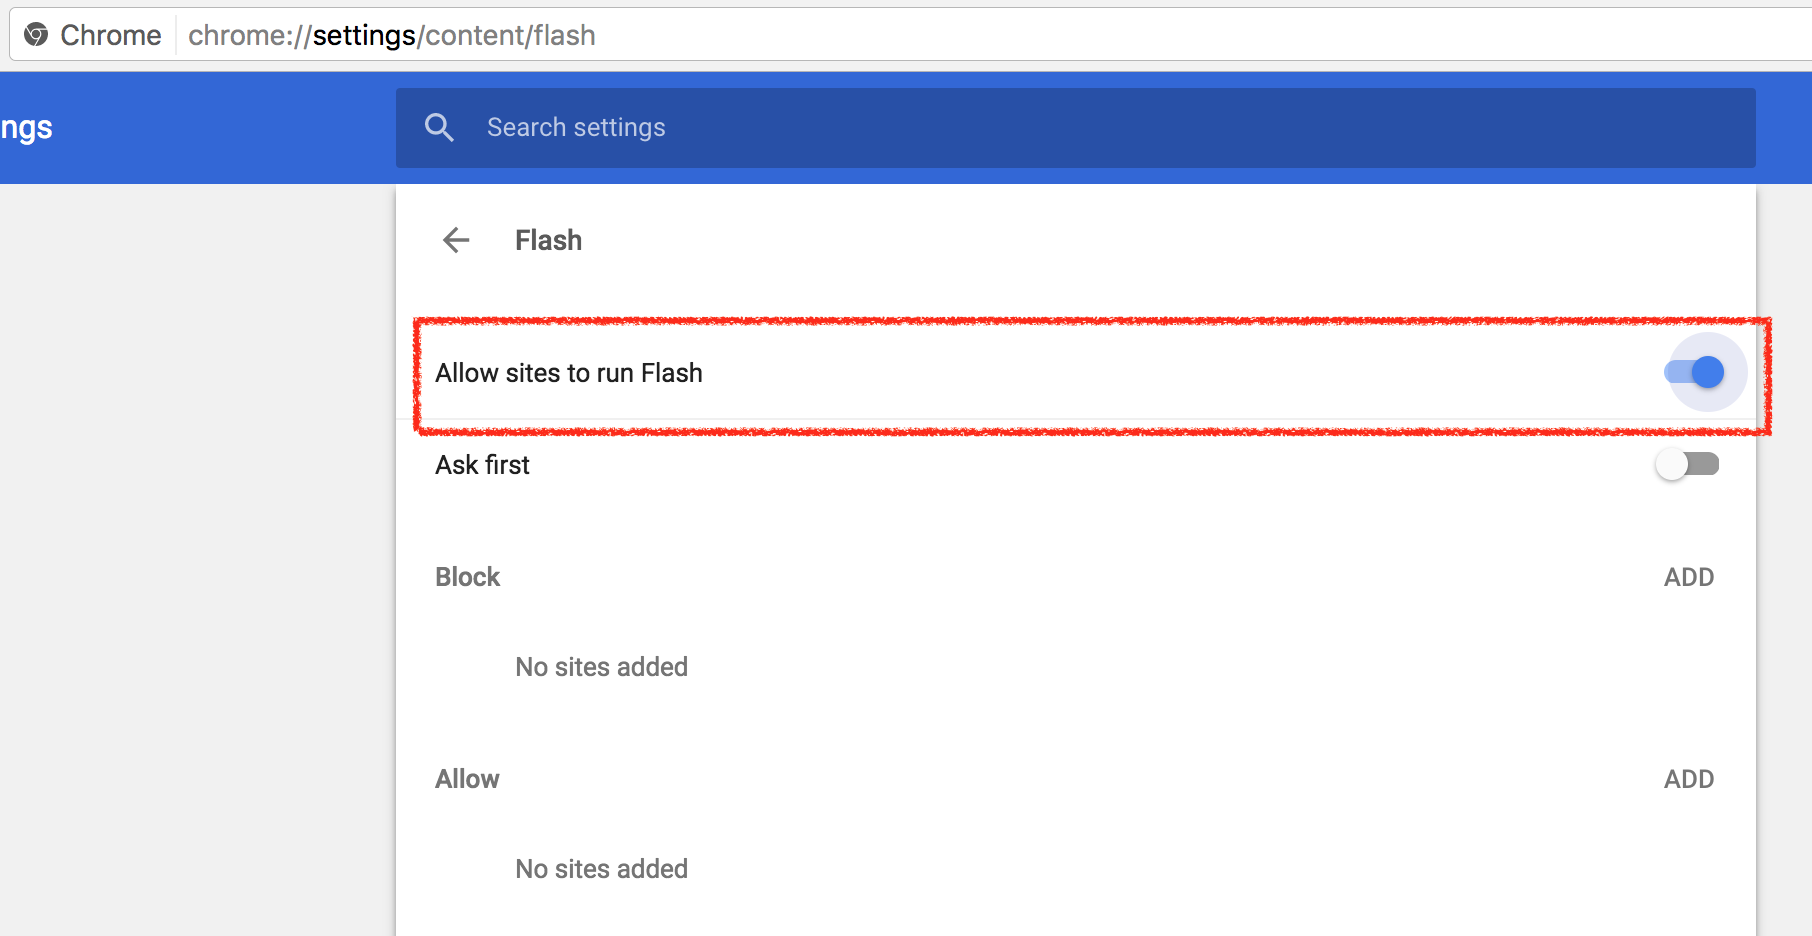
So now you can turn on the option to ‘Allow sites to run Flash’ as shown in Figure 6.
Figure 6
Now if I re-run the Connect test link it will give the response below in Figure 7. Also note that the Add-in is still not installed.
Figure 7

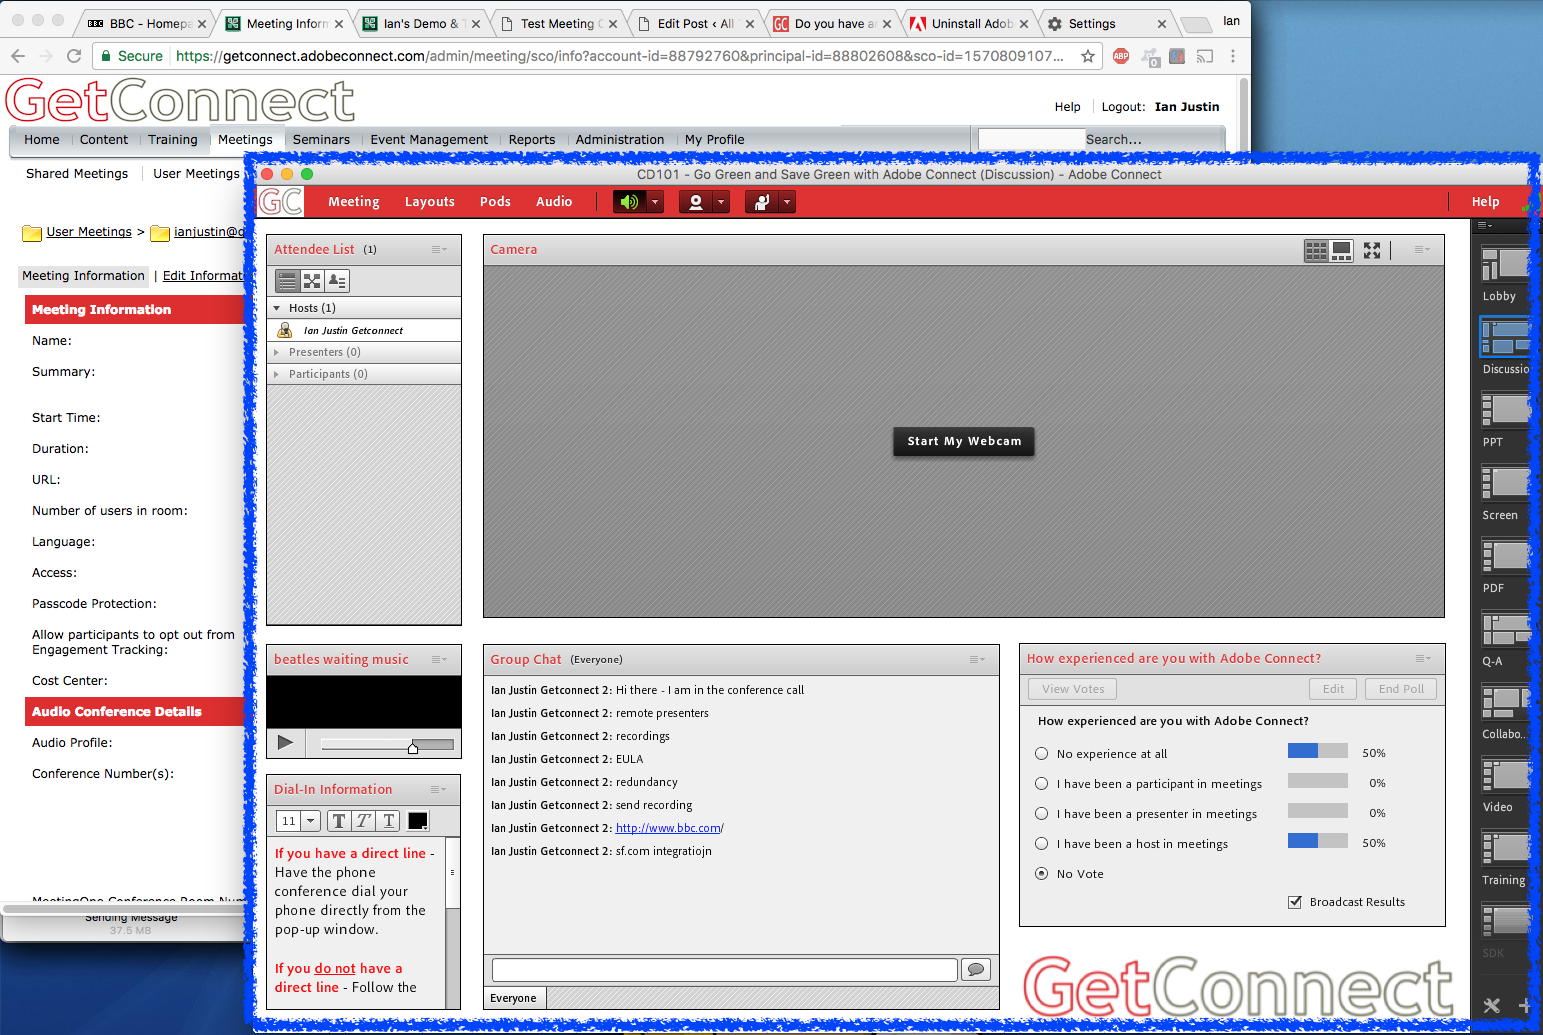
Now we can click on a meeting room link and enter the room. Note that as we are using FP only, the room will open in the browser itself (Figure 8) and not in a separate window. If we are using the Add-in then the room will open in a separate window outside of the browser (we will look at that later in this blog post).
Figure 8

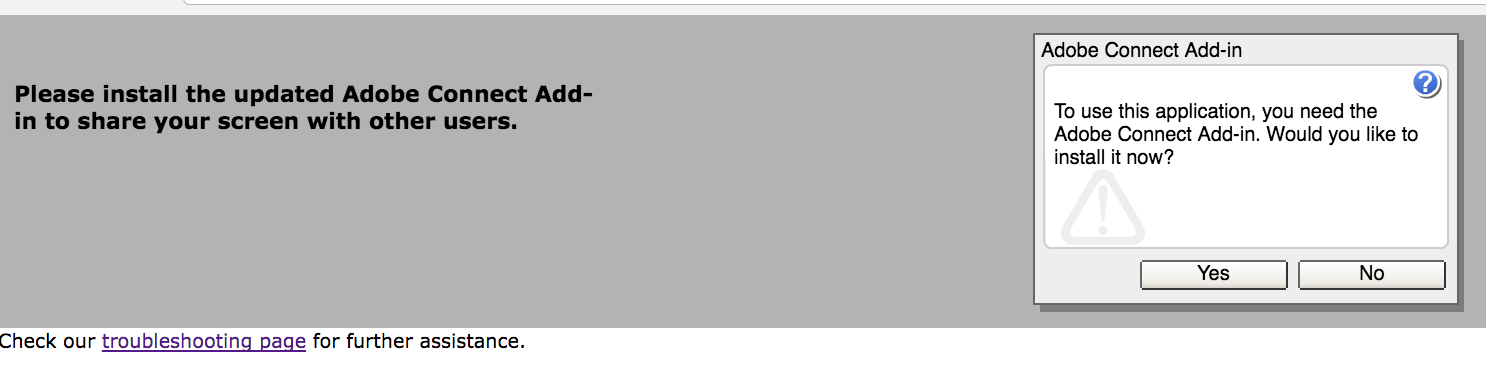
It is possible that as you open the meeting room you will see a message as shown in Figure 9 explaining that if you want to share your screen you need to install the Add-in, click ‘No’ to just use Flash Player unless you have admin rights on your computer.
Note – There are advantages in bandwidth and optimization that come as a part of the Add-in so if you can install it then it is a good idea to do so.
Figure 9
Using the Connect Meeting Add-in to join the Meeting Room
There are a number of ways to install the Add-in, we will look at a few of them below. In my case, I have Admin rights to my computer, the install will fail otherwise and you will need to use FP to attend the session.
Installing the Add-in from the Meeting Test Link
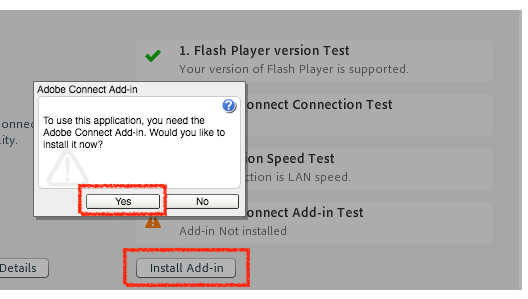
We discussed the meeting test link in the sections above. When that link is sent to participants, they can attempt to install the Add-in from that page. Click on the ‘Install Add-in’ button and then say ‘Yes’ to the next pop-up (Figure 10). The Add-in will install in a few seconds.
Figure 10
When you click on a link to enter the room with the Add-in you will see the room open in a separate window, not in the browser window (Figure 11).
Figure 11
Installing the Add-in from within the Meeting Room
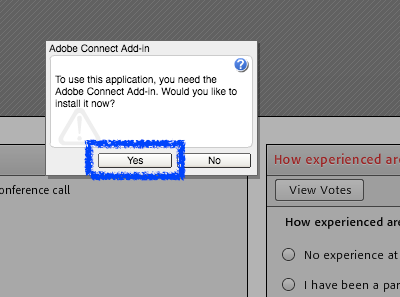
If you are in the meeting room using only FP (the room is open within the browser), you have the option to install the Add-in directly from the room. To do this go to the ‘Help’ menu to the top-right of the room and click ‘Install Adobe Connect Add-in…’ (Figure 12). You will need to click ‘Yes’ in the next pop-up to complete the installation (Figure 13).
The installation will take a few seconds only and the room will close and you will immediately (automatically) re-enter the room using the Add-in and in a separate window from the browser.
Figure 12
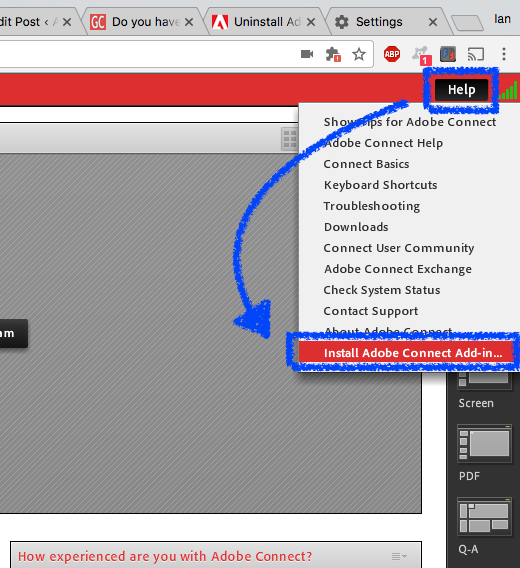
Figure 13
Installing the Add-in from a file (.exe on Windows OS or .pkg on Mac OS).
You can install the Add-in in a more controlled manner by downloading the installer from the ‘Getting Started’ page shown in Figure 1 earlier in this blog post. This time you will click on the ‘Windows’ or ‘Macintosh’ links to download the files for your OS (Figure 14).
Figure 14
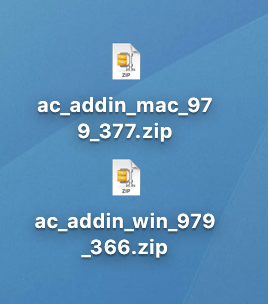
The files will be in a .zip format and the naming is clear for Mac and Windows (Figure 15). Both files are just over 40MB each.
Figure 15
To install, unzip the file and double-click on the ,pkg or .exe file and follow the instructions.
Note to IT Professionals – You can of course use this method to control the distribution of the Add-in across your organization and install selectively using your admin rights. As an IT Professional, you may also want to uninstall the Add-in during your testing, you can see how to uninstall the Add-in from the page here.
Installing the Add-in as you attempt to enter the room
Finally, you have the option to install the Add-in as you click on the meeting room link. As noted above, if you already have FP enabled then you will not need to install the Add-in. If FP is not enabled then you will see the option to download the Add-in (Figure 16). Once downloaded you will follow the instructions (Figure 17) to install the Add-in file and launch into the meeting room.
Figure 16
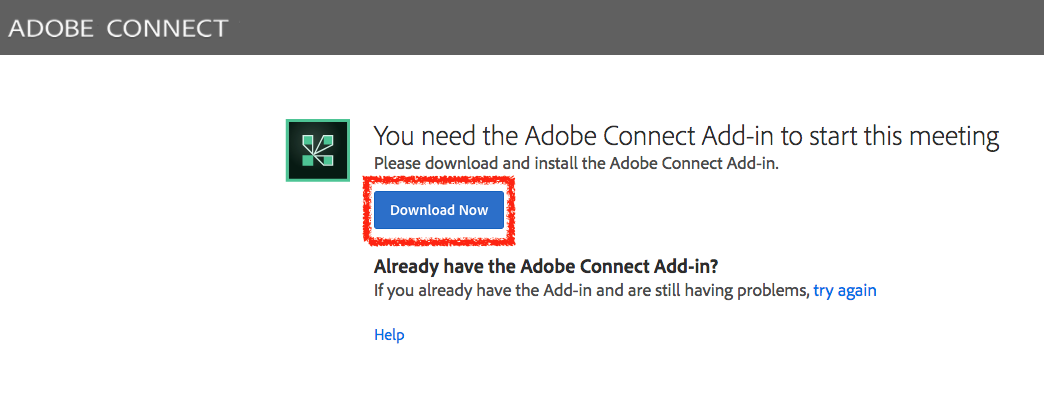
Figure 17

Example Note to send to Attendees
As discussed earlier in this blog post, here is a note that summarizes the points above in a format that would be suited to an invitation, feel free to edit this of course.
—snip—snip—
You are invited to join an Adobe Connect Meeting Room.
Please click on the following link to join the session at the appropriate time: https://companyname.adobeconnect.com/roomname/
We suggest that you test your ability to join the meeting prior to the session. Please use the Meeting Test Link below here to test your computer: https://companyname.adobeconnect.com/common/help/en/support/meeting_test.htm
If you see in the test that you do not have Flash Player enabled, please follow-the instructions on this page to enable Flash Player for your particular OS and browser: https://helpx.adobe.com/flash-player.html
You can install the Connect Meeting Add-in if you have administration rights on your computer. You only need this Meeting Add-in if you are intending to share your screen or if you do not have the rights tin enable/install Flash Player. You will be prompted to install the Meeting Add-in when you attempt to enter a room or if you attempt to share your screen.
If you wish to test your ability to enter a room directly, you can use the room at the link below as a live example. Enter your name into the ‘Guest’ field and the room passcode is ‘testingtesting’: https://getconnect.adobeconnect.com/testing/
For further help, please contact your IT Department or visit the Adobe Connect Support Centre here: https://helpx.adobe.com/support/connect.html
—snip—snip—