The Connect Add-in for Outlook is a very useful tool for scheduling meetings and sending emails that can be pre-configured with your Connect Meeitng Room and audio conference information.
A surprisingly large number of people seem to struggle with setting up and using the Add-in so I have outlined my experiences below.
Download and Requirements
You can download the Add-in from the Connect Users site here. You will need to determine if you are using a 32 Bit or a 64 Bit operating system before you download the correct version of the Add-in. Please also take account of the table below to determine what configurations will and what will not work as of the time of writing this post.
|
32 Bit Outlook Add-in
|
||
|
32 Bit WINDOWS OS
|
64 Bit WINDOWS OS
|
|
|
32 Bit MS Office
|
Supported
|
Not Supported
|
|
64 Bit MS Office
|
Not applicable (64 Bit office cannot be installed on 32 bit OS)
|
Not Supported
|
|
64 Bit Outlook Add-in
|
||
|
32 Bit WINDOWS OS
|
64 Bit WINDOWS OS
|
|
|
32 Bit MS Office
|
Not Supported
|
Supported
|
|
64 Bit MS Office
|
Not applicable (64 Bit office cannot be installed on 32 bit OS)
|
Supported
|
The official user guide for the Outlook Add-in is also at this location.
Installation
The Add-in will be in a zipped folder, unzip the content. Next you need to close Outlook *before* you install the Add-in. Double-click on the ‘Setup’ option in the folder and follow the instructions, there is nothing too difficult in the installation process. Note that you may be asked to install some .NET Framework applications as well, this is normal behaviour for the installer. If you have issues then it is likely that you do not have permission to install the Add-in so you will ned to contact your IT folks.
Configuring the Connect Outlook Add-in
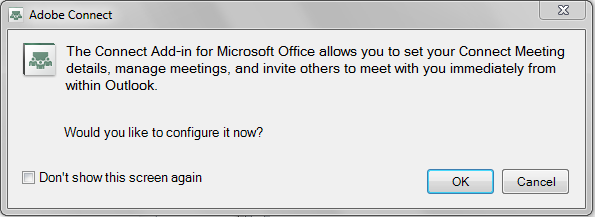
When you first start Outlook after installing the Add-in, you will be given the option to configure the Add-in to communicate with your Connect account (Figure 1). Click ‘OK’ to configure the Add-in.
Figure 1
The next dialogue is key to confguring your account. Enter your Adobe Connect login (typically your email) into the first field, then your Connect account password. You will need to add the server/domain for your Connect account so click the ‘Edit’ button next to the ‘Server’ field (Figure 2).
Figure 2

You can now enter the URL for your account into the field to the left of ‘Add Server’. In my case the URL is ‘http://getconnect.adobeconnect.com’. When you have added the text to the field, click ‘Add Server’. The server information will be listed in the lower of the fields now and if you have another Connect account that you wish to use as well you can add another server to the list by repeating the steps above (Figures 3 and 4 below).
Figure 3

Figure 4

When you click ‘OK’ you will be taken back to the previous dialogue box and the selected server will now be shown. Note that I do not check the ‘Always connect using SSL’ option, my account is not configured to use SSL but I have not found this to make a difference either way, it will work whether this is checked or not.
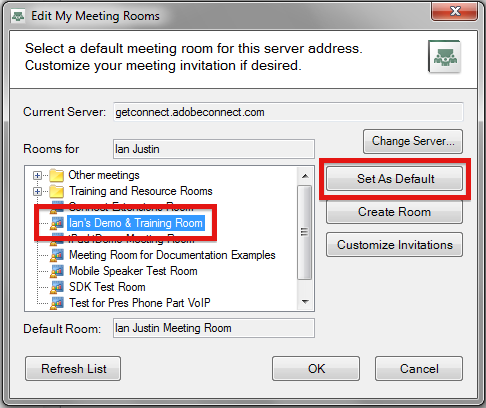
Now you need to set a default room that will be populated into your invitations (you can change this later). Click on the ‘Edit’ button to the right of the ‘Default Room’ field, provided you have entered the correct URL, login and password, you can now browse your Connect account and select your default room (Figure 5). The default room will now be populate into the field in the previous dialogue box.
If you have not created a room on your account yet, you can use the ‘Create Room’ button form this interface, but I would personally suggest that you build the room from within your Connect account in the traditional manner to allow you more control over the settings.
Figure 5
If you have not configured your login, password and URL correctly, you will see a login error as the Add-in tries to communicate with your Connect account. You need to check the URL and your login and password information. (Figure 6).
Figure 6

Using the Connect Outlook Add-in
Now that your Outlook client is ‘talking’ to your Connect account, you can use the Add-in to speed up a few tasks. The Add-in resides in the ‘Add-Ins’ Tab/Toolbar in Outlook (Figure 7). The options in the Add-in are as follows:
- Add – when you select this, Outlook will create an Outlook Appointment and populate it with your default meeting room and audio conference information. You can just send this to an attendee of group and have them join you in a meeting at a scheduled time. This might also be considered as an ‘instant meeting’ (Figure 8).
- Select – this option allows you to choose a meeting room on your account and then with one more click you can create an appointment using that room and conferencing details (Figure 9).
- Create – this allows you to create a new meeting room on your account, but as noted earlier, the configuration options are limited. If you complete the fields and then select ‘Create and Manage Meetings on Connect Server’ then you can create the invitation and you will be directed straight to the meeitng room in your account ad you can tweak the information from there.
- Preferences – this allow you to change the default meeting room or the configuration information for your account. Note that if you select ‘Edit’ beside your default room, you can select a room, then choose ‘Customize Invitations’ on the next screen and from there you can edit the format and text of the invitations that are populated by the Add-in (Figures 10 and 11).
Figure 7

Figure 8
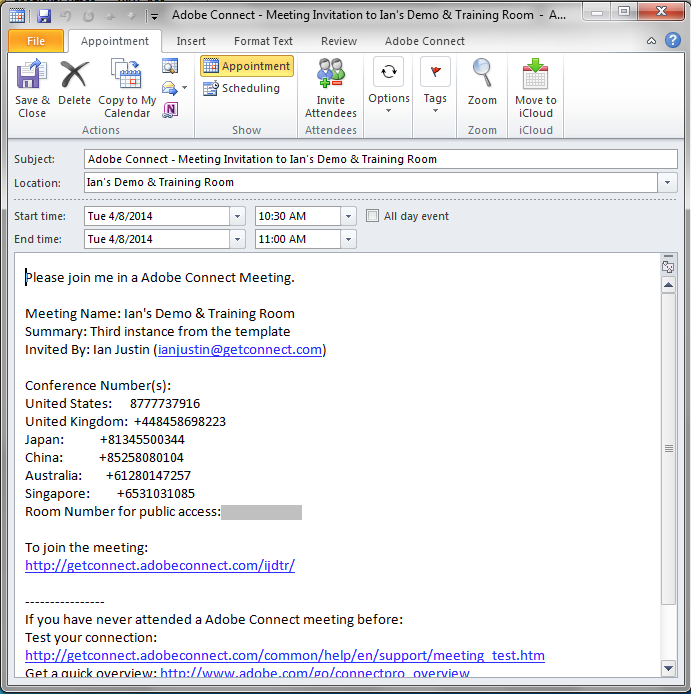
Figure 9

Figure 10
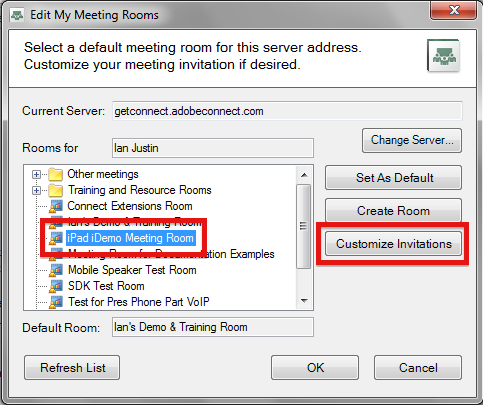
Figure 11

Using the Connect Outlook Add-in with an Appointment
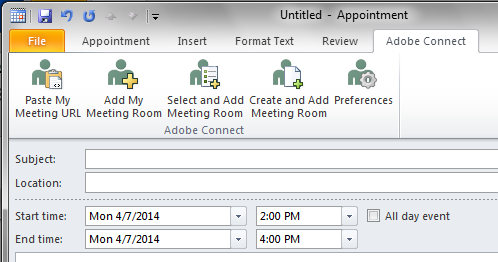
If you have already created an Outlook Appointment in the usual manner, you can click on the ‘Adobe Connect’ tab or toolbar and then populate the appointment from there (Figure 12):
- Paste My Meeting URL – This is simply an automated paste of the default meeting room URL.
- Add My Meeting Room – This will add all of the default room information that you configured earlier (including audio conference etc.).
- Select and Add Meeting Room – The option to populate a chosen meeting room information.
- Create and Add Meeting Room – As noted earlier in this document.
- Preferences – As noted earlier in this document.
Figure 12
Using the Connect Outlook Add-in with an Email
If you have already created an Outlook Email in the usual manner, you can click on the ‘Adobe Connect’ tab or toolbar and then populate the appointment from there (Figure 13):
- Paste My Meeting URL – This is simply an automated paste of the default meeting room URL.
- Preferences – As noted earlier in this document.
Figure 13

Important Note – You can only use the Connect Outlook Add-in to schedule Connect Meeting Rooms. You cannot use the Connect Outlook Add-in to schedule Virtual Classrooms (from the Connect Training module) or Connect Seminar Rooms (scheduled using the Seminar Sessions tool).