Pre-Reading: For more information on the overall voice options in Connect, please see the article here. This will give you an understanding of the phone and VoIP (voice through computer) options in Connect 8 Meetings
The quick summary of terminology used in this article is as follows:
Fully Integrated Conferencing (FIC) – this refers to the phone integration that allows the Meeting Host to control volume, mute etc. for phone conference attendees form the ‘Attendee List Pod’. This also allows participants in the meeting to see who is speaking and allows the option to have the Connect Meeting ‘dial’ the attendee directly. This integration is only available at this time through Meeting One, Intercall and PGi. Note that this the documentation refers to these as ‘Integrated Audio Adapters’
Universal Voice (UV) – this refers to the lesser degree of integration afforded by Connect to any regular toll-free number. This integration allows the Connect Meeting Room to ‘dial-in’ to the conference as a participant and ‘listen’ to the conference. In this case, the control of participant voice is not available form the ‘Attendee List Pod’. By definition, any toll-free number can be used in this case (including the FIC providers if desired)
Voice over Internet Protocol (VoIP) – this refers to voice being transmitted purely through the computer speakers and microphones
Integration of FIC or UV audio into your account or a Meeting Room
This can be a little confusing and the Help Guide is a great resource for instruction on how to integrate audio into your account, but below is a relatively simple guide to get you on the right track. The Help section for phone conferencing can be found here. there are essentially 2 steps in the integration, enabling the audio option, creating a profile for yourself and then linking it to a Meeting Room (or Meeting Rooms)
Fully Integrated Conferencing
Enable the option from the ‘Administration’ tab in Connect, then select ‘Audio Providers’ and then the provider you want from the list. The list will only include the providers who have the FIC capability (see above). Select the provider, ‘Edit’ and then ‘Enable’ and ‘Save’. This provider will now be available to people across your account. Understand that this is not the place you enter the host-codes etc. as each individual will have their own passcode in their personal profile
Now each Meeting Host in your Account can login and go to ‘My Profile’ and then ‘My Audio Profiles’ and select the profile you have enabled, then enter their own personal provider information (See Figure 1 below)
Figure 1

The Meeting Host can now select ‘Include this audio conference with this meeting’ when they make a new Meeting Room or edit an existing room. Users may have multiple audio profiles associated with their account and choose the profile to use with a specific client for example
Universal Voice
This is similar to the FIC option above, but the whole dialling sequence needs to be included in the profile. This is something that seems to work well when the Meeting Host themselves do the work, configuring it as an Administrator seems a little confusing and counter-intuitive to me personally
To build this as an individual use, the user would go to ‘My Profile’ and then ‘My Audio Providers’ and select ‘New Audio Provider’. In the next screen you will complete the fields (see Figure 2 below) and with your personal information
Some points to consider:
- Naming your profile will help you track it and associate it with the right sessions
- The URL is a reference for more information (additional numbers for example)
- The upper field for ‘Dial-in Numbers’ is not a part fo the actual integration per se, it is just the numbers you would want displayed in the Meeting Room upper-right information section
- The lower fields for ‘Dial-in Steps’ represents the actual dial in information and it is typically the ‘Conference Number’ (choose form the pull-down menu), followed by the ‘DTMF’ code (‘Dual Tone Multi-Frequency’) for the Moderator to be able to start the conference
- On occasion you will need to add a few ‘pauses’ into the sequence and that can be achieved by selecting a step and choosing ‘Delay (ms)’ from the menu
- You can test the steps from this field as well to be sure the numbers and codes are correct
Figure 2

As before, The Meeting Host can now select ‘Include this audio conference with this meeting’ when they make a new Meeting Room or edit an existing room
Starting the Conference
Now that you have associated the Conferencing information (FIC or UV) with your Meeting Room, you can enter the room and start the conference. The same process applies to VoIP and we will differentiate each solution as we explain the options in this article (note that the VoIP option will be enabled in all rooms, there is no preparation necessary to configure the Connect Meeting Rooms for VoIP)
Starting FIC and UV – From your Meeting Room, go to the ‘Audio’ menu and click ‘Start Meeting Audio’ (See Figure 3). This will begin either the FIC or the UV conferencing as this has been integrated
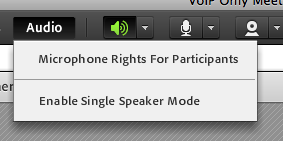
Starting VoIP – In this case the audio is already set to go so you will just see the options in Figure 3a to enable ‘Microphone Rights for Participants’ and ‘Enable Single Speaker Mode’. initially, you probably just want to start your own microphone
Figure 3

Figure 3a
Start options for FIC – If you are using the Fully Integrated Conferencing then another dialogue box will appear immediately asking you how you would like attendees to join your audio conference (See Figure 4). If you select just the ‘Using Phone’ option then the option for participants will be to join using your conference number. There are other options here and we will cover these later in this document
Start options for UV – If you are using UV then the the dialogue box will be the same as FIC (Figure 4)
Figure 4

Now you will be presented with the dialogue to actually join the conference yourself. If you are using FIC or UV then chances are you will be joining via the phone so in that case choose one of the options below
Joining FIC – You can either have the meeting dial your phone *if* you have a direct line or dial-in yourself to the conference. In the former case enter your direct phone number in the ‘Dial-out’ field (Connect will remember your number from previous sessions so you will not do this too often), your phone will ring and you will follow the prompts (See Figure 5). If you choose the option to ‘Dial-in to the Audio Conference via Phone’ then you will be presented with the listing of the dial-in options so that you can manually call into the session, in this case you would then cancel the dialogue (See Figure 5a)
Figure 5

Figure 5a

Joining UV – In this case there is no option to have the Connect Meeting Room dial you directly, this is limited to the FIC integration. You will start the audio as above and then you need to click on the ‘Connect my Audio’ option a the top of the Meeting Room (typically a white phone icon). when you click here you will be presented with a similar dialogue to the options in FIC, but the ‘Dial-out’ option will be greyed out and you would select ‘Dial-in to the Audio Conference via Phone’. The options shown here will represent what you have added in the initial configuration of the audio provider (See Figure 5b)
Figure 5b

Now that your conference is up and running, there are a few places where you can check status and see information about the conference status, all of these are typically found at the top-right of the Meeting Room
Joining VoIP – You will notice on the dialogue options shown in Figure 5, 5a and 5b that the option to join ‘Using Computer’ is not available, this is because to simplify the initial discussion we did not allow that option from the dialogue we saw in Figure 4. If we check the option to ‘Enable Microphone right for Participants’ then the ‘Using Computer’ option will be available
Let’s cycle-back quickly and turn that on, just check the option to ‘Enable microphone rights for participants’ when you start the Meeting Audio (See Figure 4a below) and the option to use the computer (VoIP) will become available (Figure 5c below)
Figure 4a

Figure 5c

Once you have selected the option to use your computer for the audio, you can select the microphone icon at the top of the Meeting Room to connect your computer into the audio conference for the session (See Figure 5d)
Figure 5d

So now we can just take a few minutes to see exactly what is happening in our Meeting Room and how our conference is working
If you have enabled FIC or US you will be able to gather information from the top-right of the Meeting Room, information below
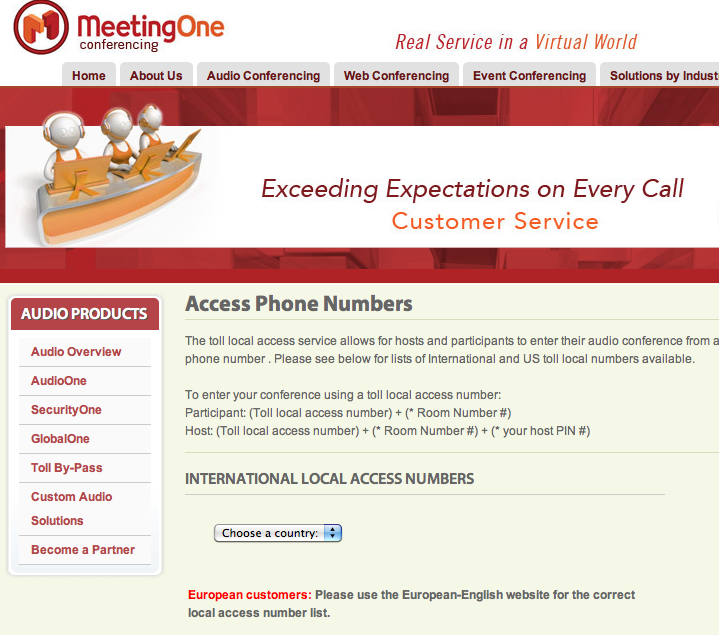
In-Meeting Information for FIC – click on the small ‘i‘ to the top-right of the Meeting Room and you will have the option to get more information. The expanded dialogue can be seen in Figure 6 and the content is determined in this case by the pre-configured information from the FIC audio provider. If you click on the ‘More dial-in information’ option you will be taken to the support web-page for the provider (see Figure 6a for the example page related to the Meeting One FIC implementation)
Figure 6

Figure 6a
In-Meeting Information for UV – This is again similar to the information seen for the FIC implementation, but as the integration is less sophisticated, the information is driven purely by what you have entered in the initial setup of the audio provider. The example dialogue for more information (under the ‘i‘ at the top-right of the Meeting Room) can be seen in Figure 6b below
Figure 6b

In-Meeting Information for VoIP – In this case there is no information shown at the top-right of the Meeting Room, the indication of your broadcast is that the microphone icon is green and flashing that audio is being broadcast
‘Attendee List Pod’ FIC and VoIP – During your session a great indicator of the overall audio in place for attendees using FIC and VoIP is given by the ‘Attendee List Pod’. In this case FIC attendees are represented with a phone icon beside their name that flashes when they speak (See Figure 7), similarly a VoIP attendee has a microphone beside their name that flashes in the same manner when they are speaking (See Figure 7a)
‘Attendee List Pod’ UV – Attendees using UV are not represented in the ‘Attendee List Pod’ other than as regular attendees in the Connect Meeting Room, there is no way for Connect to add audio detail in the case of UV as there is no direct connection between the conference and the Connect Meeting Room for each individual attendee. The Connect Meeting Room is essentially just ‘dialling into’ the conference call as a participant and then ‘listening’ and ‘broadcasting’ into the conference call. There is no sophisticated link between the conference call participants and the Connect Meeting Room
Figure 7

Figure 7a

The Participant and Presenter Experience
The experience of the Participants, Presenters and other Hosts in your Meeting Room will closely mirror your own experience in the cases above, with the exception that of course they cannot configure the audio for the session or change the options. Once you have decided on the option you wish to use and started the audio, the attendees will be presented with the dialogue box to join the session as you have seen in Figure 5, 5a, 5b and 5c and they will have the options you chose
This is a good time to look at the possible configurations for audio in the room overall, and of course consequently the options that will be presented to your attendees. We have already discussed this a little in Figure 4 (above), but we will look at all of the possible option in the notes below
Phone Conference Only using FIC and UV – these essentially function in the same way in that you are choosing to use the integrated phone conferencing and asking Connect to start the conference as a part of your Meeting Room. In this case you would just check the ‘Using Phone’ option in the ‘Start Meeting Audio’ dialogue (See Figure 8)
The other attendees will have the option to join by dialling themselves from the Meeting Room directly (FIC only) or dialling into the conference manually using their phone (FIC and UV)
‘Non Meeting Room’ attendees can join by just calling into the conference call number in the traditional manner, they would just not be in the Connect Meeting Room seeing the content there
Note – we will be covering the audio in the Connect Mobile client in another article
Figure 8
VoIP Only – In this case there is no configuration form the ‘Start Meeting Audio’ dialogue, you would just start the audio from the ‘Audio’ menu (See Figures 3 and 3a above)
Phone Conference and also Broadcast VoIP using FIC and UV – In this case we want to rebroadcast the phone conference audio to the people on their computers. This is a common use-case as you are saving a lot of money in phone charges. You might use this if you had your meeting presenters dialling in to a phone conference (as many ‘guest’ presenters are more comfortable with their phone headset), you would then have Connect rebroadcast the conference audio to all of te attendees on their computer. You would just pay for the presenter phone lines (maybe 2 or 3 presenters) and the VoIP broadcast is essentially free (maybe hundreds of attendees)
To configure this ‘one-way’ rebroadcast of the phone conference you can select the ‘Start broadcasting telephony audio’ option when you initially start the meeting audio (See Figure 8a below). In this case the phone audio will be sent to the speakers of the participant simultaneously with the phone conference.
Note – there will almost always be a delay between the phone audio and the VoIP audio feed. It should only be a split second, but it will be noticeable as these are using different transmission methods
To start rebroadcasting to VoIP during the session then you can either select the ‘Audio’ menu and ‘Change Meeting Audio Mode’ (Figure 8b) then you can follow the steps above (Figure 8a) or you can shorten this process if the conference is already running by selecting the ‘Audio’ menu and then ‘Start Audio Broadcast’ (Figure 8c below)
Figure 8a

Figure 8b
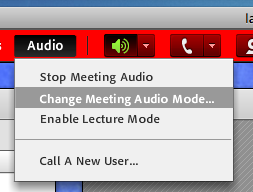
Figure 8c

Note – when you are testing this be aware that you really need to consider some of the relatively smart things that Connect will do with audio. If you are using your computer and the phone to broadcast, you will not hear the audio from your meeting speakers because Connect knows to mute your side to avoid feedback and echo (See Figure 8d below). Test this with another attendee in another location to be sure you are reproducing the real-life circumstance, otherwise the two meeting feeds can ‘listen’ to each other and you will cause echos and feedback. Ideally, test this using headphones if indeed you have to test everything in the same location
Figure 8d

You can un-mute and adjust your speakers from the speaker icon to the right of the ‘Audio’ menu (See Figure 8e below)
Figure 8e

Phone Conference and also Broadcast VoIP using FIC and UV plus allow VoIP participants to speak – OK, this is putting everything together and it is considerably more complex to explain than it is to actually do! To enable this requires just a checkbox, but we will delve a little deeper here to be sure we understand what is happening
So far we have used a conference call and rebroadcast that to VoIP (computer speakers or headphones). Now we will also allow the people using computers only to speak as well. We covered this a little in Figure 4a, but now we are pulling it together in more detail
We configure this again from the ‘Audio’ menu and the ‘change Meeting Audio Mode’ option (Figure 8b above). In the ‘Change Meeting Audio Mode’ dialogue we check the option to ‘Enable microphone right for participants’ and this will give computer-only attendees the option to join the conference using their microphones (See Figure 5c and 5d above)
In this scenario, quite simply ‘everyone can hear everyone’. The phone conference audio is rebroadcast to the VoIP audio and the VoIP audio is rebroadcast to the phone conference audio. It’s as simple as that.
Best Practice Note for VoIP – OK, now all of the reasons you don’t really want to do this. it is the equivalent of giving 300 people in an auditorium a microphone and letting them all talk, eat chips and cough at the same time…it is just not a good best practice. This is great for smaller groups where you would have strong interaction and collaboration (similar to sitting around a boardroom table) but not something you would want for a theater-style presentation.
Also remember that even if a person mutes their microphone or says nothing, they are still essentially sending ‘silence’ and this is unnecessary use of bandwidth. In the case of phone conference and VoIP it is appropriate to follow the best practices you would use in a non-virtual Meeting Room environment.
Instead of giving microphone rights to everyone on VoIP, use the option from the ‘Attendee List Pod’ to ‘Enable Audio’ by mousing over the name of the attendee and selecting the option shown in Figure 9 (note that if you have not selected the option of ‘Using Computers’ from the ‘Change Meeting Audio Mode’ dialogue then this mouse-over option will not be available to you)
Figure 9

Best Practice note for FIC and UV – In truth, this is also true of pure phone conferencing in that allowing everyone to speak is not a great idea, so you can use the option to mute the attendee audio from your Connect Meeting Room (in the case of FIC) or in the case of FIC and UV you can use the regular conference line codes (whatever the ‘mute all participants’ option is for your conference provider). When you have a lot of participants it is not really that beneficial to have the FIC in place as you are really using it more like UV integration (one-to-many). Be aware that you can configure a second profile for your FIC numbers as UV, just follow the instruction for the UV profile creation in Figure 2 above
Best Practice using UV Moderated Conference Calls – FIC is not applicable in these cases as you are going to use a moderator from the phone provider to mute, open lines for questions etc. and the FIC integration is redundant. In this case you would use your UV profile and let the moderator manage the question as you would normally, then your Connect Meeting Room just ‘listens-in’ on the moderated questions. The ability to rebroadcast VoIP or to ask questions over VoIP (using the ‘Attendee List Pod’ to enable microphone rights) is still applicable. It is worth making sure the moderator understands what you are doing though prior to your call
Best Practice using the Q&A Pod in your Meeting Room – Using the ‘Q&A Pod’ in your Connect Meeting Room is complimentary to any of the options for voice we are discussing here. You can answer questions purely by text or you can just read and answer the questions verbally. This offers the added benefit of ‘cherry-picking’ for the presenters of course
Now that we have covered some of the overall conferencing options, we can look at some of the lesser known options and edge cases in Connect audio
Single Speaker Mode in VoIP – This is a great feature for VoIP and incredibly practical from both the technology and the perspective of a best practice. This is essentially the option to make the Connect MEeting Room VoIP audio operate like a walkie-talkie radio, where only one person can speak at a time and by pushing the ‘talk’ button
When you have enabled ‘Microphone Right for Participants’ from the ‘Audio’ menu, you will also see an option to ‘Enable Single Speaker Mode’ (See Figure 10 below). At this time the microphone icon will have a small asterisk (*) added to denote that ‘Single Speaker Mode’ is enabled (See Figure 10a).
When one of the microphone enabled attendees clicks the microphone to talk, the microphone is greyed out for all other participants (Figure 10b) and it will not appear available again until the speaker releases the microphone (un-checks the microphone on their side). Of course on occasion the Meeting Host will want to take back the microphone rights from the speaker ‘by force’, fortunately in this case the host would use the option to ‘Release Mic from Speaker’ in the ‘Audio’ menu (Figure 10c)
Figure 10

Figure 10a
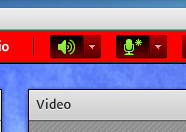
Figure 10b

Figure 10c

Connect Breakout Rooms and Audio
The very extensive Breakout Room capabilities in Connect allow you to take groups of attendees into separate room within the main Connect Meeting Room. The most impressive feature here is not just the capability to take participants into separate meeting spaces, but the ability to dynamically separate the audio into separate sub-conferences that sync to the Breakout Rooms
As with some of the examples above, it is actually far easier to do than to explain in detail, but as with many other features here, ‘it just works’
There are some fundamental differences in the manner in which audio functions here though, so I have separated the functionality by integration method below
Breakout Room Audio and FIC – This really is pretty cool. If you are using the FIC you need each participant to either connect using the ‘dial-out’ feature or you need to manually ‘merge’ their audio with their Meeting Room ‘presence’. The reason you need to be diligent here is that the conference for the person will need to move with the attendee and you need to be sure Connect and the FIC ‘knows’ who is using what line to get this right.
I am not intending to use this as a full tutorial on the integrated conferencing operation, but this is kindof important for Breakout Rooms so here is the short version.
If an attendee uses the ‘dial-out’ function then you are set, the line will be associated with their Meeting Room ‘presence’. If however the attendee dials into the conference call separately form the meeting login (for example they do not have a direct line) then you will need to manually associate the phone line with the attendee. The most simple method I use is to do a roll call for attendees who appear to be ‘orphaned’ from a phone icon in the ‘Attendee List Pod’, when the person replies, look to see who is speaking and drag that line to the meeting attendee…they are now merged
Ideally, have them dial from within the meeting and save yourself a fair amount of time getting everyone set up for the Breakout Rooms
When you assign people to the Breakout Rooms form the ‘Attendee List Pod’, their phone lines will go with them, when you click the ‘Start Breakouts’ option the attendees will be placed into a sub-conference for that room. Depending on your provider and your settings, they will also hear a message to that effect
If you reassign an attendee to another Breakout Room (drag them to another room for example int he ‘Attendee List Pod’ then they will be moved also to the appropriate sub-conference automatically
As a Host you can ‘jump’ between Breakout Rooms as you see fit and you will be moving between sub-conferences at the same time
Breakout Room Audio and VoIP – This functions in the same manner as the FIC implementation. When a Breakout Room is started, the VoIP will also split into the appropriate sub-conferences. As VoIP is always associated with the attendee, there is not need to worry about manually associating attendee and voice feeds
Otherwise the functionality is essentially identical to the FIC implementation
Breakout Room Audio and UV – There is no automated sub-conferencing capability in the UV implementation. In this case you will need to set up sub-conferences beforehand, or have separate phone conference numbers. You would then ask attendees to hang-up from the main conference, start Breakout Rooms and then ask them to use the conference information you have added to each Breakout Room (typically in the ‘Notes Pod’)
When you move between the Breakout Rooms as a Host you will need to manually dial into the phone conference for each Breakout Room
Hybrid (FIC and VoIP) Meetings and Breakout Rooms – At this time, there is no capability for managing both FIC and VoIP in a sub-conference, you cannot use a ‘merged’ audio setup in a Breakout Room as you would in the main Meeting Room. If you start Breakout Rooms with both FIC and VoIP in use, the attendees on VoIP will see a message telling them to use a dial-in option to the phone conference rather than VoIP (See Figure 11 below)
Figure 11

It is worth remembering that when the Breakout Rooms are in progress you can also maintain the main Meeting Room audio conference and have participants join you there if you want to coach them or help them with an issue. This is particularly useful if you need to help a facilitator for example without letting the Breakout Room attendees see or hear what is happening. Just move the facilitator (or facilitators) into the main Meeting Room, meet with them (the regular attendees are still working away in their Breakout Rooms) and then drop the facilitators back into their respective rooms
Again, in essence, ‘it just works’
If you have items you would want added to this article, please send a note to Ian Justin directly at ‘[email protected]’