The integration between Adobe Connect and Captivate Prime is not particularly deep at all at the time of writing this post (February 2019). This post is intended to give insight into what can be achieved today.
I would expect this integration to become significantly more sophisticated as the Adobe Connect product now resides in the Captivate Prime business unit.
Scope
In this exercise, we will add a Connect room to a Captivate course, have a learner self-register for the course and attend the virtual class. We will look at the communication, experience of the learner, author and manager and also outline some fo the limitations in the current integration.
Process
Build a Course in Captivate Prime – Login to Captivate Prime as an author and build a new course (if you are adding a Connect Virtual Classroom to an existing course then you can skip this part).
Note on Adobe Connect Licenses – I am using the phrase ‘Virtual Classroom’ as this is the terminology used in Captivate Prime, it is important to note that you can only use the current integration to invoke and use rooms from a meetings license (Named Host or Concurrrent Participant license). You cannot fully integrate a Named Webinar Manager, Shared Webinar Manager or Named Virtual Classroom Manager license at this time.
If you with to integrate a room other than from the meetings license, you will need to simply offer the link to the room as a part of the course.
Add a Virtual Classroom to the Course – In the Captivate Prime course, select ‘Add Modules’ and then complete the Virtual Classroom dialogue (figures 1 & 2 below).
‘Title’ – The name of the Virtual Classroom session. Note that in Connect this room will have a long suffix of identifying numbers from Captivate Prime. The room will be built in the ‘Meetings’ tab and under ’Shared Meetings’>’prime-meetings’.
Best Practice – Contrary to the Adobe Connect paradigm, this room is really used only once so the title can relate to the Virtual Classroom session rather than a room used for multiple sessions. A name of ‘On-boarding Session’ would therefore be appropriate.
‘Description’ – It is worth adding a description here as this will appear in the Captivate Prime course against the module. Again this is somewhat contrary to the regular Adobe Connect paradigm or reusable rooms.
‘Timezone’ – This should default to the timezone you have set up for your Captivate Prime account.
‘Start Date’/‘End Date’/‘Start Time’/‘End Time’ – This is important at this will both inform the learner of the time for the session and it will determine when the room will be open and available for learners to attend.
‘Seat Limit’ – You can limit the number of enrolled learners to maintain the quality of the class if desired. Remember that this is not a reflection of your meeting license in Adobe Connect, this is limiting enrolled learners.
‘Conferencing System’ – In our case we will of course select ‘Adobe Connect’.
Note on Adobe Connect/Captivate Prime Integration – If at this stage you see an error message that that your integration is not in place, either login as an administrator to Captivate Prime and set up the integration or contact your Captivate Prime administrator to set this up for you.
‘Template’ – You will see a list of templates in your Connect account that you can ‘clone’ to build the Virtual Classroom.
Note on Templates – These are the templates in your ‘Shared Templates’ folder in your Connect account so you will need to move templates there if you want to use them to build new Virtual Classrooms that are already pre-populated with content, layouts etc.
‘Instructors’ – You will be able to type in the name of the instructor and select it from the list. This person will be added to the new Virtual Classroom as a ‘Host’. You can add more than one instructor/host.
‘Completion Criteria’ – This is based purely on the time the learner spends in the session. If the session is 1 hour and the ‘completion Criteria’ is set to 50% the learner needs to be in the class for 30 minutes to gain a pass/completed status for this module.
‘Do you want to add a quiz score for this module?’ – Pending…At the time of writing this post I have not researched this feature.
Click ‘Add’ to complete the module.
Figure 1
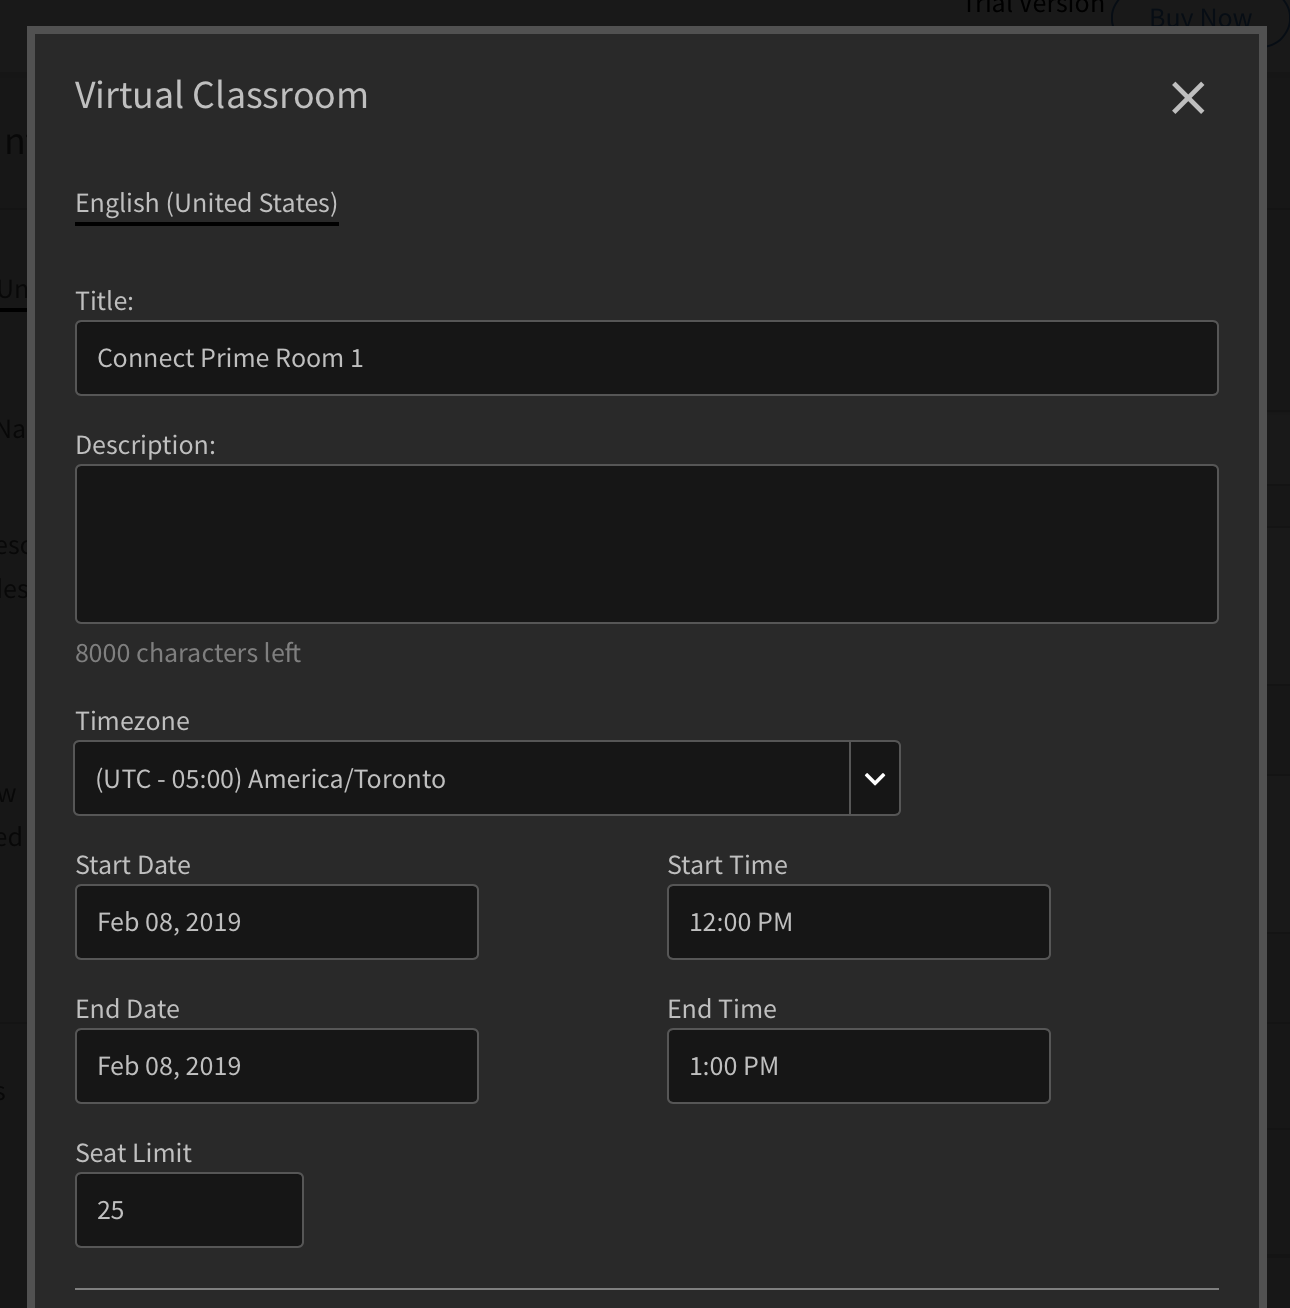
Figure 2

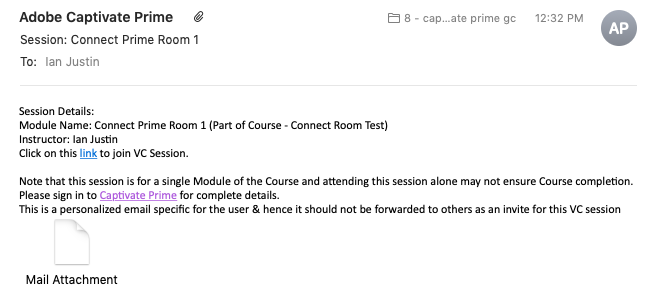
Instructor Emails – At this time the instructor for the course will receive some emails (shown below in figures 3 & 4). The email in figure 3 informs the instructor that they have been added as an instructor for the course. The email shown in figure 4 includes a calendar appointment for the session and the details of the session.
Note on Connect Licenses – The instructor(s) will need a login to the Connect account and have meeting host rights (be a member of the ‘Meeting hosts’ group) in order to open the Connect room.
Best Practice on Adding the Session to your Calendar – The calendar appointment does not appear to include the actual room details so it makes sense to copy and paste the body of the email into the appointment.
Figure 3
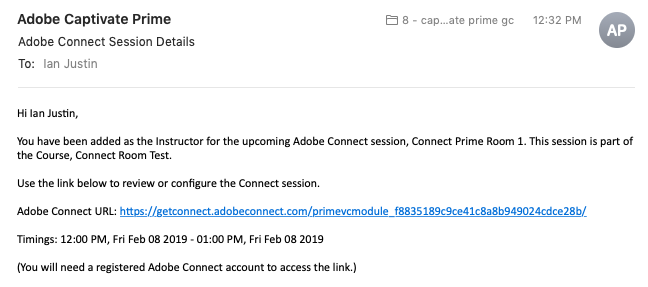
Figure 4
The Learner Perspective
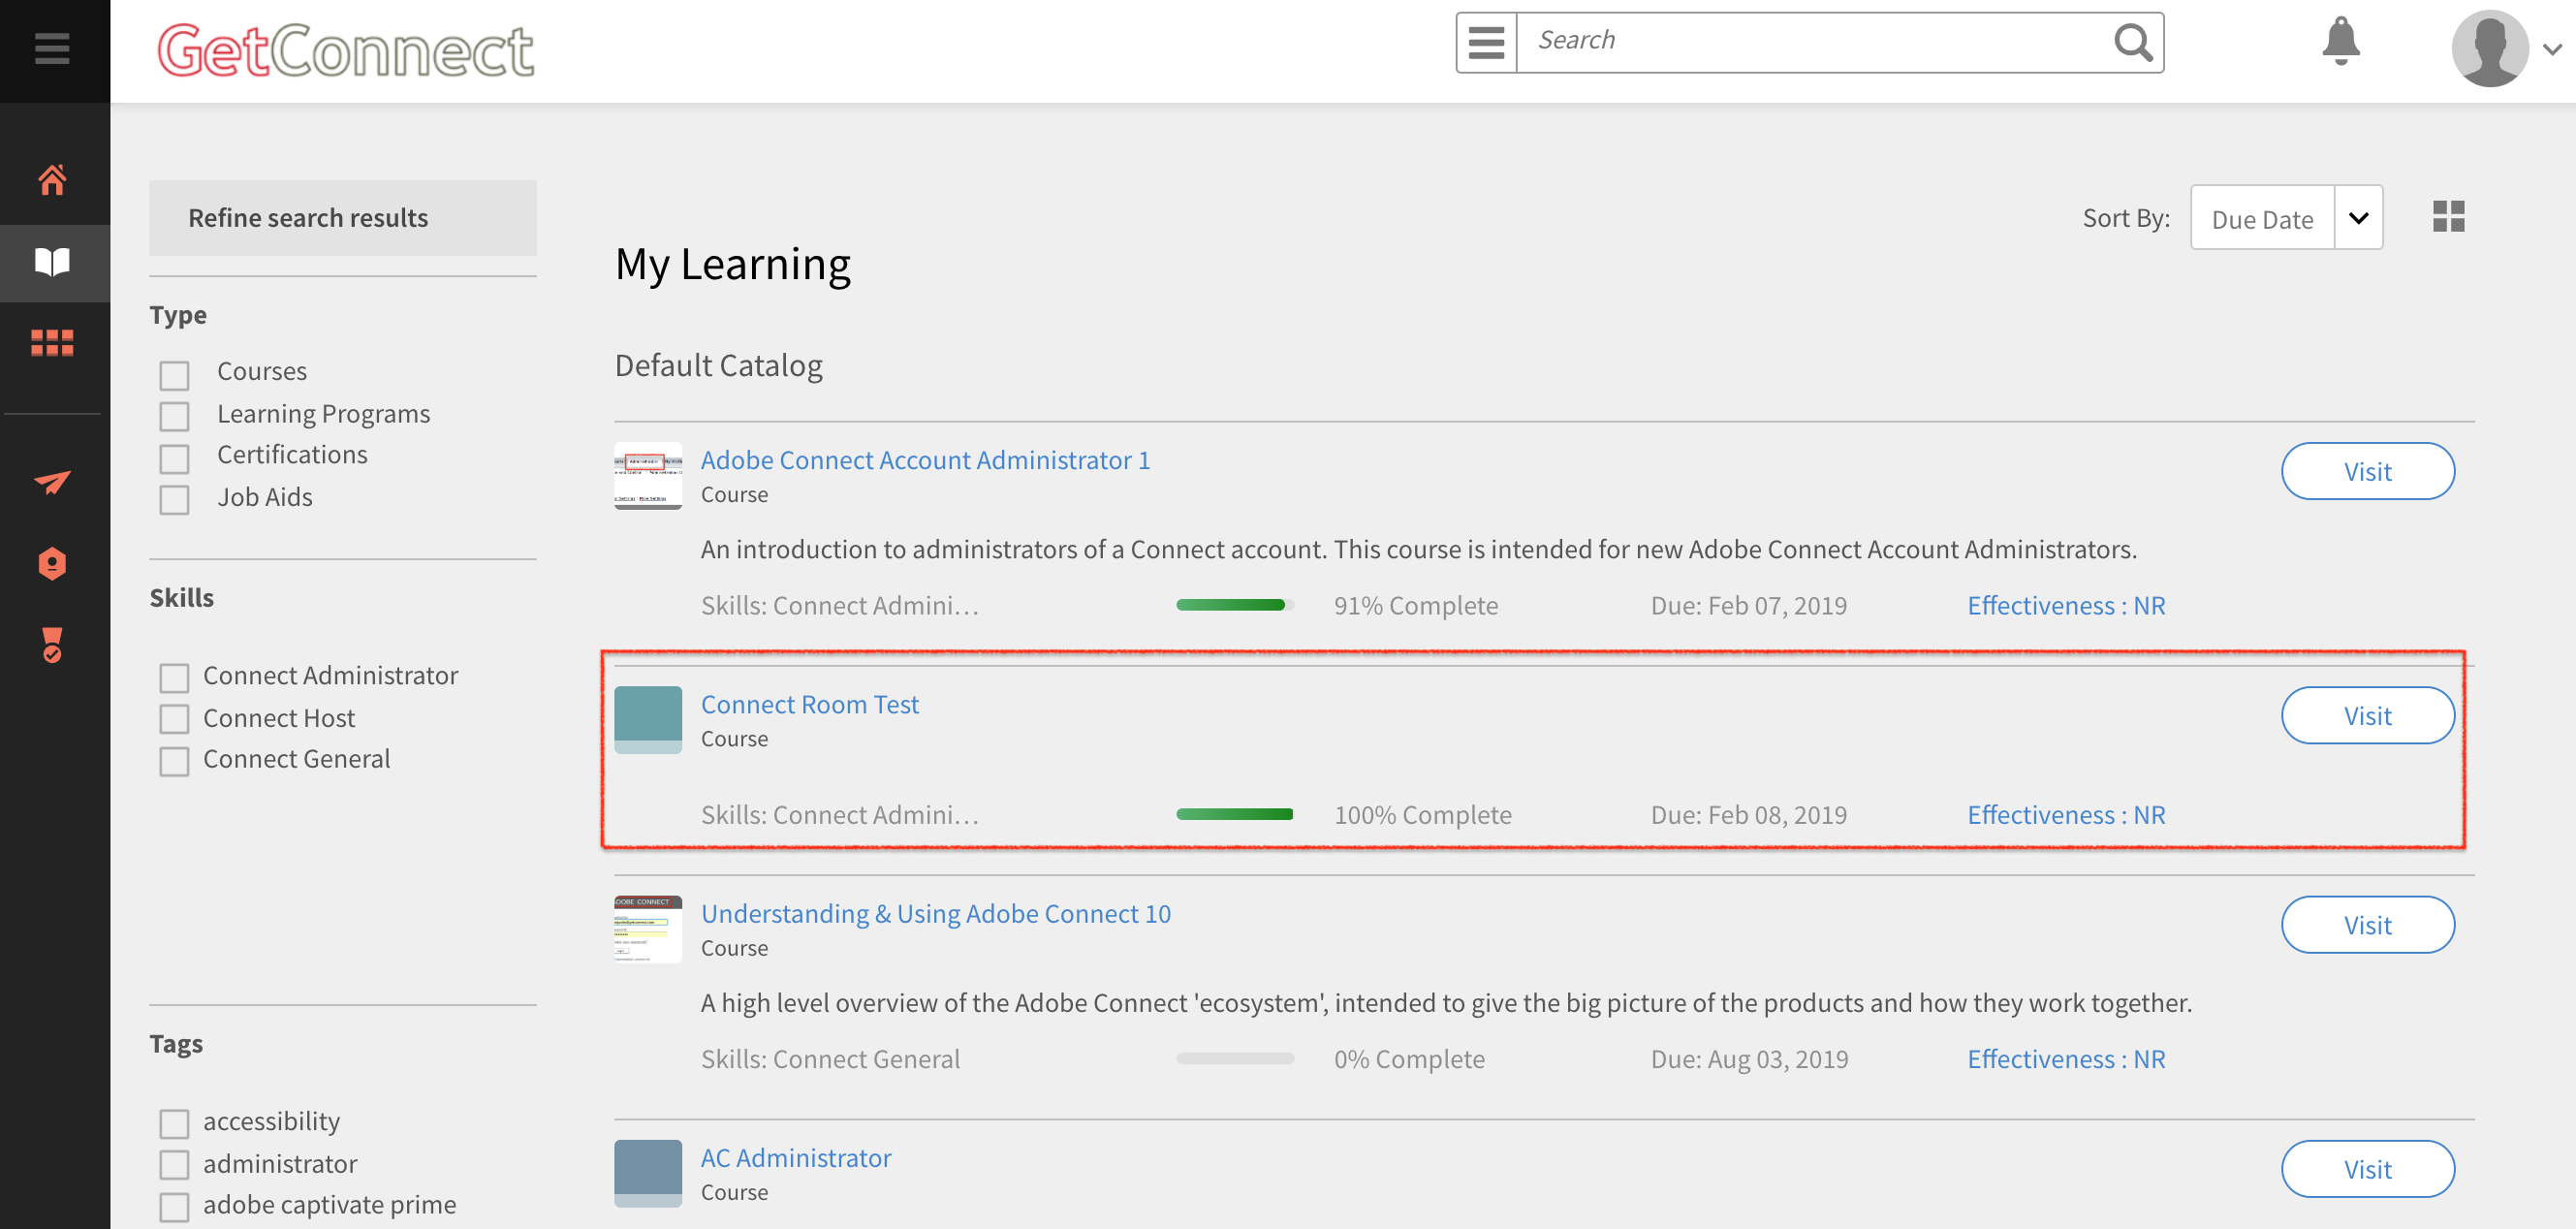
In this example, I chose to allow learners to ‘Self Enroll’ so the next piece is to see the learner experience. I logged into Captivate Prime as Luke Sywalker and under his ‘Catalogue’ there is the course ‘Connect Room Test’. If Luke is interested he can click to learn some more about the course (‘Explore’) and then ‘Enroll’. The course will not be added to Luke’s ‘My Learning’ area.
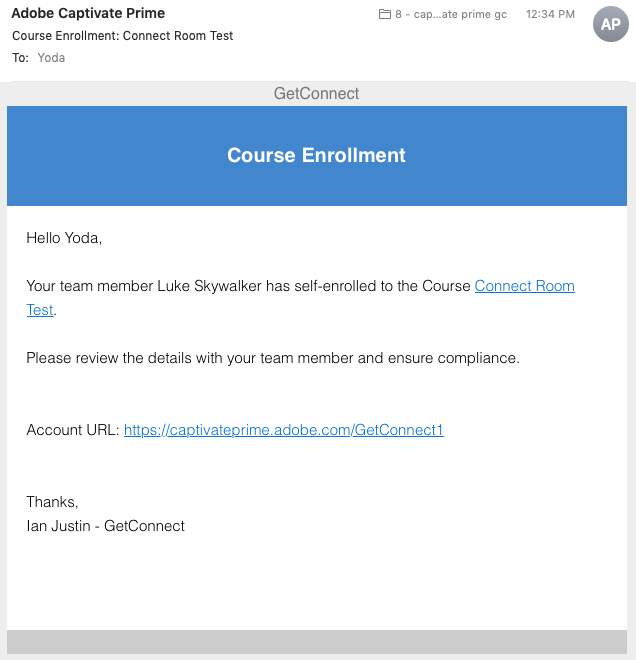
When Luke unrolls for the course, some emails are sent (based on the settings designed by the author of the course). In tis example there is an email sent to Luke confirming that he has enrolled in the course (figure 5) and another sent to Luke’s manager (Yoda) to inform him that Luke is enrolled in the course/class (figure 6).
Figure 5
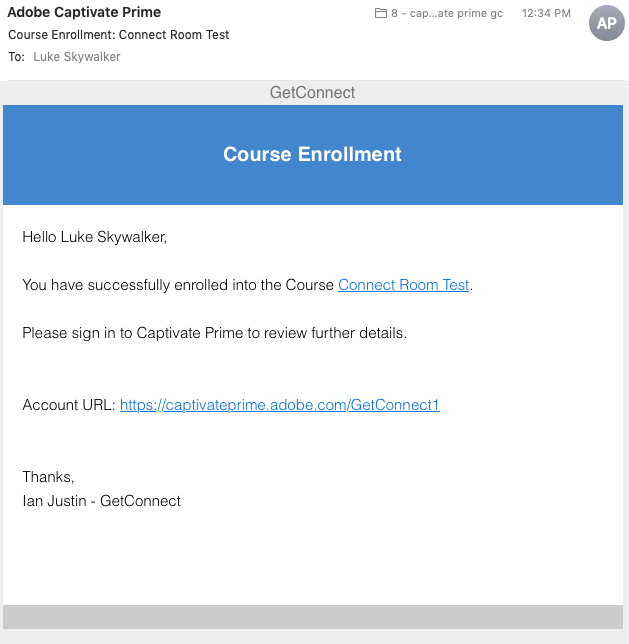
Figure 6
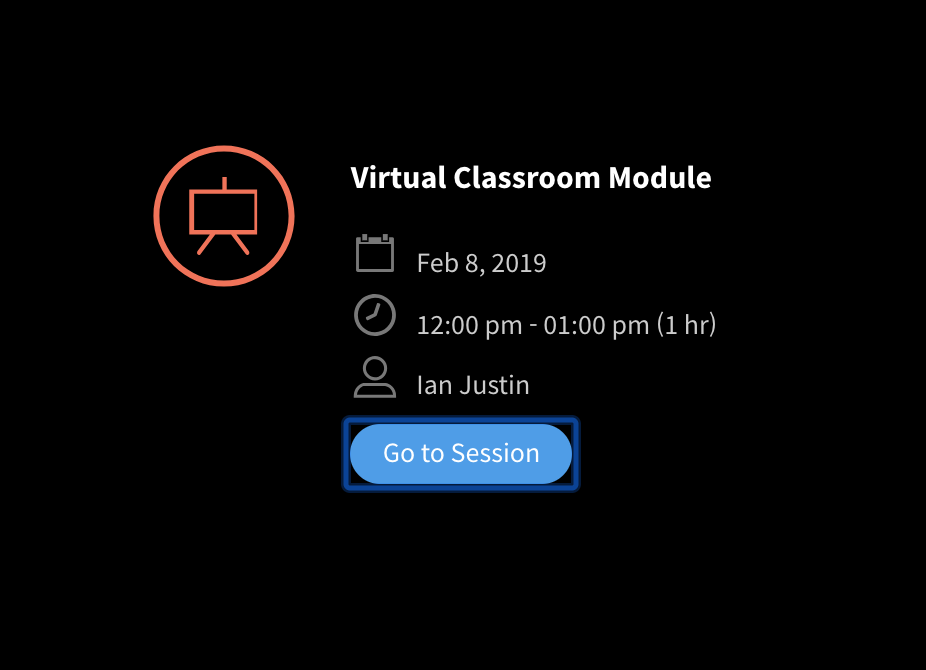
When Luke click to take the module he is presented with a page that will either tell him that the class is scheduled for the set time and it will open 15 minutes before the session, or if he is joining at the appropriate time he will see the option to join the session as shown in figure 7 below.
The instructor (in this case Ian Justin) will need to be in the room and let Luke in, again based on the rules you set in your Connect room.
Figure 7
Once in the room it is just a regular Connect session. Luke is seen in the Attendee List Pod in this case as ‘Luke Skywalker _’ I have not delved deeply in the way the naming is set, but it works as expected (figure 8). You can see the naming convention for tracking (I assume) that is given to Luke in the ‘Meeting’>’Reports’>’By Attendees’ section on the Connect account and in the room (figure 9).
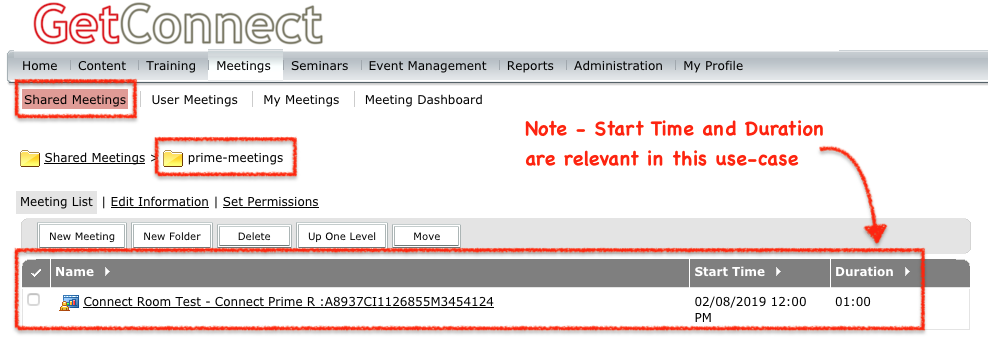
You can see the location and naming of the Virtual Classroom (in the ‘Meetings’ tab) in figure 10 below.
Figure 8
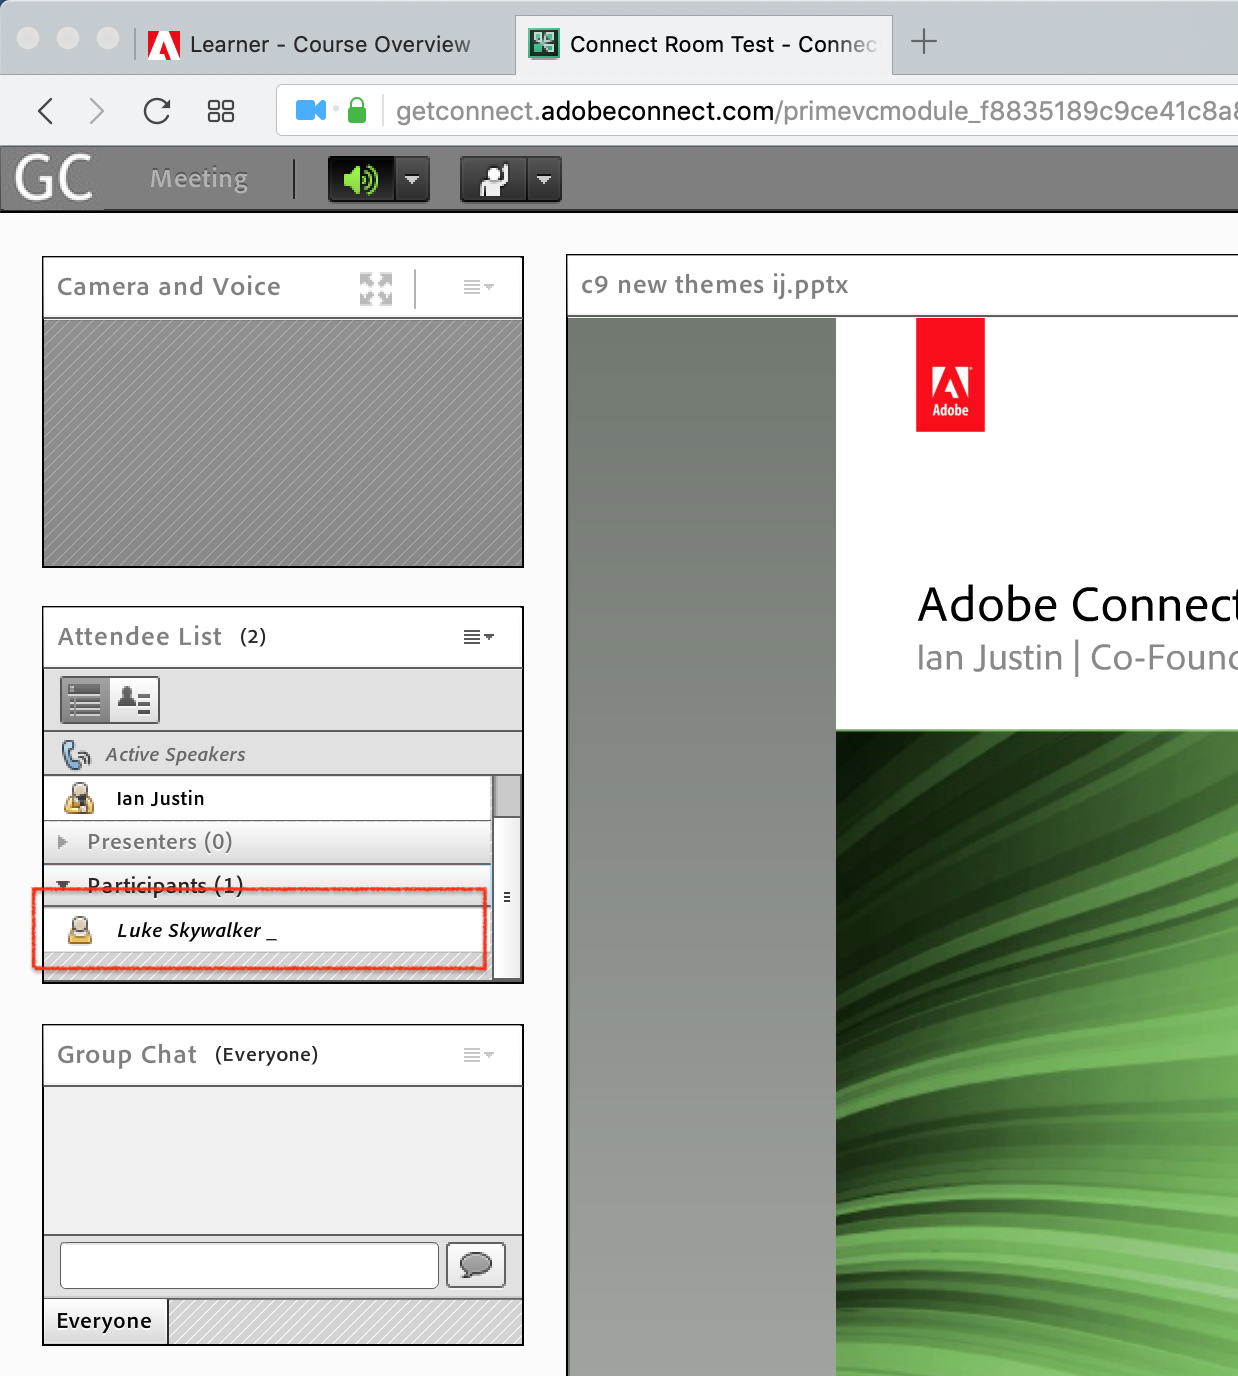
Figure 9
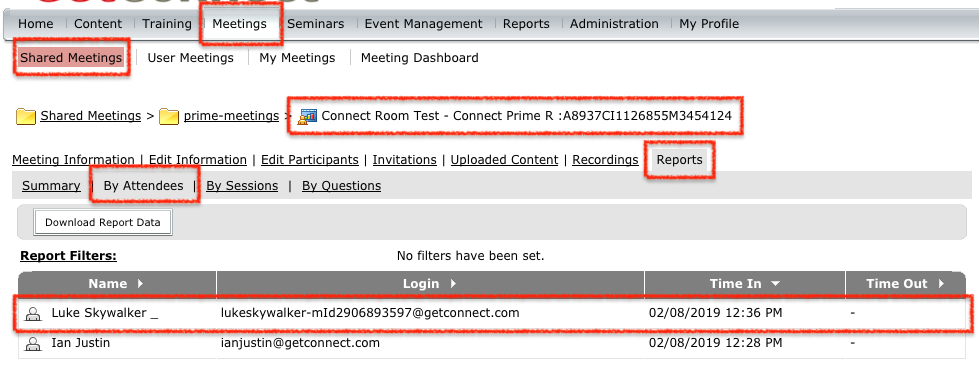
Figure 10
Tracking and Credits
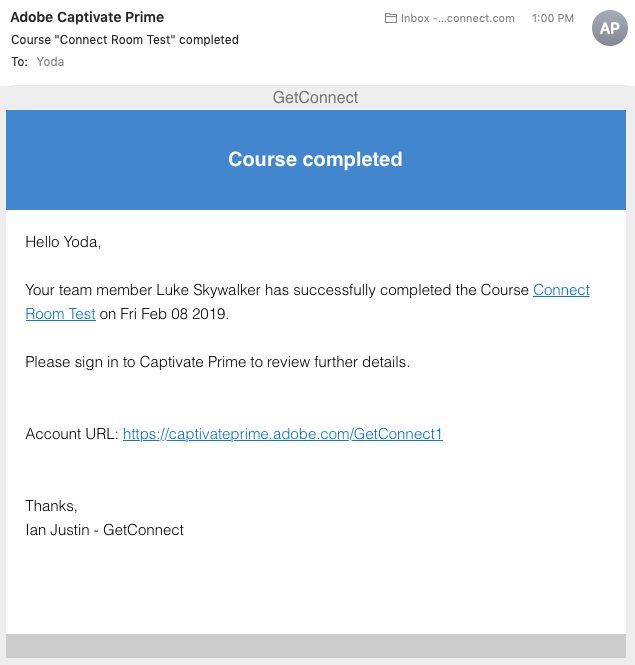
In this example, the requirement to pass the module was to attend for 50% of the class time, the class was an hour so after 30 minutes Luke had attained a pass. When Luke passed the module/course an email was again sent to Luke to confirm his completion (figure 11) and to his manager as well to confirm the completion (figure 12).
Figure 11
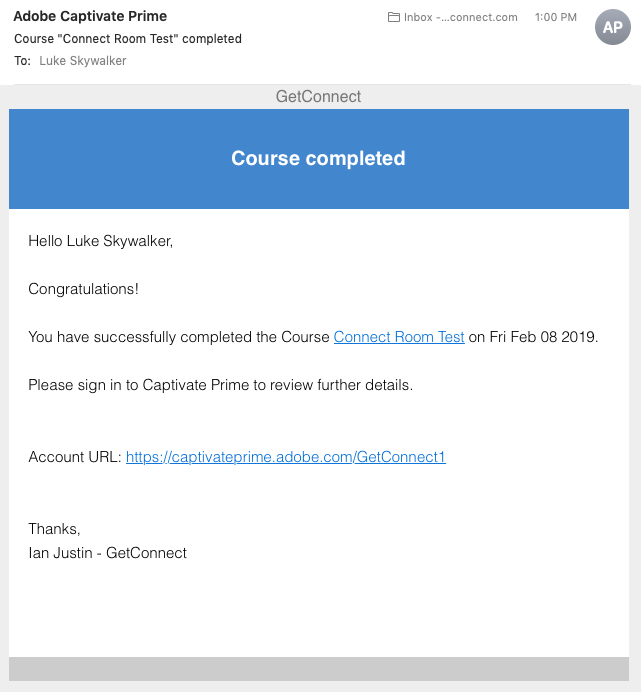
Figure 12
The managers for the course can see the passing grade in the reporting on learners for the course (figure 13). Luke can see the completion of the course under his ‘My Learning’ section (figure 14).
Figure 13
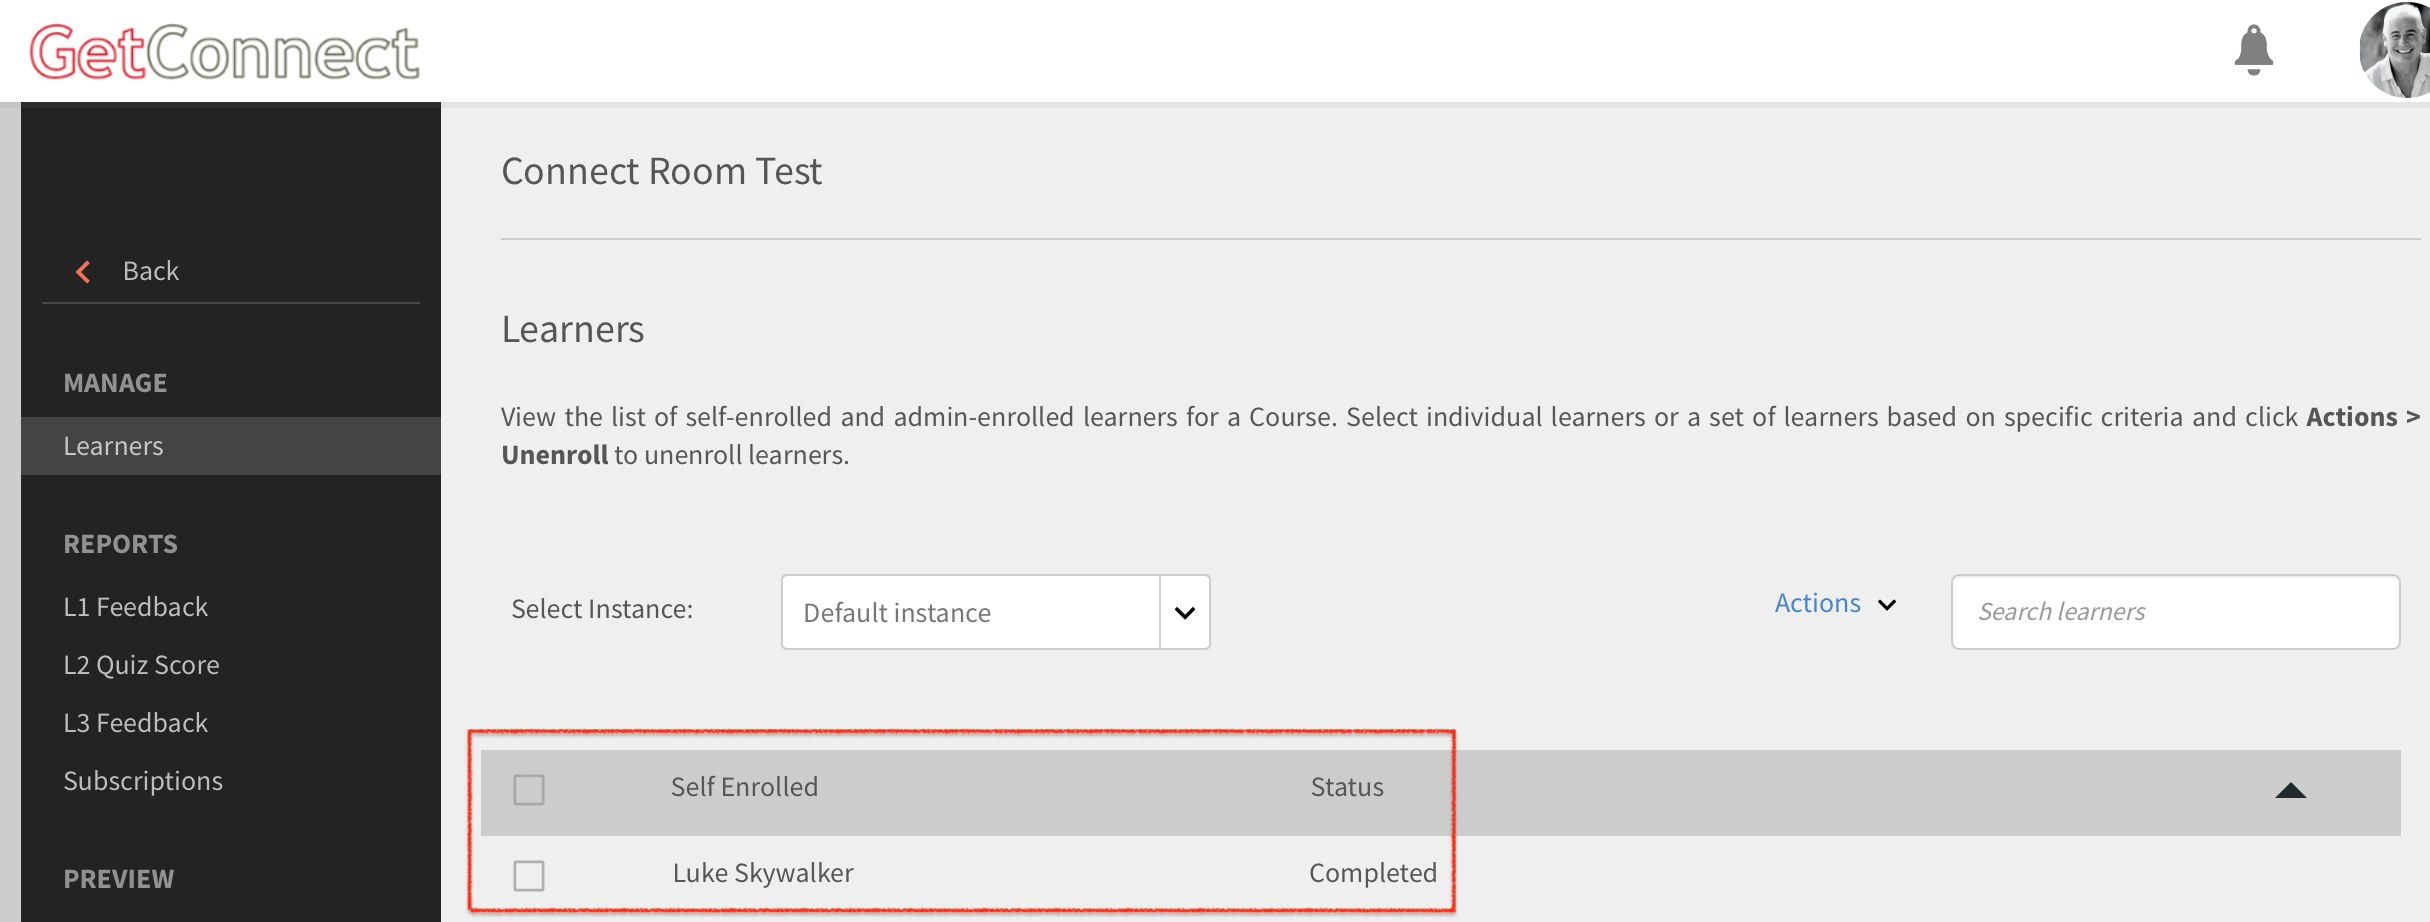
Figure 14
To truly test whether the learner has retained the lessons in the Virtual Classroom session, you would add a follow-up quiz from Adobe Captivate or Adobe Presenter as the next module in the course and this would be a requirement for the completion of the course overall.
This is pretty much the process as I see it today. As the integration evolves I will add more detail to this post.