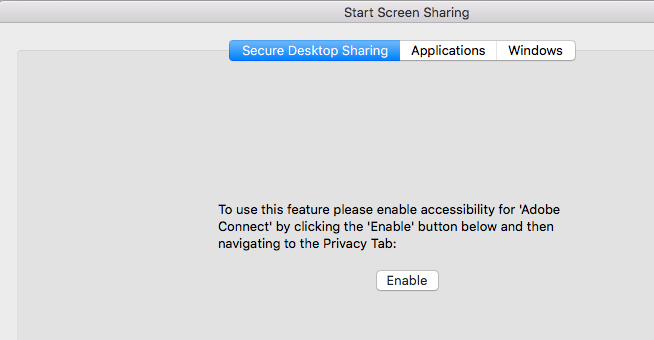
If you install or update the Adobe Connect Desktop App. on Mac OS you may see a message that you need to enable accessibility for Adobe Connect (Figure 1 below). This should be self-explanatory and you will only need to do this once for the new installation, but the process is outlined below as well.
Figure 1
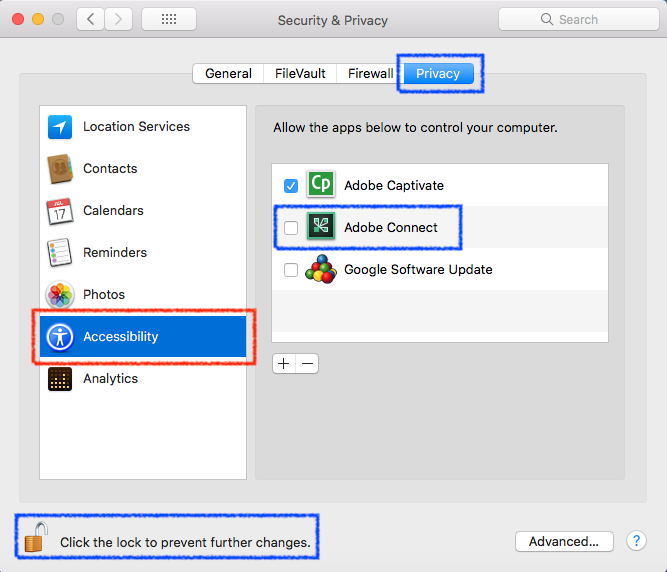
When you click on the ‘Enable’ option it should open your ‘Preferences’ pane at ‘Security & Privacy’. You will need to click on the lock to the bottom-left corner in order to edit the preferences and then choose the ‘Privacy’ option , then choose ‘Accessibility’ from the left-column. Adobe Connect should appear on the right-side as an application requesting control of your computer (screen sharing). See Figure 2 below.
Figure 2
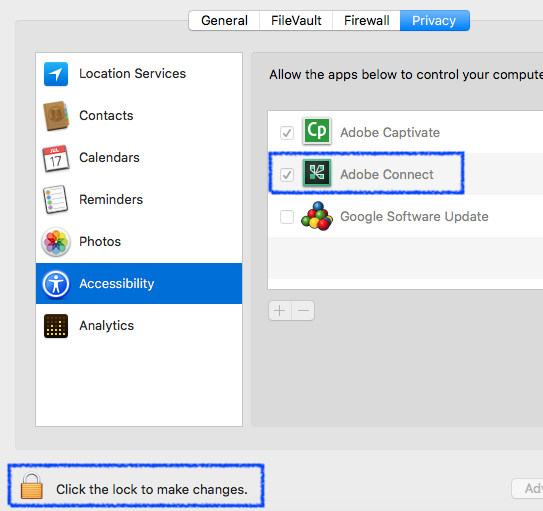
Ensure that the check-box to the left of the ‘Adobe Connect’ app is selected and then click the lock to stop editing and close the Preferences pane (Figure 3).
Figure 3
Note – My experience as of April 23rd 2018 is that when I installed and tested the beta version of the 64-bit Mac OS Desktop App. (here), the first time you attempt a screen share in Connect there is a delay of maybe 30 seconds before the sharing choice pane appears. This happens the first time I entered the room. After the first delayed screen share the subsequent screen shares were timely and OK. I went back to the older version of the Desktop App. for the Mac (here).
Note – If you ever update the Desktop App. I would strongly suggest you test it prior to a full Connect meeting.