Connect is an incredibly deep tool with very sophisticated functionality, but you do not need to know everything on day-one and you may just want to get started ASAP. This Blog Post (and the associated linked posts) are intended to get you up and using your Connect licenses in a hurry.
As you become more confident, you can start to add the deeper features and practices to your sessions.
Note on terminology – The name of the module we can discussing here is ‘Connect Events’, I suggest you think of this as ‘Connect Registration’ and this will help you think through the processes. An ‘event’ can be confused with the room or the meeting, A ‘registration’ is a layer we can put in front meetings, webinars, white papers, recordings or whatever. We are discussing ‘registration’ tools here.
Important Prerequisite – You need to create the room or content for your registration *before* you create your event as the registration will ‘point’ to your room or content.
Scope of this Blog Post
This post covers the ‘Connect Events’ registration functionality. Access to the registration tools can be given in one or two ways:
If you have access to any of these licenses you will also have access to the Connect Events registration tools:
- Named Webinar Manager (NWM), Shared Webinar Manager (SWM) or Named Virtual Classroom Manager (NVCM) licenses. There are separate blog posts that explain how to gain access these licenses here.
- ‘Connect Events’ licenses on their own and not the licenses above. See below for instructions on how to assign your Connect Events licenses.
These instructions assume you are the account Administrator. If you are not the account Administrator, go to step #3 as your Connect Events license will have already been assigned to you by the account Administrator.
1 – Log into your account – Use your email and password from Adobe.
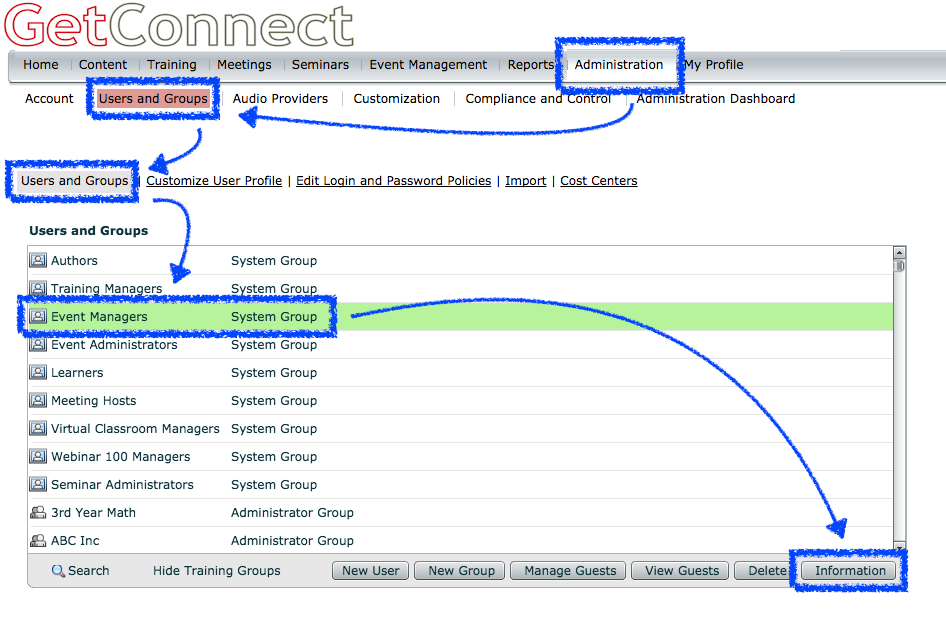
2 – Assign your Connect Events license(s) – Go to the ‘Administration’ tab, then ‘Users and Groups’. Select the ‘Event Managers’ group and then click ‘Information’ (Figure 1). On the next page select ‘Edit Group Membership’. Select your name from the list on the left, and then ‘Add’ to give yourself the rights to create and manage registrations.
Note on the number of people that can be in the ‘Event Managers’ group – If you purchased 1 Connect Events license, you can have 1 person in that group, if you purchased 5 Connect Events licenses, you can have up to 5 people in that group.
Note on creating users – If you need to add more logins/users to your account and give them Connect Events/registration rights. You add users by clicking on the ‘Administration’ tab, then ‘Users and Groups’, select ‘New User’ and complete the fields as you desire and then click ‘Next’.
Figure 1
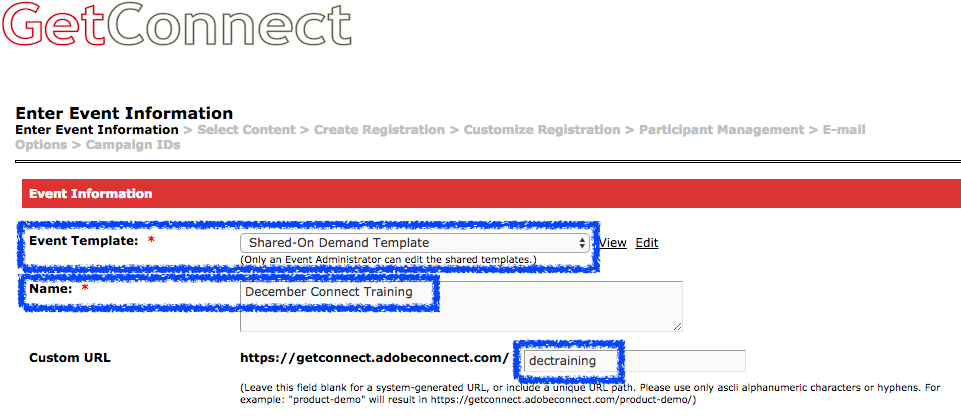
3- Build your first registration – Click on the ‘Event Management’ tab and then ‘New Event’ (Figure 2). First select a template for your registration, I suggest the ‘Shared-On Demand Template’ as this template is clean and very flexible for most needs. Complete the ‘Name’ field to identify your registration. If you want a unique URL name for the room, enter it in the ‘Custom URL’ field (Figure 3).
Note on Custom URLs – You must enter a custom URL at this stage, you cannot add it later. Remember that a URL cannot have spaces etc. and you cannot use the same URL more than once.
Note on Event Templates – The way registrations work in Connect Events is that you populate the fields in the event form and these fields are then ‘assembled’ into the actual landing page, registration form etc. The look and feel of these pages is determined by the Event Template. These landing page, registration and email templates can be extensively customized but this is not covered in this ’15 minute’ blog post.
Figure 2
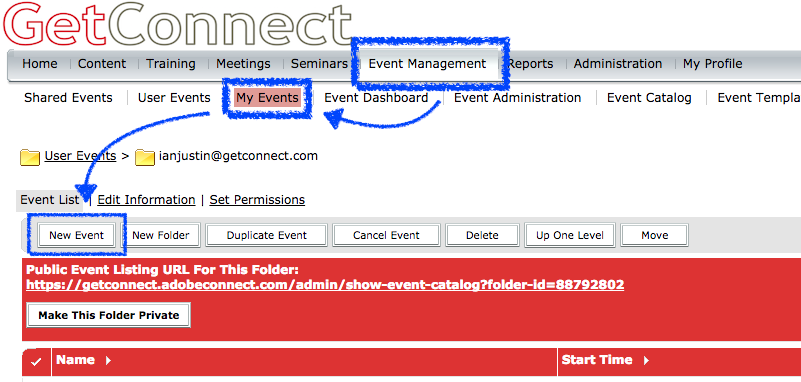
Figure 3
Now you complete the rest of the fields in the registration form. Most of these fields should be self-explanatory and they are covered in detail in the manuals and resources referenced at the end of this blog post. the key is to remember that these fields will be populated into fields in the landing page, speaker page, registration form and emails. If you are unsure of how the fields are populated, a good approach is to create a test event with the text in the fields identifying the actual field, so in the field ‘Detailed Information’, enter the text ‘Detailed Information text’. This way you will see where each field appears in your published event and emails.
There are also places to include images/graphics in the registration and emails. Again, a simple placeholder that identifies the image will help you discover where each one appears. There is a recommended size for these images but you can use any size and see how the template behaves.
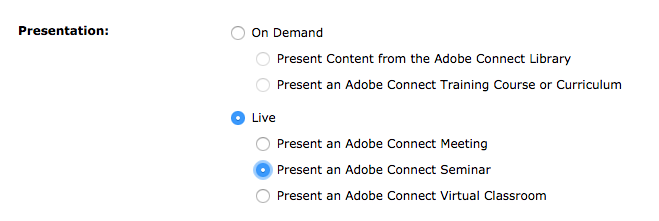
Important note on the ‘Presentation’ field – You must decide whether you are going to present content, a meeting room or a seminar room etc. *before* you complete the form (Figure 4). You can change from one meeting room to another, or one seminar room to another, but you *cannot* change from a meeting room to a seminar room once the form has been created.
Figure 4
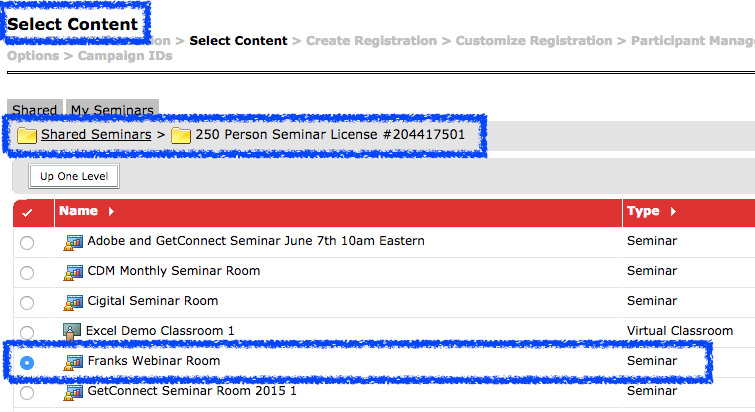
4 – Select your Room or Content – When you have completed the fields (or at least the fields you want to complete) click ‘Next’ at the bottom of the page. Now select the content/room you wish to place behind the registration (Figure 5). Click ‘Next’.
Figure 5
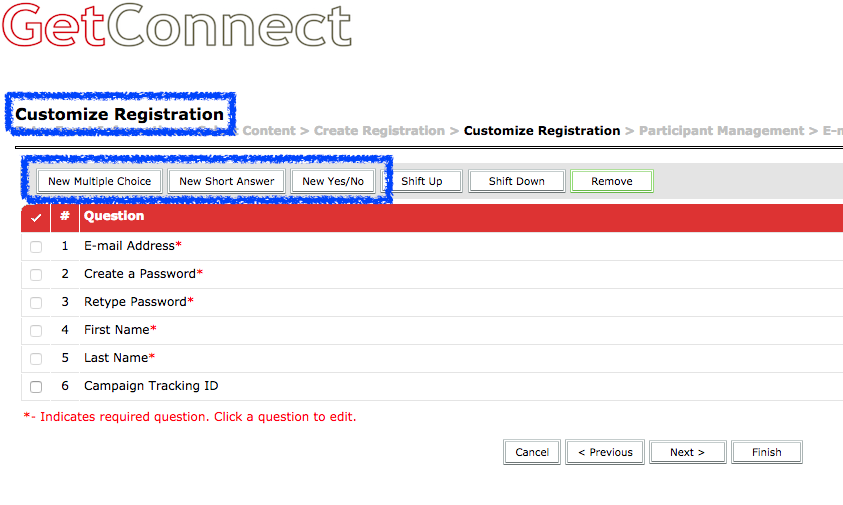
5 – Choose your Registration Form Questions – The default questions that are required based on your completion of the template will already be checked. You can select additional pre-defined questions from this page and click ‘Next’. On the next page you can create your own custom questions (Figure 6). Click ‘Next’ when you are done.
Figure 6
6 – Participant Management – On the next page you can add additional presenters or hosts that have logins in your account and you can use Connect to send invitations if you upload a list of emails. Typically, you would send these emails from your own email system and publicize the event on your web pages etc. Click ‘Next’.
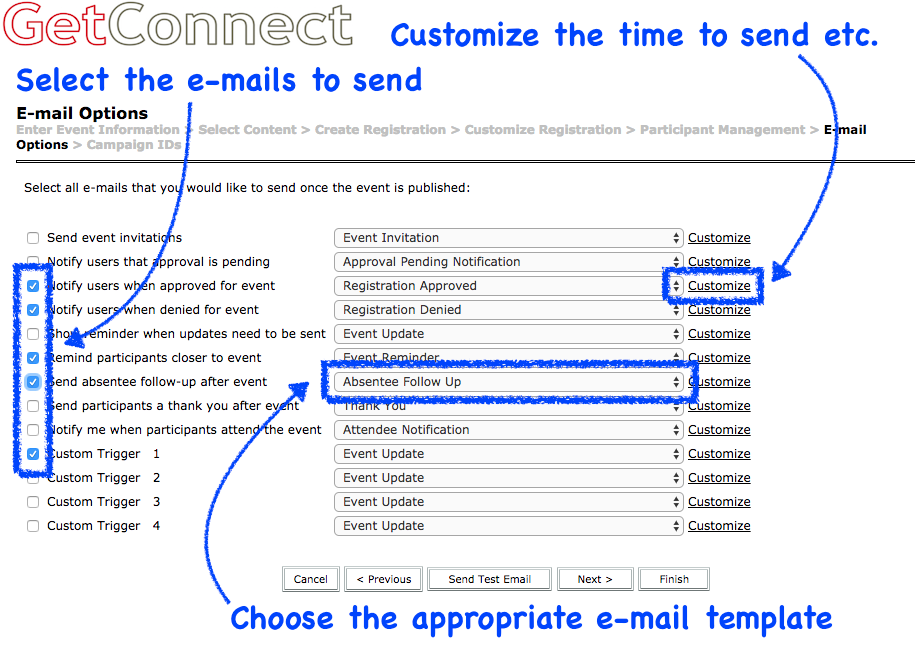
7 – Set your E-mail Options – Here you can choose which emails you wish to send for your event, uncheck or check the options as necessary. You can select the appropriate email template and customize field such as time to send a reminder etc. (Figure 7). Note that there is a button at the bottom of the list ‘Send Test Email’. Click this to have the full set of emails sent to you so that you can see how they look. Click ‘Finish’.
Note on Campaign ID’s – You can use Campaign ID’s to create different links for different campaigns and track them separately but this is not covered in this ’15 minute’ blog post.
Figure 7
8 – Publish You Event – Your event is ready to go, but you still have to publish it before it is made public, this allows you to create events and have them queued and ready to go when a product is launched for example. Scroll down the page and click the ‘Publish’ button (Figure 8) and again confirm this on the pop-up.
Figure 8
![]()
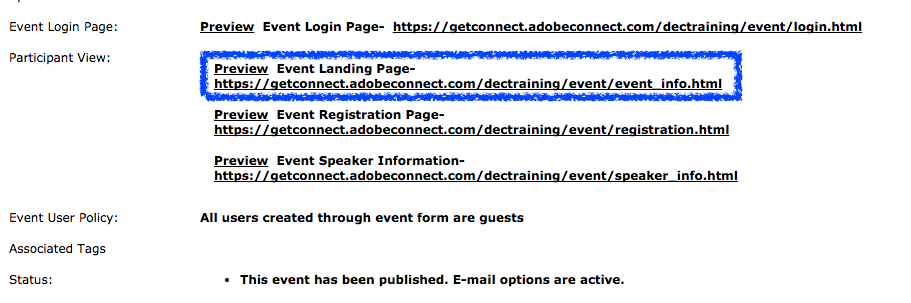
9 – Proof your Event Pages – There are links on the page that allow you to preview your event pages. The long-form link is the one you would send to prospective registrants or put under a button on your web page etc. (Figure 9)
Figure 9
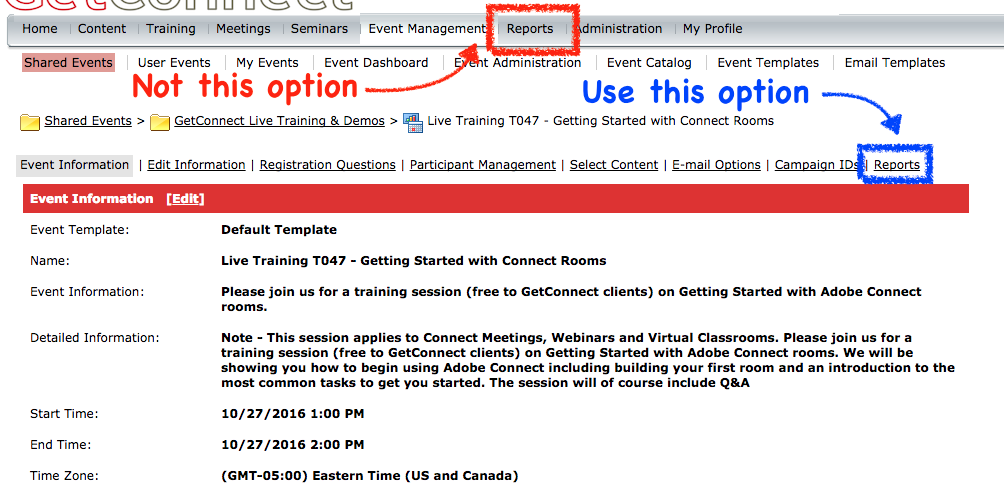
10 – Track the registrants and then run your event – As people register for your event you can track them from the ‘Reports’ option (Figure 10). Be sure to select the report for the event, not the ‘Reports’ tab.
Figure 10
Run your event! – You can work on the room and prepare whenever you wish. When the time comes to actually run your event, your registrants will be able to log into your room (or view your content).
More information – There are details and training and reference resources available to GetConnect clients on the ‘All Things Adobe Connect’ blog here:
Search – You can search for topics such as ‘powerpoint’ or ‘video’ to find tutorials.
Manuals – There are training manuals under the ‘Resources’ tab here.
Training – There is recorded training under the ‘Resources’ tab here.