You may want to move a Seminar Room you have created to another license to take advantage of a larger capacity, or is you have changed your license structure (moved from a shared seminar/webinar license to a named seminar/webinar license for example).
Note – ‘SWM’ denotes a ‘Shared Webinar Manager’ license. ‘NWM’ denotes a ‘Named Webinar Manager’ license.
Note – For the purposes of this post, ‘seminar’ and ‘webinar’ are interchangeable and mean the same thing.
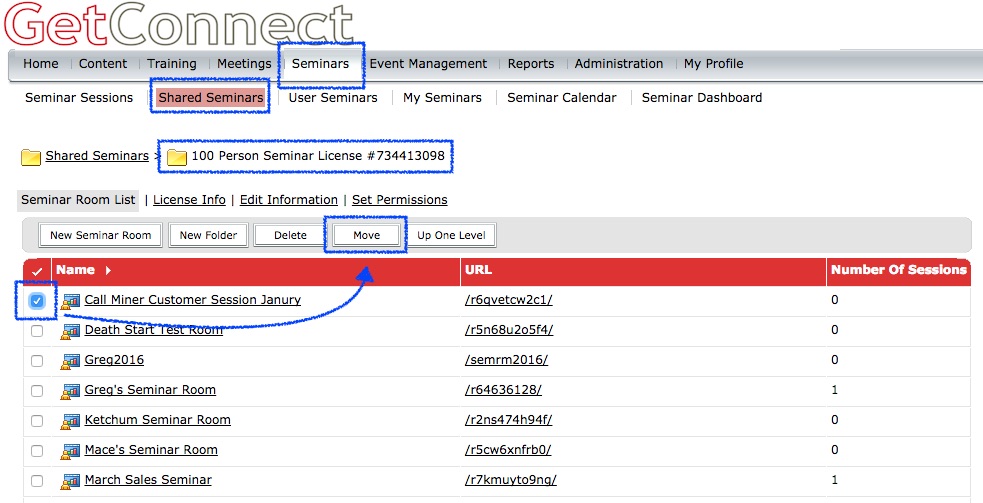
First, login as an administrator and navigate to the license containing the room you want to move. In Figure 1 the room resides in my ‘Seminars’ tab under ‘Shared Seminars’ and in my 100 person license. Select the room you want to move (checkbox) and then ‘Move’.
Figure 1
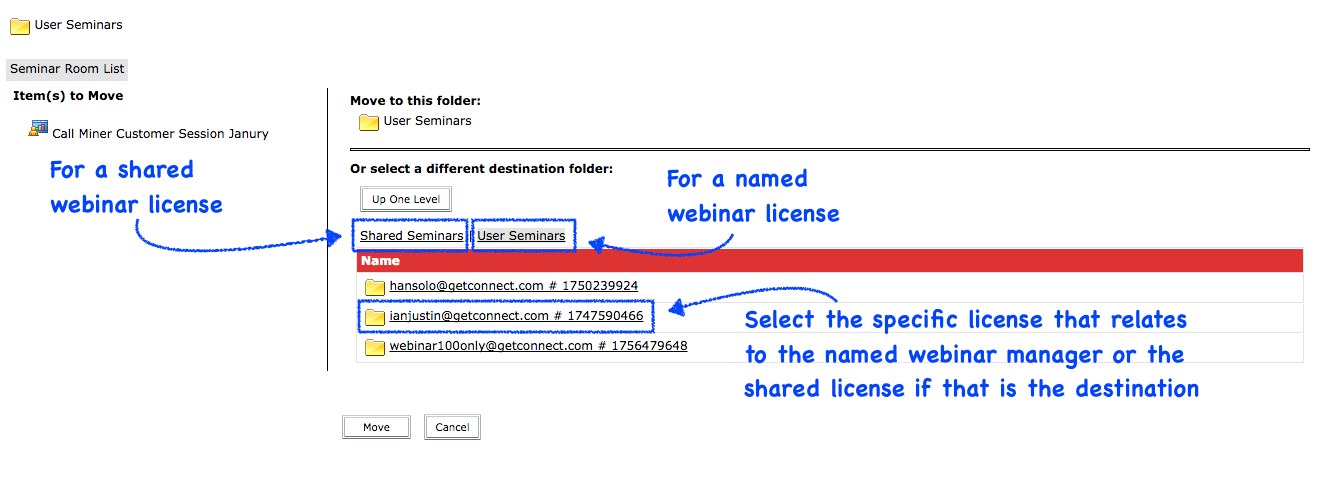
Now you need to choose the destination for the room as shown in Figure 2 below. If you are moving to a shared license then select the ‘Shared Seminars’ option. If you are moving to a named webinar license then select the ‘User Seminars’ option.
For shared seminars you will choose the license into which you want to move the room. For the named webinar license you will choose the name of the person holding the license. You may only have one of either of these of course.
Figure 2
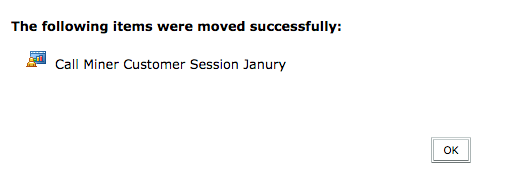
When you have selected the destination, click the ‘Move’ button and you will be asked to confirm the move, then you will see a confirmation Figure 3).
Note – If a room with the same name already exists in the destination directory, you should see an error and the room will not be moved.
Figure 3
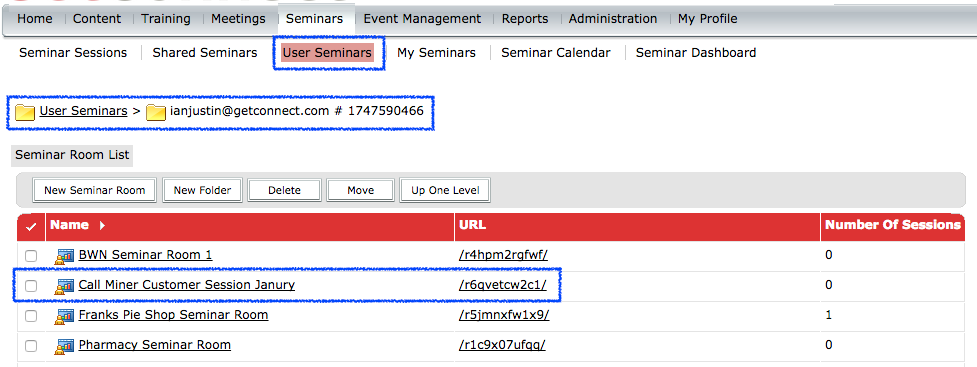
The room should now be in the new license (Figure 4).
Note – You will lose all future sessions booked in this room when you move it over to the new license so you should aim to time your move appropriately or expect to rebuild/rebook the existing sessions.
Figure 4