Connect Events is typically set up to use a single speaker in a registration. A single photo, bio and name. There are ways to create templates for multiple speakers using HTML but they are not necessarily for the faint-hearted.
The method I have described below is simple and uses existing, basic template ‘technology’.
Note – This technique applies equally to 3 or more speakers
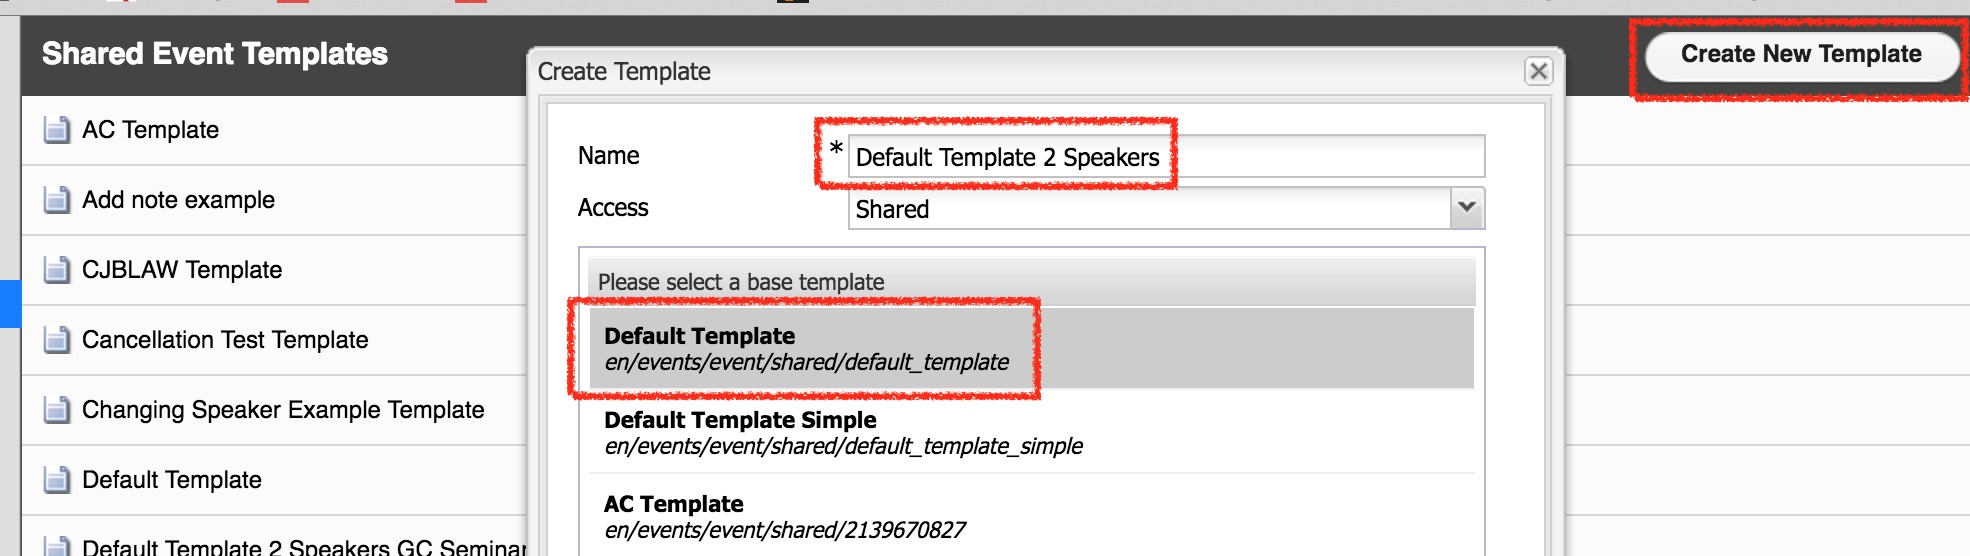
Create a new Event Template – First you need to create a new template, you do not want to edit or overwrite one of the default templates typically. Go to the templates section, select ‘Create New Template’ and then select the template you want to ‘clone’, give it a new name (Figure 1).
Figure 1
Your new template will now appear in the listing and it may open automatically in edit mode…if it does not open you select the pencil icon to the right of the template name to edit the template.
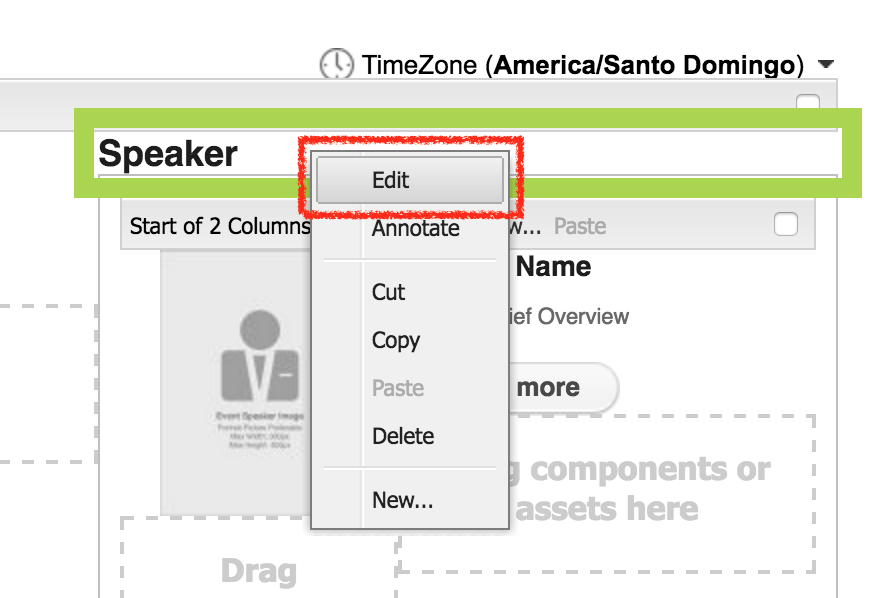
The changes are essentially cosmetic and to correct grammar. Right-click on the ‘Speaker’ text and select ‘Edit’ (Figure 2). Note that you can also double-click on the element to edit it.
Figure 2
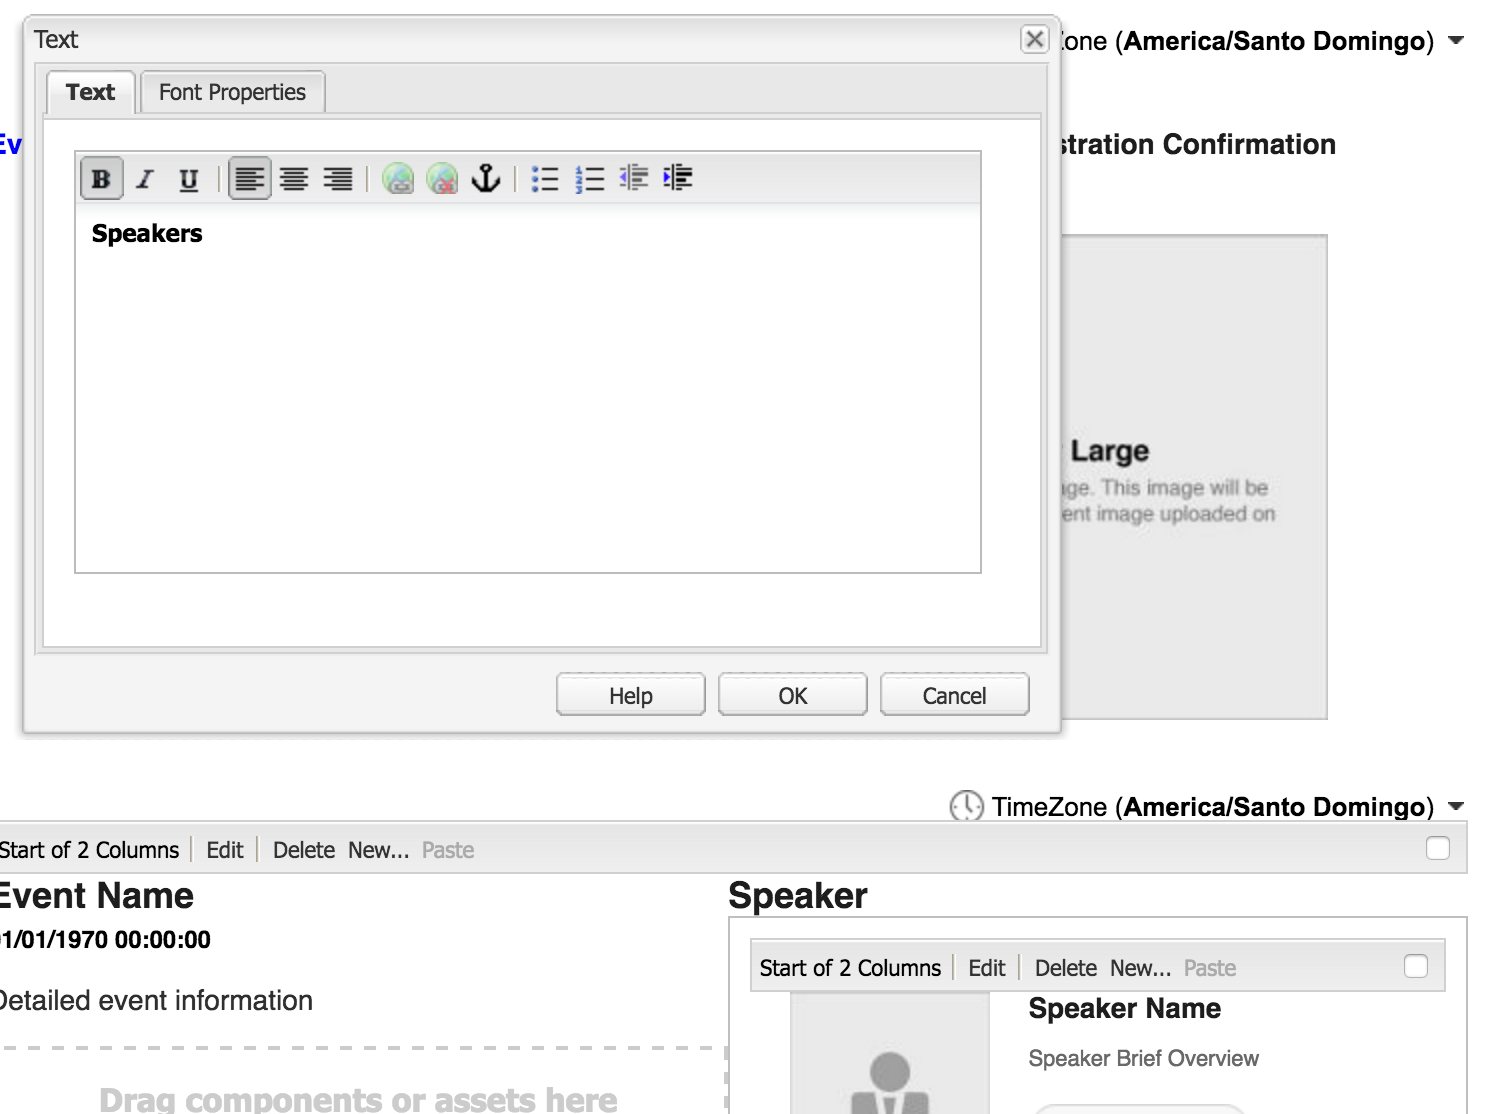
Now change the word ‘Speaker’ to ‘Speakers’ and click ‘OK’ (Figure 3).
Figure 3
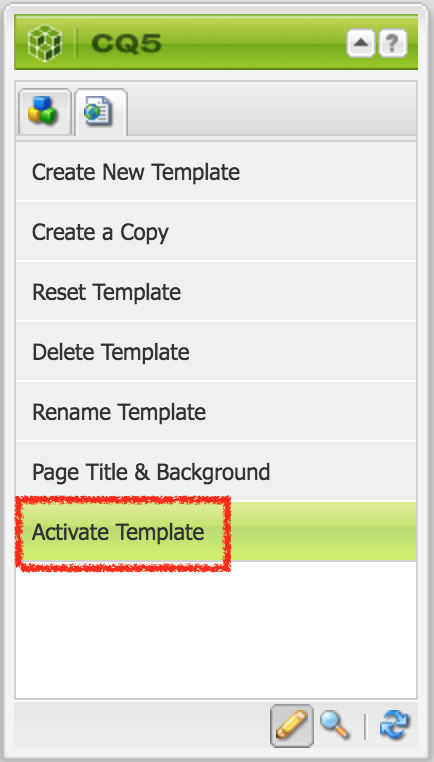
Now go to the palette and select ‘Activate Template'(Figure 4) and you are done with this part of the process.
Figure 4
Note – You do not need to change the ‘Speaker Name’ text as this is populated from the event form and we will cover that later.
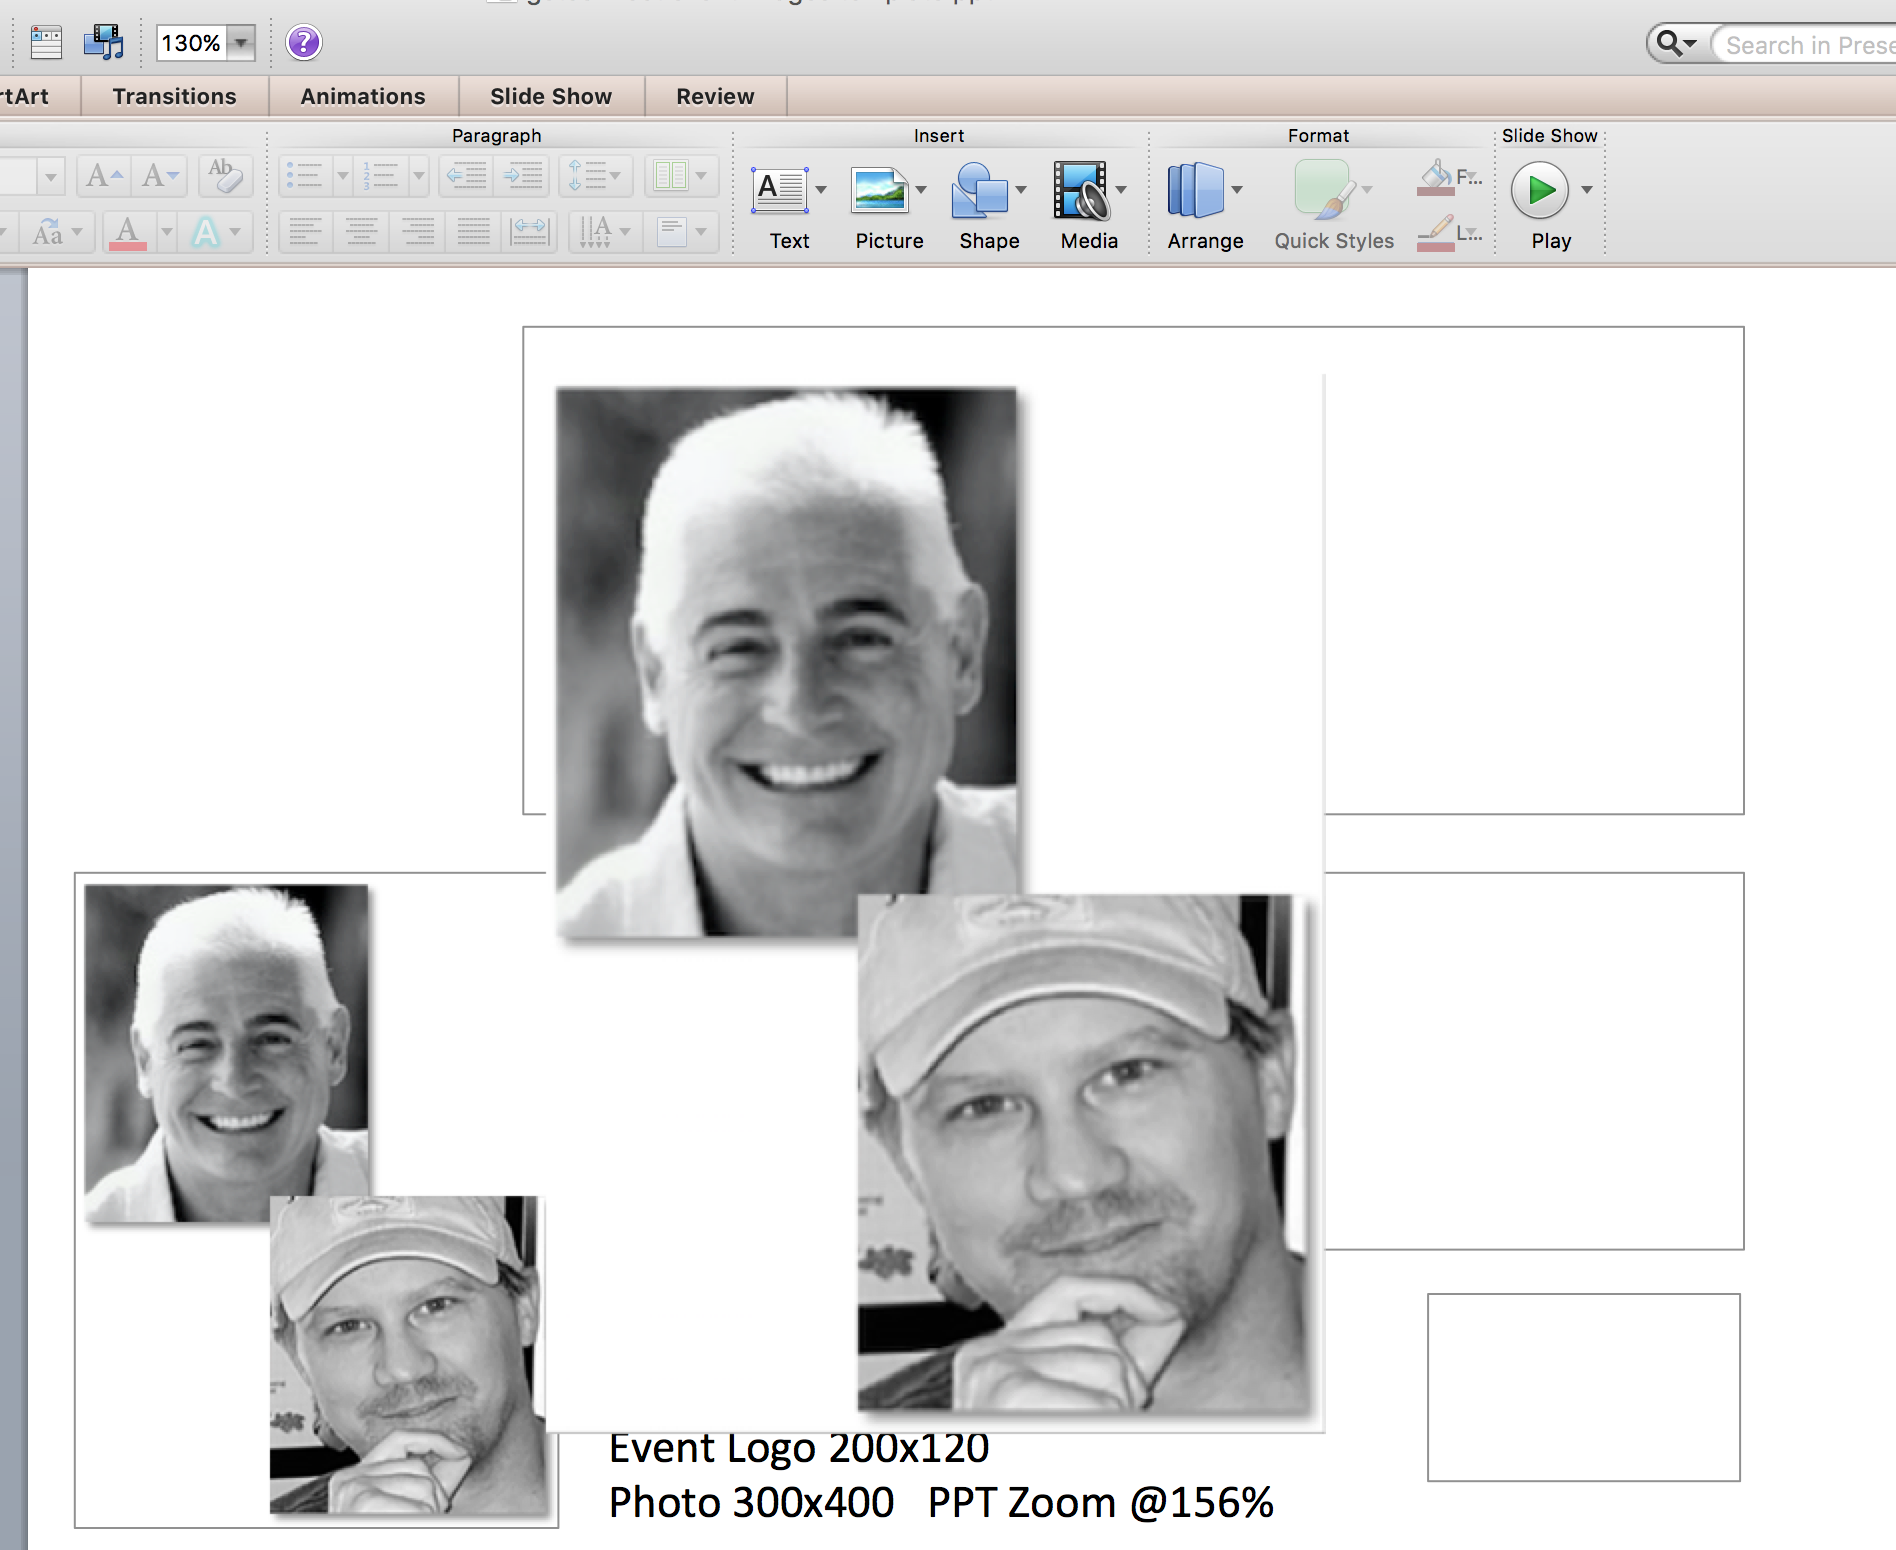
Create a ‘merged’ photo of your speakers – Now for a little photo editing.
Rather than try to create multiple areas for photos, we are going to use the same area, but merge multiple photos. Depending on your photo editing skills you may want to use a more sophisticated editing tool, for the purposes here we will just use Powerpoint.
The photo for the event should ideally be around 300×400 pixels. You can see how I do this in Figure 5 below. I create a rectangular box on a PPT slide that has the same proportions as the required 300×400 pixels. Arrange the photos in the box and I like to add a little shadow. The background colour should be the same as your event background, in my case the background is white. Snap the photos with a screen-capture tool.
Figure 5
Now open the snap in any simple image editing tool, on the Mac I use ‘Preview’. Edit the size, keep the relative proportions and make the width 300 pixels…the height will be close to 400 pixels, certainly close enough. Save this and you have the image for your event (Figure 6).
Figure 6

Create your Event Registration – Now create your event registration. Select the new template you created for 2 speakers and complete the form as usual. When you get to the speaker section in the form you can complete is with 2 speakers in mind (Figure 7). For the ‘Speaker Name’ section add both of the names. For the short bio section you can give the names and titles of the speakers, for the longer bio section you can have both profiles.
For the ‘Speaker Image’ you upload your new multiple speaker photo.
Figure 7

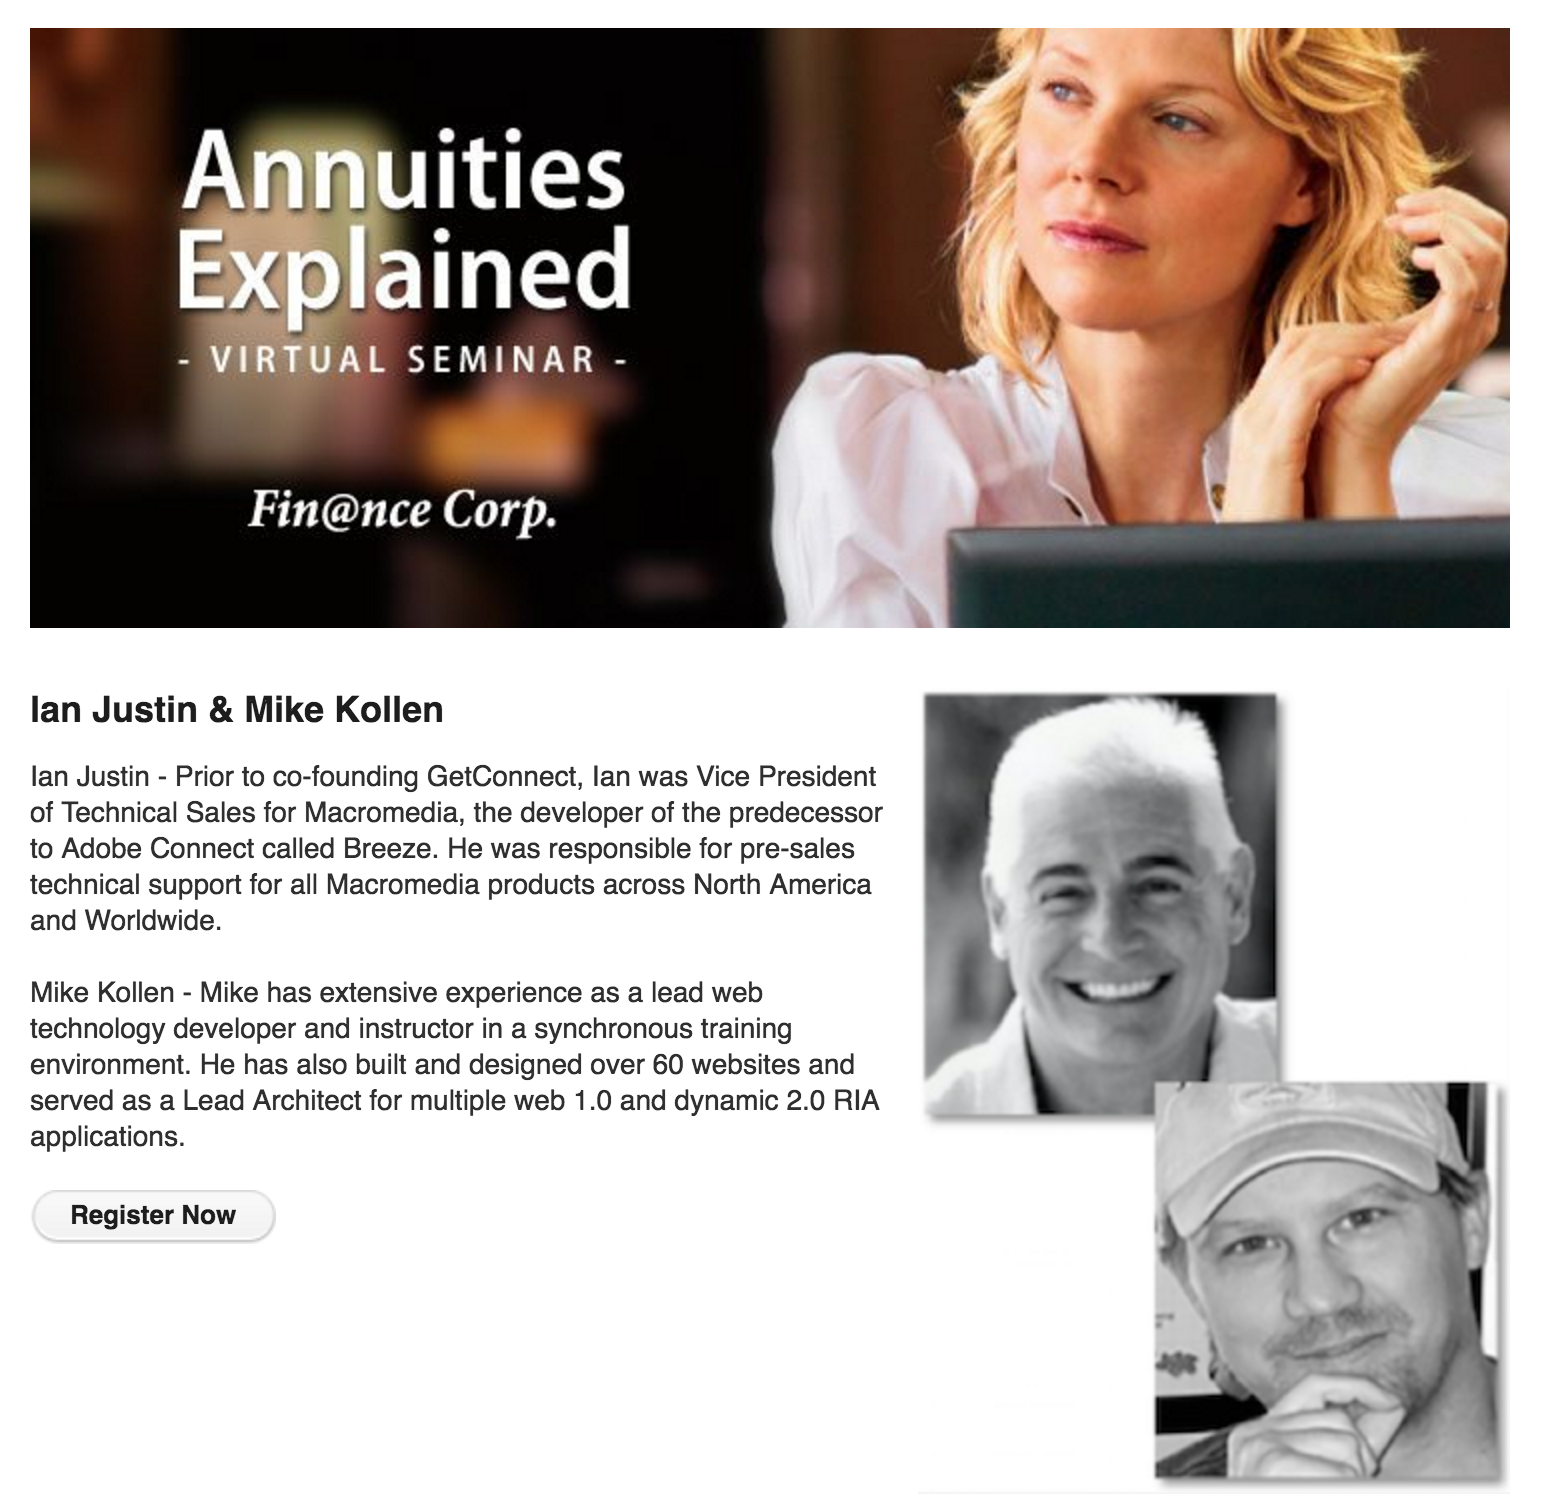
Publish your Event – When you save and publish the event you will see the event landing page shown in Figure 8 with the multiple photos and the names and titles. When you go to the page to learn more about the speakers you will see the longer bios in Figure 9 below.
Figure 8
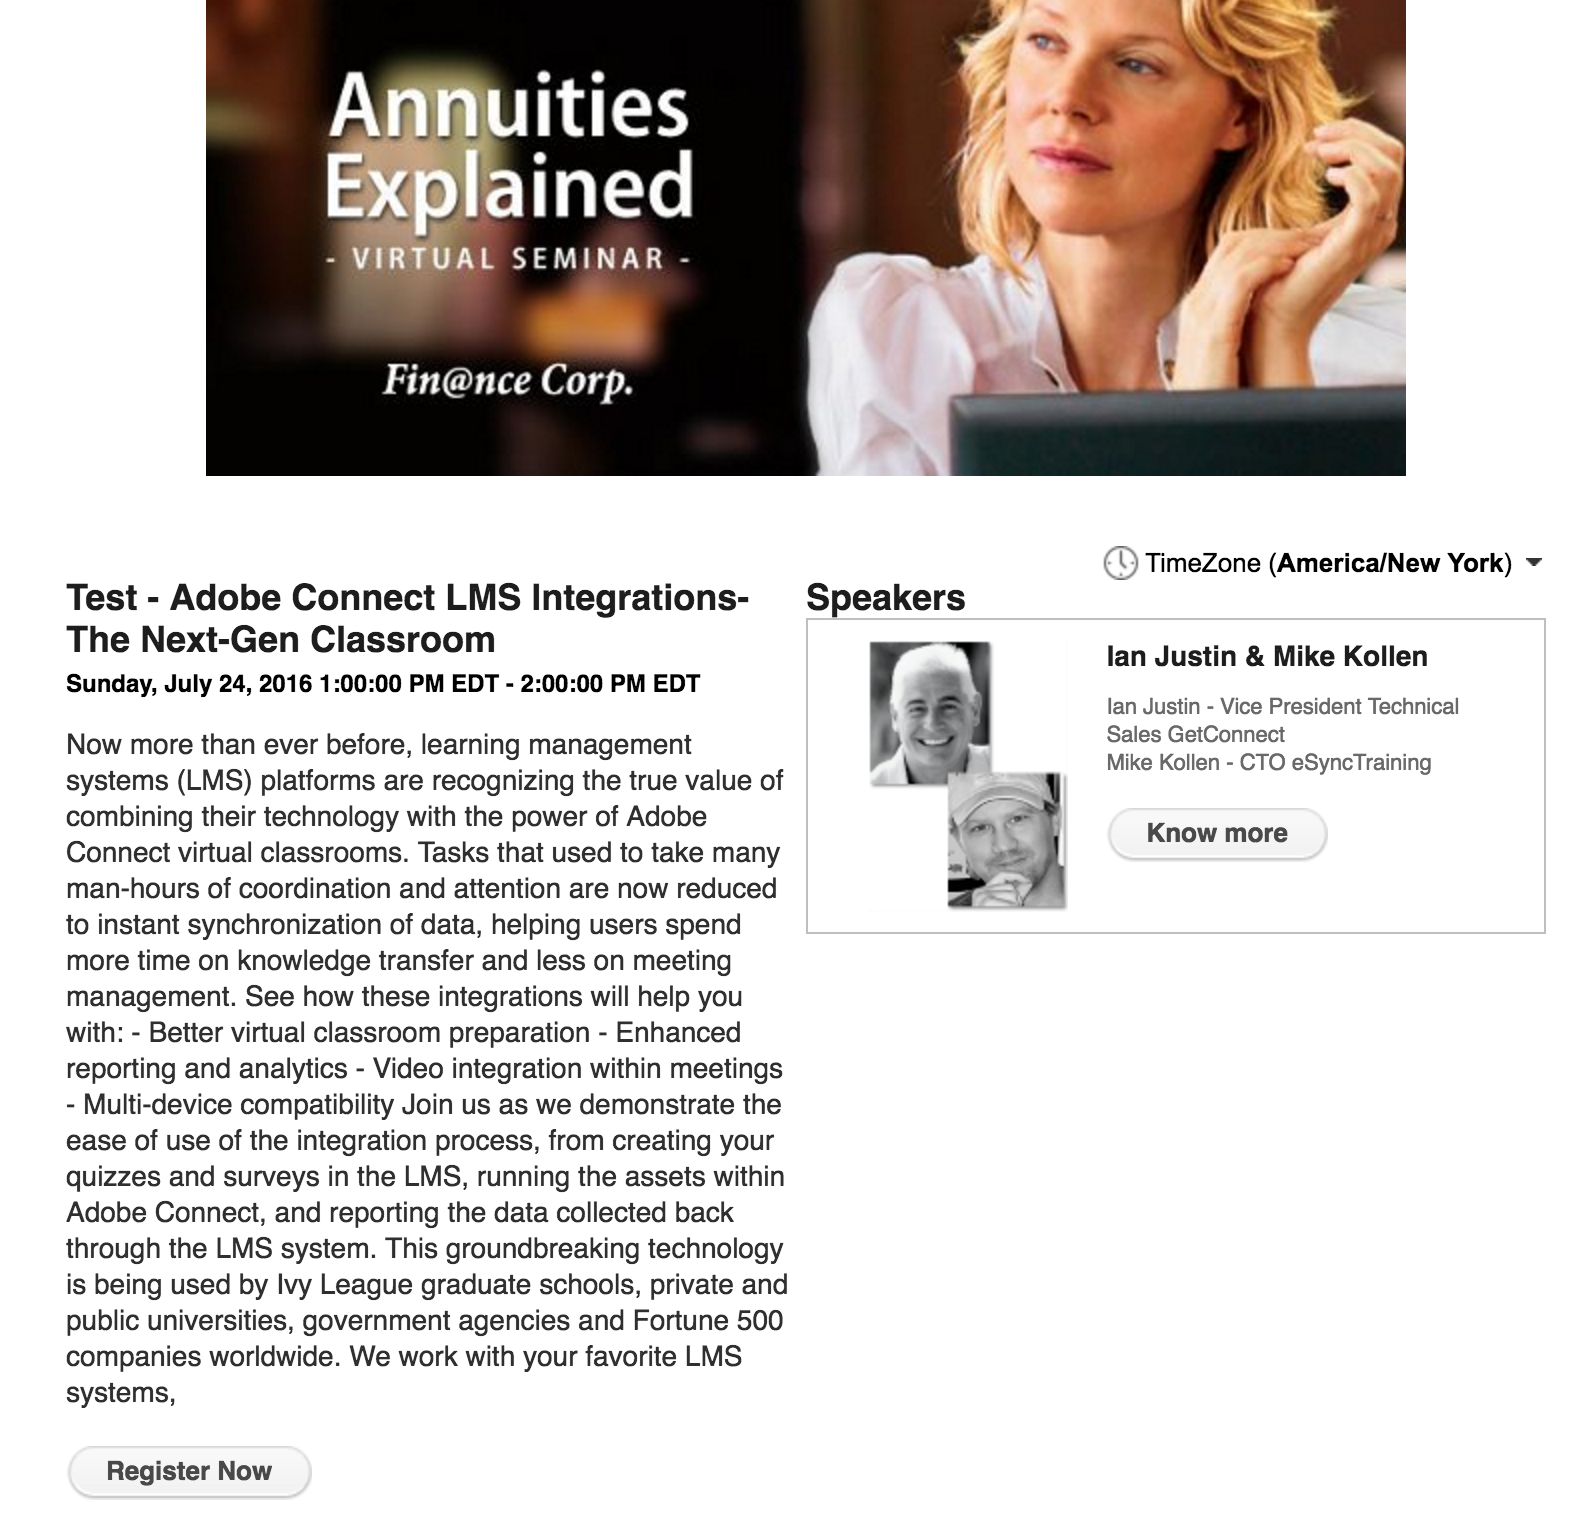
Figure 9
Email Templates – There should be no changes to be made to your email templates as the information typically refers the attendee back to the main event template. The only email that would show the speaker information is the invitation. If you use Connect Events to send the invitation then it should still represent the speakers appropriately (Figure 10 below).
Figure 10