On occasion you will want to send invitations to a group of people to have them attend a live session. for the purposes of this post it does not matter whether this is a meeting room, webinar room, seminar room or virtual classroom.
Here are a few options on how you might invite a large group to your session.
Use your email client
I know this seems obvious, but I do this all of the time as I have so much control over the format and as I have most of the addresses for people I need to contact in Outlook already.
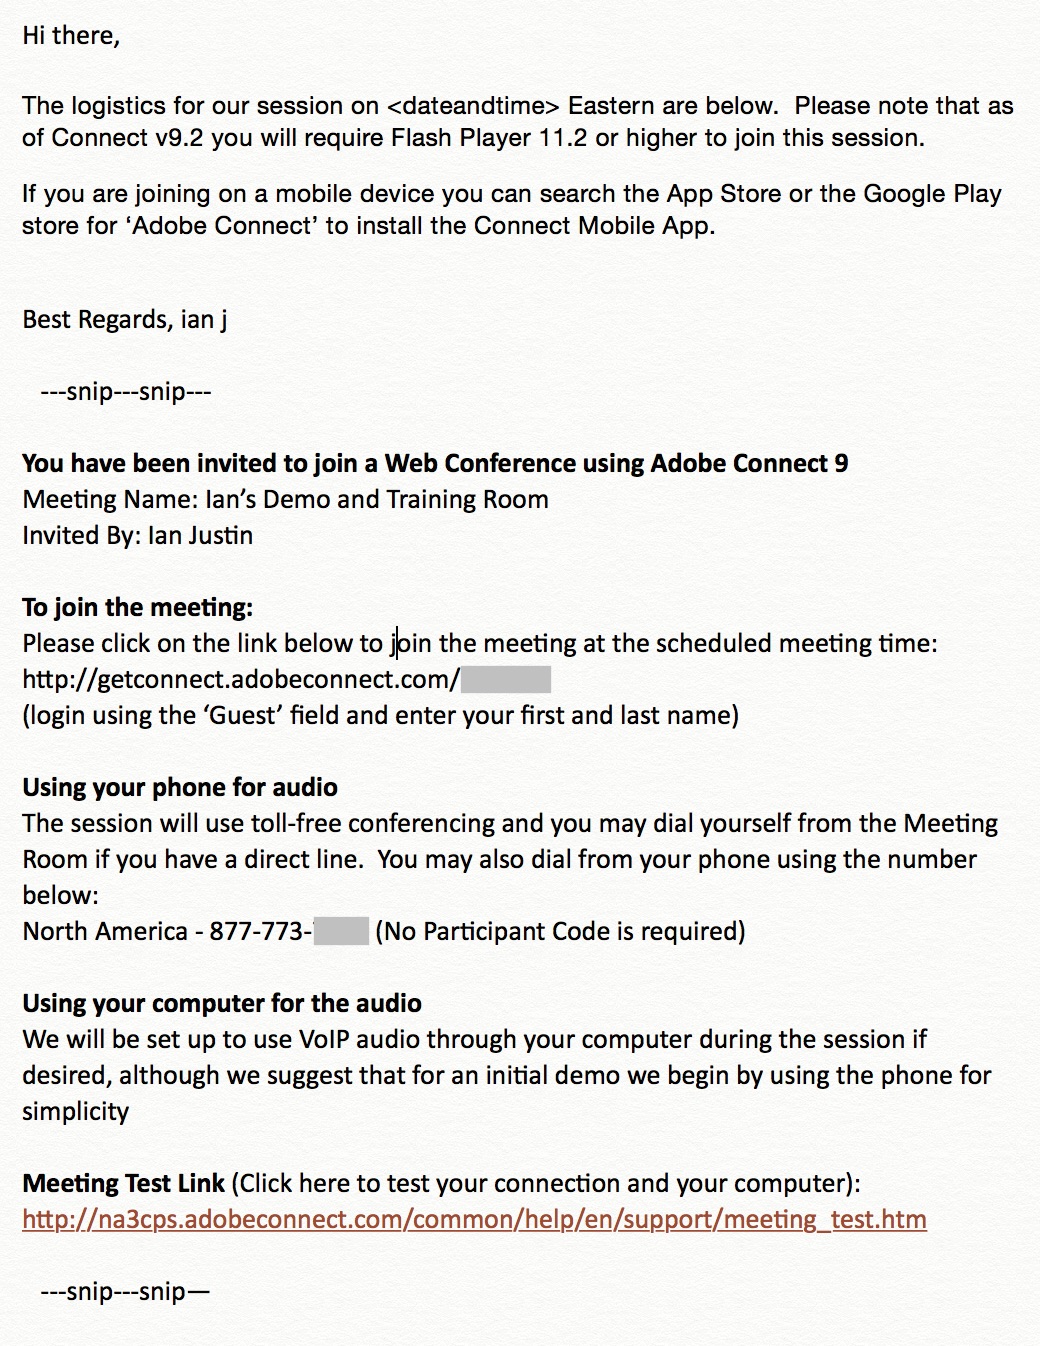
I also keep a simple template easily to hand on my PC to allow me to copy and paste the meeting/conference information and the instructions for joining. An example of my template is below in Figure 1.
Figure 1
Use the Connect Outlook Add-in
There is an Add-in available from Adobe that allows you to streamline the invitation process from Outlook. This Add-in can use the Connect API to link to your account and allow you to choose one of your rooms and the corresponding conferencing information. You can then
You can find the Outlook Add-in from your Connect account and going to ‘Home’>’Resources’>’Getting Started’. This will take you to a downloads page where you can also get the add-in for Lotus Notes and MS Office Communicator (check to ensure that the add-ins can be used with your specific connect deployment).
Adobe Connect Downloads page:
http://getconnect.adobeconnect.com/common/help/en/support/downloads.htm
Use a messaging client
If you are in a hurry you can just copy and paste the URL for your session into any messaging client, simple and effective.
Use the in-meeting invitation option
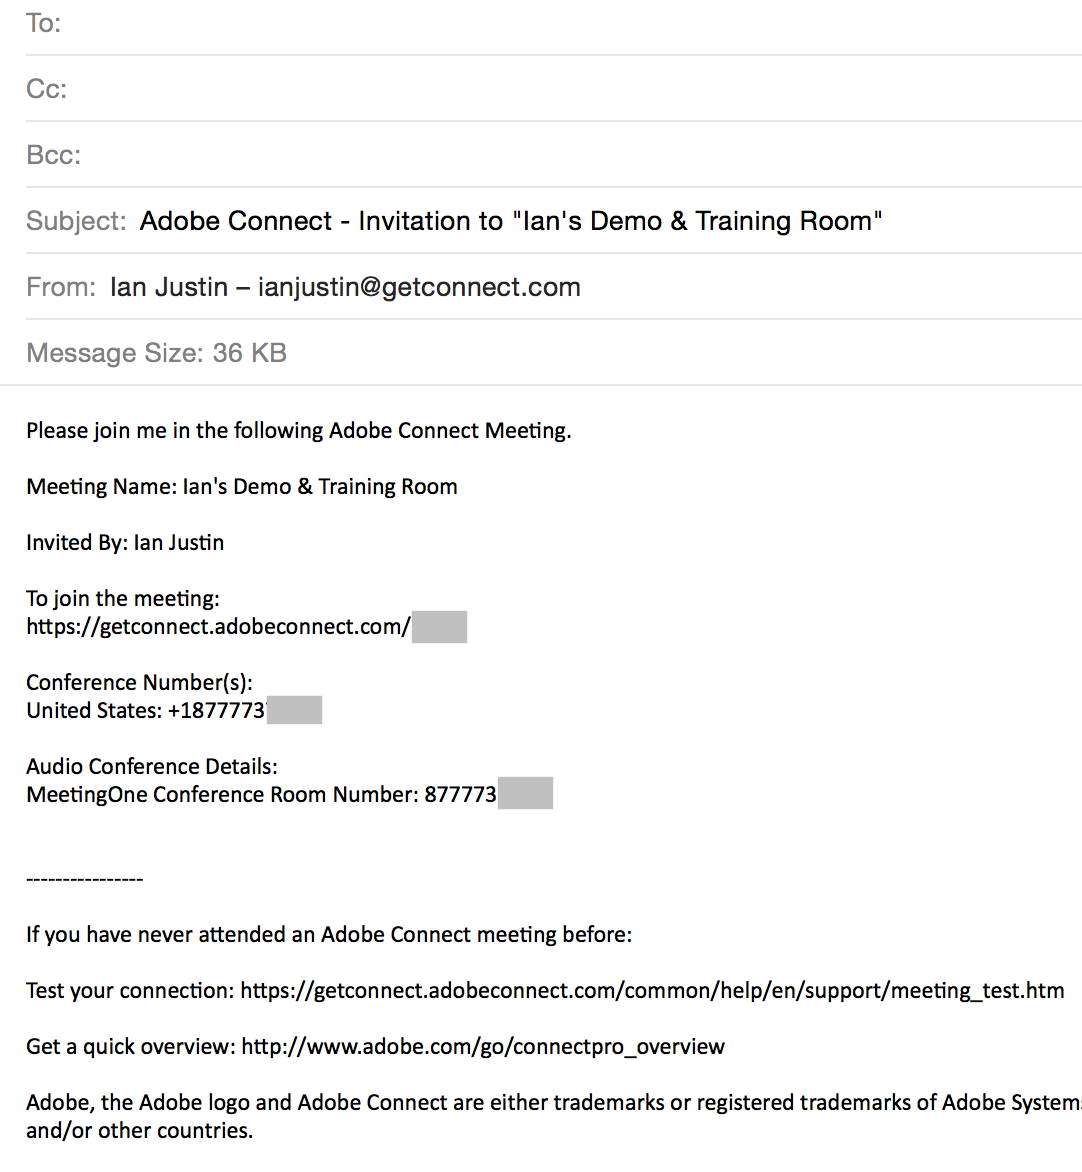
When you are in the meeting room you can go to ‘Meetings’>’Manage Access & Entry’>’Invite Participants…’ (Figure 2). This will give you the URL (which you can copy into an IM client etc. of course), or you can select ‘Compose Email’ and this will use your default email client and populate it with the meeting room information (Figure 3).
Note – In any of the cases above, access to the room is determined by the permissions you have set for your meeting room. In my case I make it clear to login as a ‘Guest’ and give instructions. You can add instructions to your login page with some tips form the Blog Post here.
Figure 2
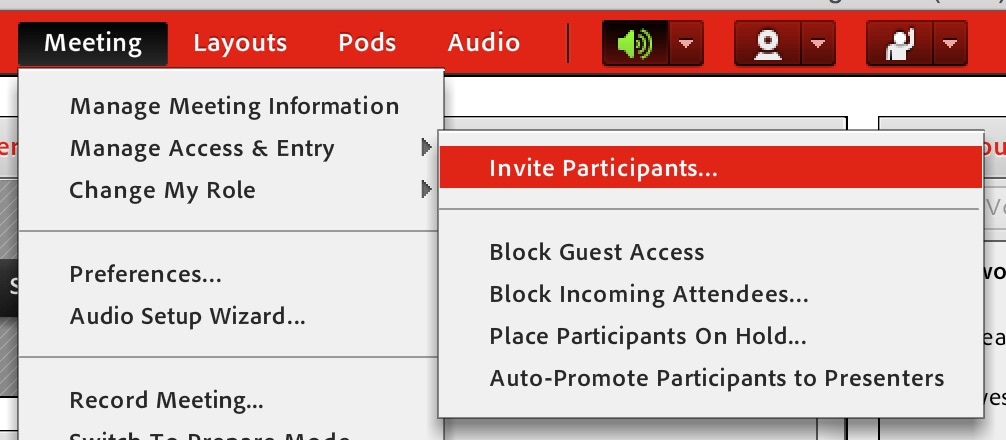
Figure 3
Upload a list of invitees and invite them from Connect Meetings
You can create a CSV (Comma Separated Values) file with the details of your invitees and import that into Connect. The process to create a CSV and import it into Connect is here. Load the users into a group so that you can manage them more easily.
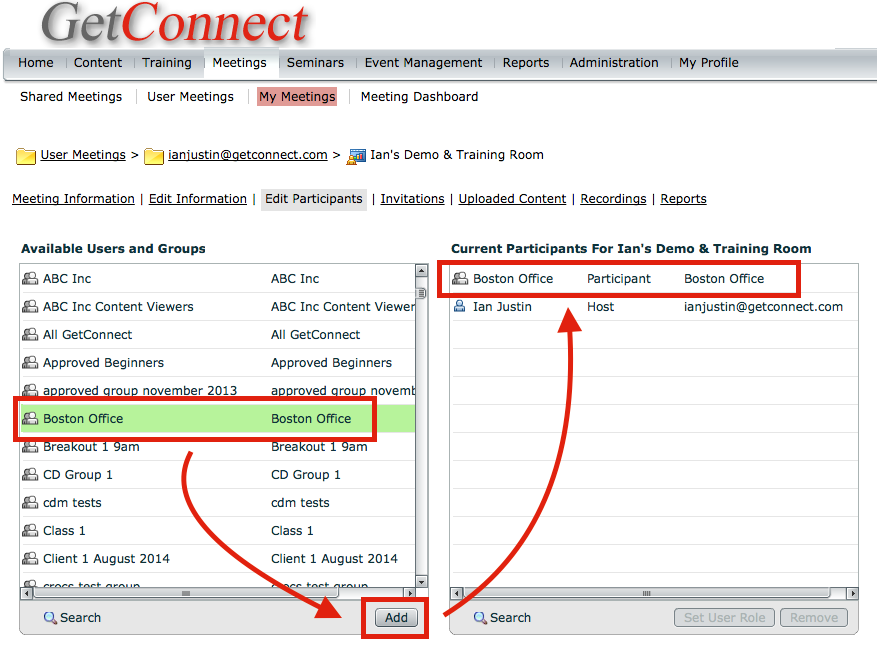
Now go to your meeting room and ‘Edit Participants’. Find the group on the left hand side and add it to the ‘Current Participants…’ pane on the right hand side (Figure 4). The attendees will be set as ‘Participants’ by default.
Figure 4
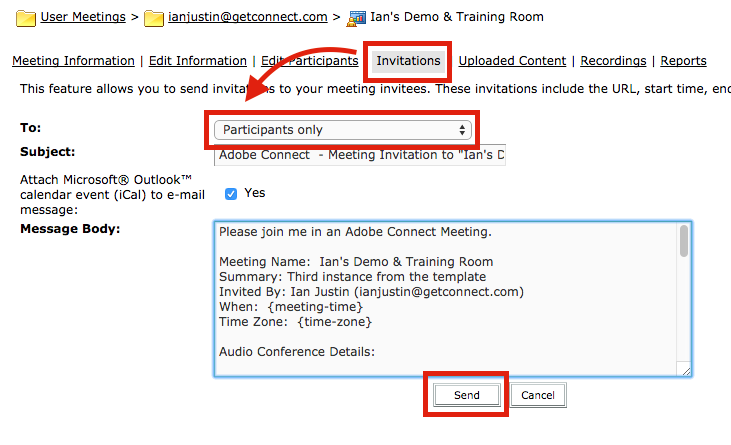
Now go to ‘Invitations’ and select ‘Participant Only’ in the ‘To’ pane (or select the larger group including hosts etc. if you prefer). You can change the body of the text to add specific login instructions and send the invitations (Figure 5).
Note – The permissions for the room are set by the room itself, so you would need to determine if you want them to login as a ‘guest’ or using the credentials you created for them when you imported their names into the system.
Figure 5
Upload a list of invitees and invite them from Connect Events
This is similar to the process above, but you are using Connect Events to send the invitations to let participants formally register for the session.
Note – You can see detailed instructions on how to build and manage registrations using Connect Events form the document I have created ‘Getting Started with Adobe Connect Events’ here.
Create a CSV (Comma Separated Values) file with the details of your invitees and import that into Connect. The process to create a CSV and import it into Connect is here. Load the users into a group so that you can manage them more easily.
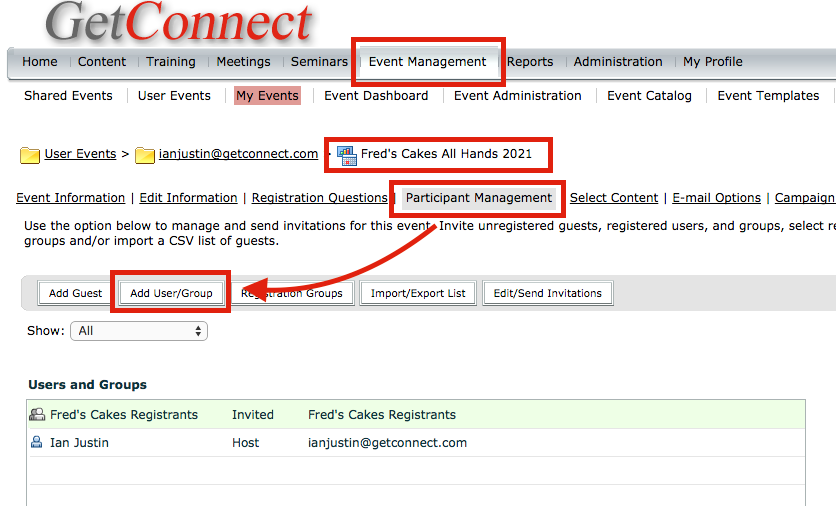
Now go to your event (under the ‘Event Management’ tab) and to ‘Participant Management’, then select ‘Add User/Group’ (Figure 6).
Figure 6
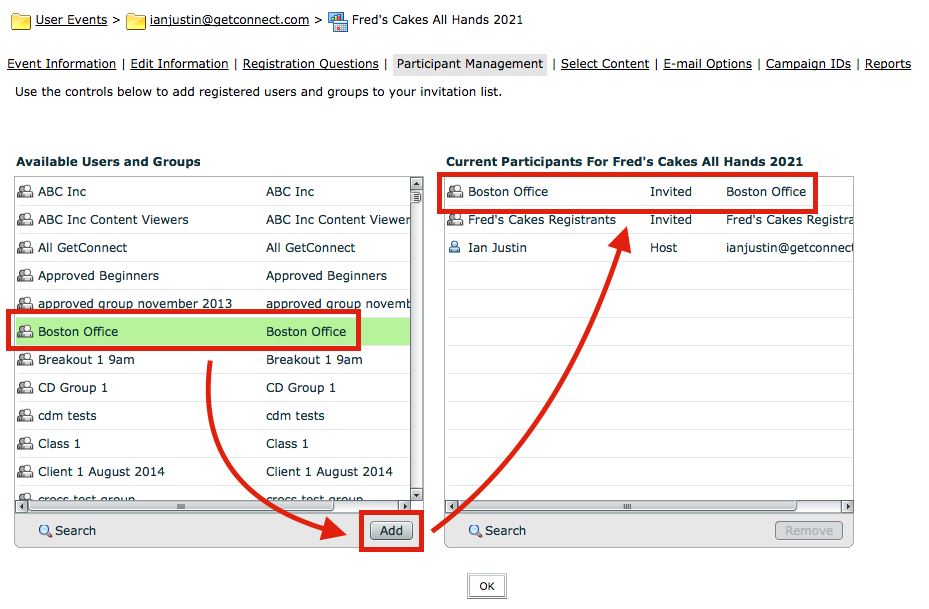
Select the group on the left hand side and then ‘Add’ to include the group in the list of invitees for your event (figure 7). This group will now be sent invitations form your event and they can register from there.
Figure 7
Note – As you have created logins for the group on your account, they will need to register using the credentials you have created for them.
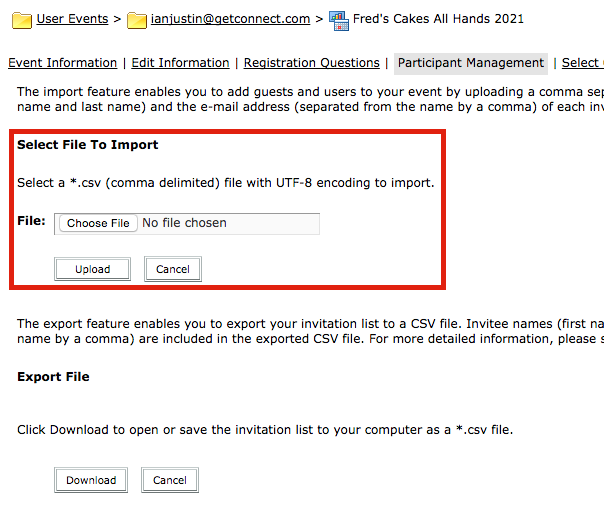
You also have the option to load the list of names directly into your event and in this case you are not creating logins in your account, you are simply uploading names to which you will send your invitation emails (Figure 7). This import is found by clicking on ‘Import/Export List’ in Figure 6 above.
Figure 8
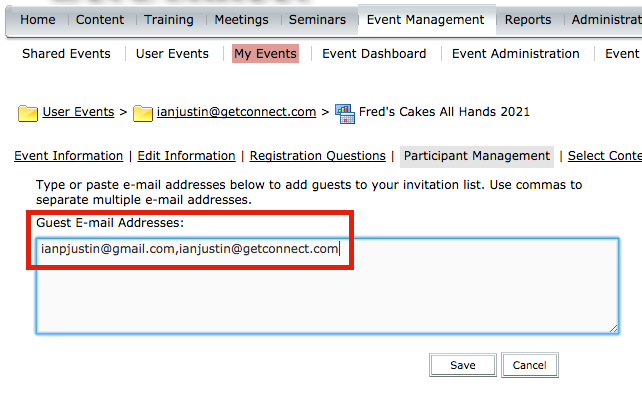
You can also just create a list of invitees by clicking the ‘Add Guest’ option seen in Figure 6 above. This allows you to enter emails and sent invitations to them from Connect Events (Figure 9).
Figure 9