Note – This blog post relates to navigating to a survey page, but this would work equally well for any page you wanted to have your participants open during your meetings.
You may want to gather feedback during your live session (or more typically as you end your session) and then you might also want to gather feedback as a part of the recording or the follow-up emails.
During the live sessions you can use the Connect Poll Pod to gather information, but this is not going to work in the recording or as something you can send out in a follow-up email.
To that end, you are far better off using a custom survey tool such as Survey Monkey:
Note – GetConnect is in no way associated with Survey Monkey, in fact Adobe has it’s own tools but even the Adobe tools would be more than you typically need for this use case.
You can get a free trial of Survey Monkey that allows up to 10 questions and 100 responses and that is more than sufficient for a trial. The other plans and options are below and these include more questions, branding and analysis:
https://www.surveymonkey.com/pricing/upgrade/quickview/?ut_source=header_loggedIn
It is pretty easy to create your survey and you will end up with a URL such as the one below that you can use in live sessions and also in the recordings and follow-up emails. In this manner, all of the responses will be together in one report.
https://www.surveymonkey.com/s/YNHMMDG
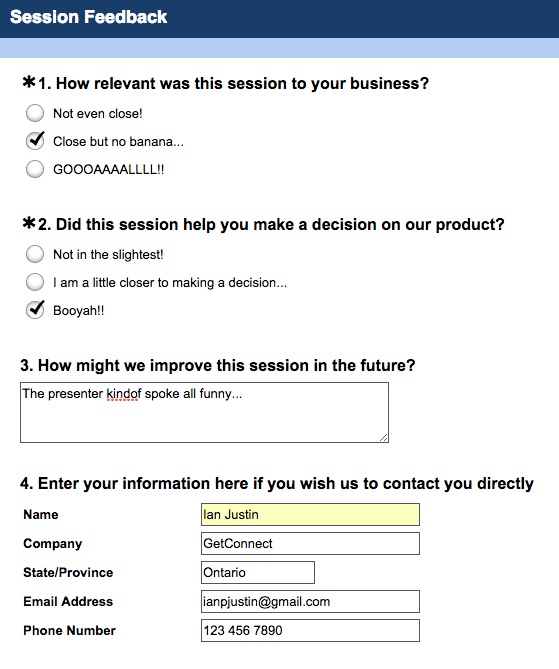
Note – I have not linked the URL above as I am only using the free version of Survey Monkey and the hits from my Blog Post would use up the free trial in a hurry, you can see the simple survey that is created from the link below in Figures 1 and 2.
Figure 1
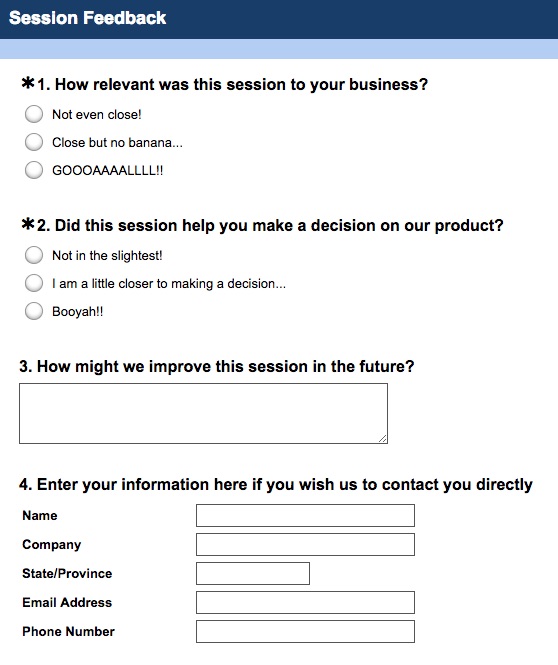
Figure 2
So now you need to use this in your live Connect meeting room (note that for the purposes of this blog post, there is no difference between webinar rooms, seminar rooms, meeting rooms or virtual classrooms).
Launching Surveys and Links form your Connect Meeting Room
In your Connect live and recorded session you have a few options to send the survey to your participants as noted below:
- Enter a URL into the Chat Pod – in this case you simply paste the URL for the survey into your Chat Pod and this will be something that can be clicked in the live session and in the recording. You can make reference to this in the commentary during the session (Figure 3).
- Use the Web Links Pod – In this case, you open up the Web Links Pod and add a new link (from the ‘Pod Options’ menu). The name of the link will be for your benefit or for the benefit of the participants in identifying one of multiple links, the URL will be the actual URL to the survey in this case (Figure 4). The links you have created will be listed in the Web Links Pod and you can select the link and then ‘Browse To’ to open it in your default browser (Figure 5).
- Force the survey page to open for Participants – If you are the Host of the session, you should keep the Web Links Pod off-stage on the Presenter Only Area (POA) and this way you can use the pod to force the survey page to open on everyone’s screen at the same time. Note that this will not open the page in the recording.
- Let people open the survey page themselves – In this case you keep the Web Links Pod in the main area of your meeting room (not the POA) and the participants can choose to browse to one or more of your listed links. Note that this will work in your recordings and you should make reference to the pod in your meeting commentary.
- Use a PowerPoint hyperlink – In this case you would build a regular hyperlink under a picture, button or text in PPT. When the PPT is loaded into your Connect room this will allow participants to just click on the button in PPT to launch the page (or anything else you want in the hyperlink). Note that this will work in recordings so you should make reference to this in your commentary.
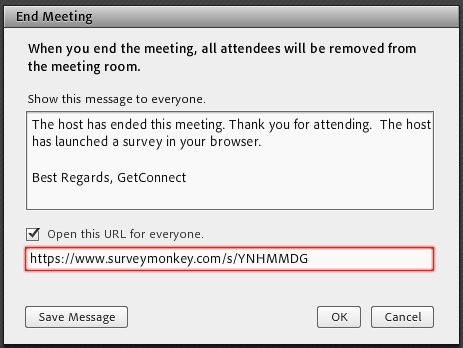
- Use the ‘End Meeting…’ option – There is an option under the ‘Meetings’ menu in your Connect room that allows you to end the meeting and send a message to participants. This also allows you to launch a page as the meeting is closed. There is an option as you configure the message to ‘Open this URL for everyone’. If this is checked and the survey link included in the field you will open this for all participants. Note that this will not work in recordings.
Best Practices – Opening tabs and pages on a participant computer without permission can be seen as very intrusive and somewhat concerning for some people. You should determine the best option for opening your survey page from both the technical constraints and the cultural norms in your organization or group.
If you are going to force a page to open and it will not work in the recording, have an alternative method of opening the page available to your participants in the recording and make reference to the link and the option to open it ‘manually’.
Some browser and some organizations will not allow pop-ups or forced links, so again an alternative method is helpful.
Also remember that in the case of mobile devices you will not be able to launch the page automatically as iOS in particular does not want application to launch an external URL as this would compromise their store business.
Figure 3
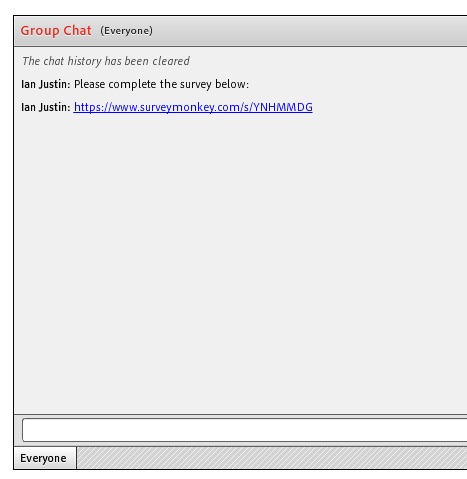
Figure 4
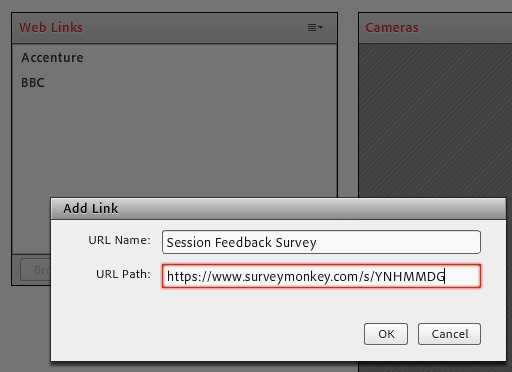
Figure 5
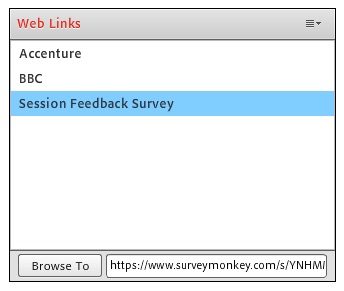
Figure 6
Launching Surveys and Links from your Connect Events Emails
The most common option here would be to add the link to the ‘Thank you for attending’ or the ‘Sorry you could not attend’ emails. In these cases you can of course include the recording link and this will then link to the survey as well based on the options above.
You can also include a direct link to the survey in the ‘Thank you for attending’ email as these people have already attended the session. Just be conscious of continuously bombarding them with the feedback request.
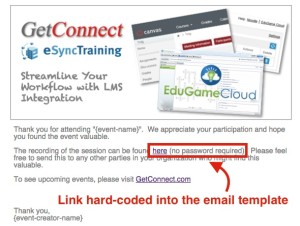
If you want to include either the survey link or the recording link specifically in your email follow-up then you will need to create a unique email template in Connect Events to do this with the URL hard-coded into the template (Figure 7).
Note – If you are concerned with gathering multiple feedback sets from a single participant, you do have an option in Survey Monkey to limit the number of responses that can be submitted from a single PC. You will find this under the ‘Collect Responses tab.
Figure 7
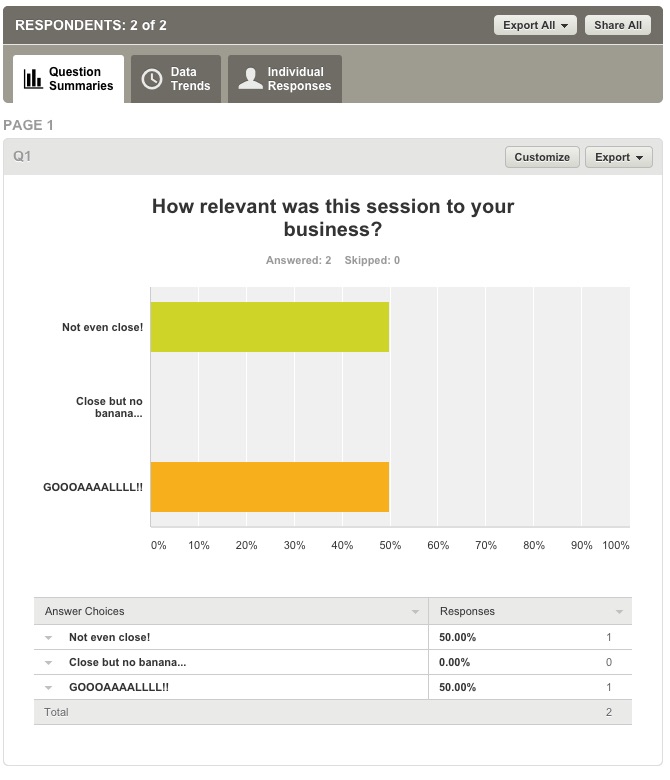
Results in Survey Monkey
Depending on the plan you choose with Survey Monkey, you will have varying reports available to you, but in the free version it gives a good representation of what is possible (an example shown in Figure 8).
Figure 8