You have a couple of options.
The recordings reside in the ‘Recordings’ section of the Meeting from which they were made, and by default they retain the permissions of that meeting (fail-safe). So you can navigate to the Meeting and the ‘Recordings’ option and you will see them listed there.
If you click on one of the recordings you will see the URL that you can send to people to view the recording, they just need Flash…*but* by default it has the same permissions as the Parent Folder so they would need a login and password for the meeting to view the recording (which you may not want to bother managing).
You will notice a checkbox on the left and if you check the box next to a recording you can then click ‘Access’ (See Figure 1 below). On the next screen you can choose to make the recording ‘Private’ or ‘Public’. If you make the recording public then clicking the URL will play the recording, no credentials are required. You can also check the box ‘Set Passcode’ and then enter a code/word you choose to enable some security. The viewer will be required to enter this code to view the recording (Figure 1a).
If you make the recording ‘Private’ then the credentials for the meeitng room will be required to view the recording, meaning the viewer would need to have a login and password for the meeting room to be able to view the recording.
You can now report on how many times the recording has been viewed from this section using the ‘Reports’ option.If you do enforce the requirement that to view the recording the user needs a login and password on the Connect account, you will be able to see specifically who viewed the recording and how long they viewed the recording, but this requires the viewer to have a login and password on your account.You can automate this by using the Connect Events tool to have people register to viewed the content (remember to set the user policy to ‘All users created through event form are full Adobe Connect users’ if you want to track these views individually.
There is another option which is very helpful in the longer term and this is to move the recording across to the ‘Content’ tab where you have all of the content management options available to you.
To do this, select the recording by clicking the check box next to the recording, select the ‘Move To Folder’ button and then select a location or folder in the ‘Content’ section (See Figure 2)
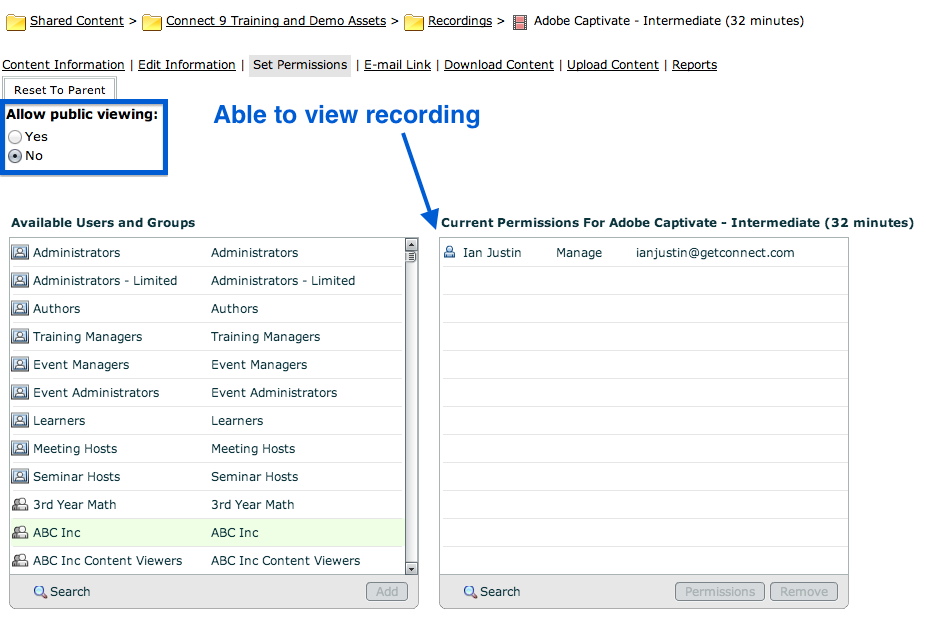
After the content is moved to the ‘Content’ tab, you can now navigate to the recording and select ‘Set Permissions’, from here you may need to select ‘Customize’ to change the permissions form the default of ‘Same as parent folder’. Now select ‘Yes’ yo public viewing and you will have the same options to leave access open or to enter a passcode as noted above. and on the next page you are able to make the content ‘Public’, or select which individuals or groups are able to view your content from your user list (See Figure 3).
Figure 1
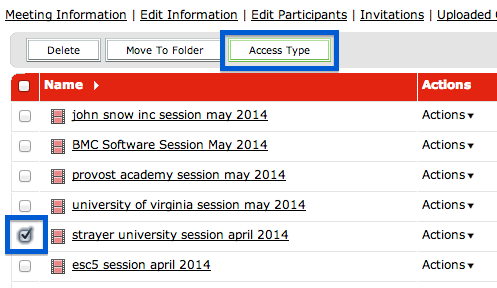
Figure 1a

Figure 2

Figure 3
how can I tell who viewed the recording?